Configuration Screens:
- To login into Amazon the following credentials are required.
- Amazon site URL
- Username
- Password
- You need to follow the steps below to create bucket in Amazon.
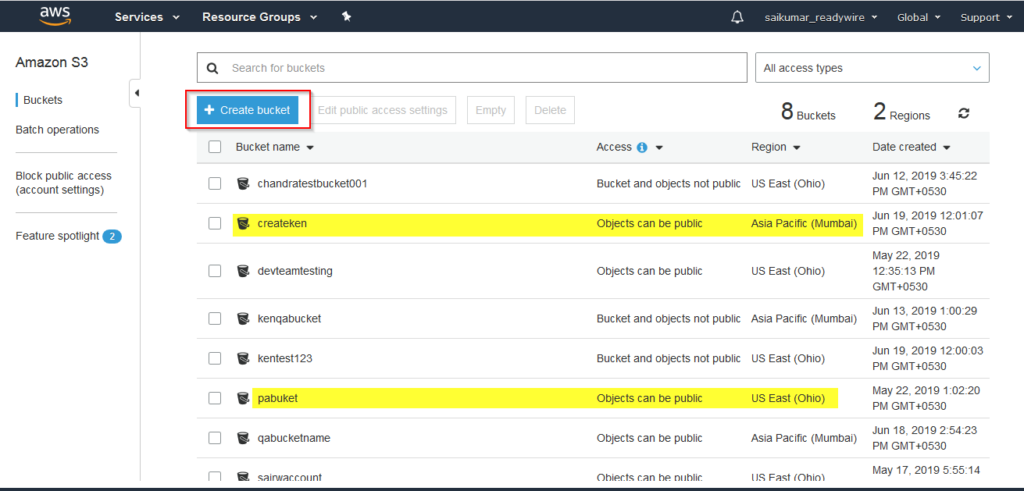
Step1: You must login into Amazon Website, and then click on [Create Bucket] and select required Time zone from the [Region].
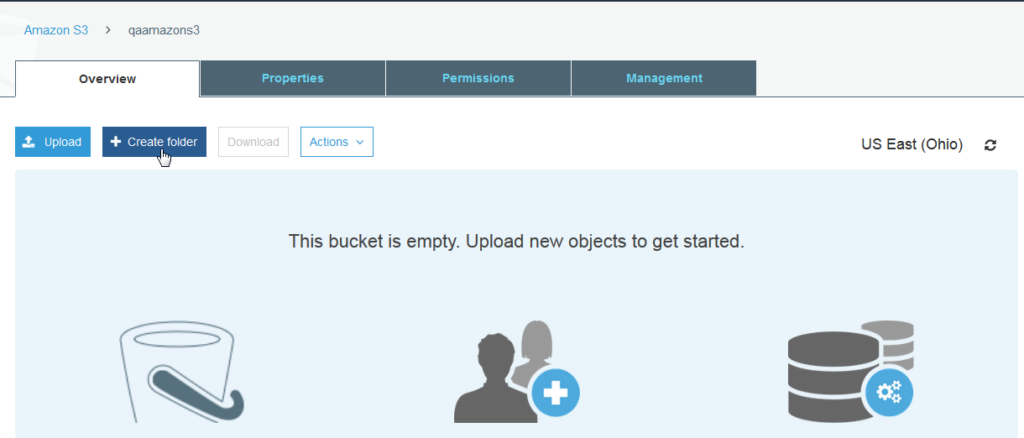
Step2: Click on [Create folder].
In Each button you have the possibility to add multiple folders.
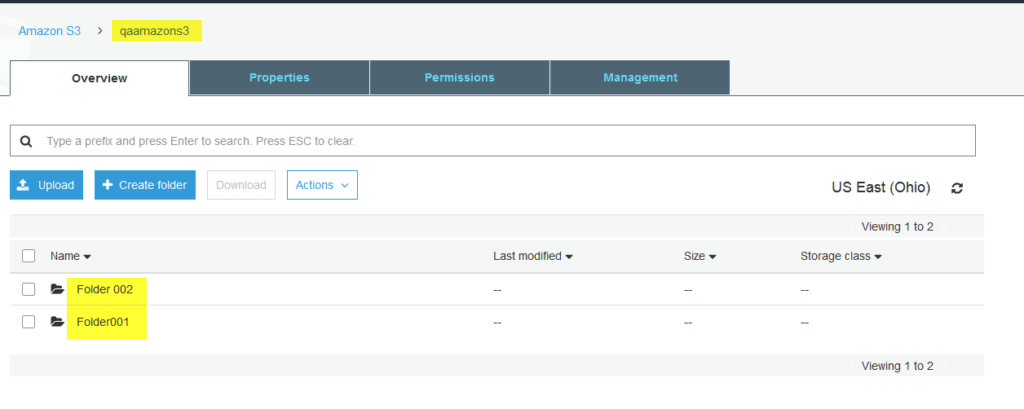
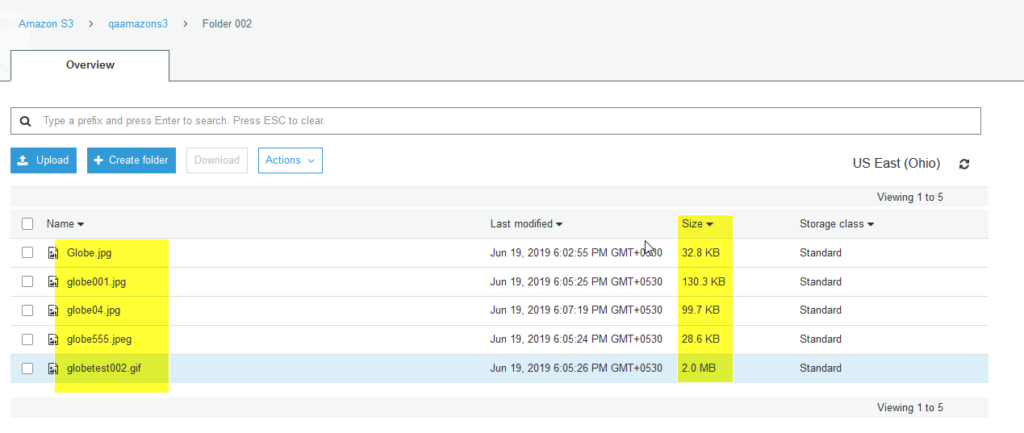
Step3: You can upload as many images as required in each folder, but you must ensure that the image prefix name matches with the inventory ID. In Acumatica, only the Amazon picture will be linked to the appropriate product if the inventory name is “Wallpaper” and the image names are Wallpaper001, Wallpapers, or Wallpaper555.
Step4: You can select the required folder to upload the images.
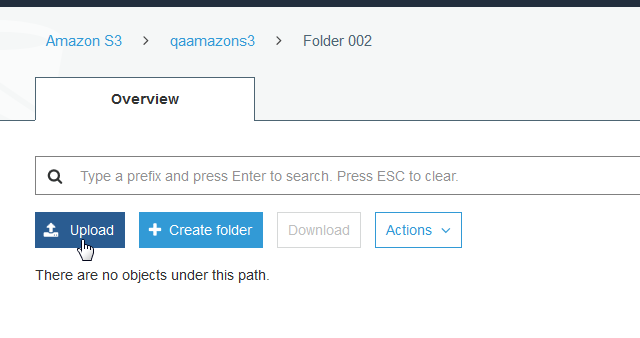
You can add any type of image, regardless of size, beneath the folder.
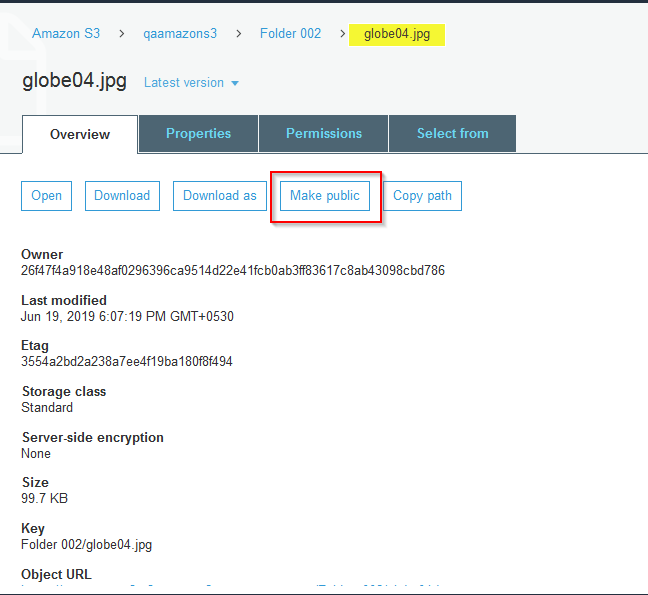
Step5: Once the image is uploaded then you need to click on the image and then click on [Make Public] then only the image will display in Acumatica.
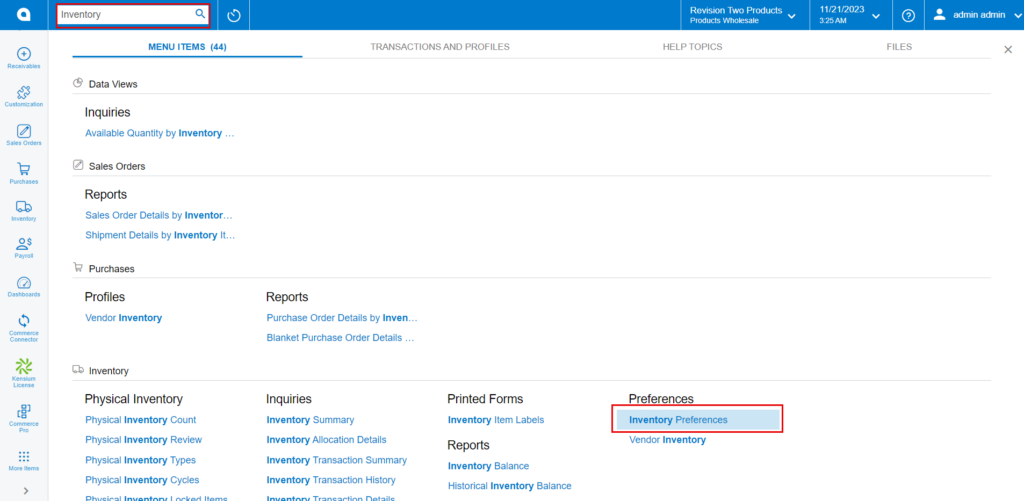
Step6: You need to search for [Inventory Preferences] in Global search bar and then click on [Inventory Preferences] under Preferences.
-
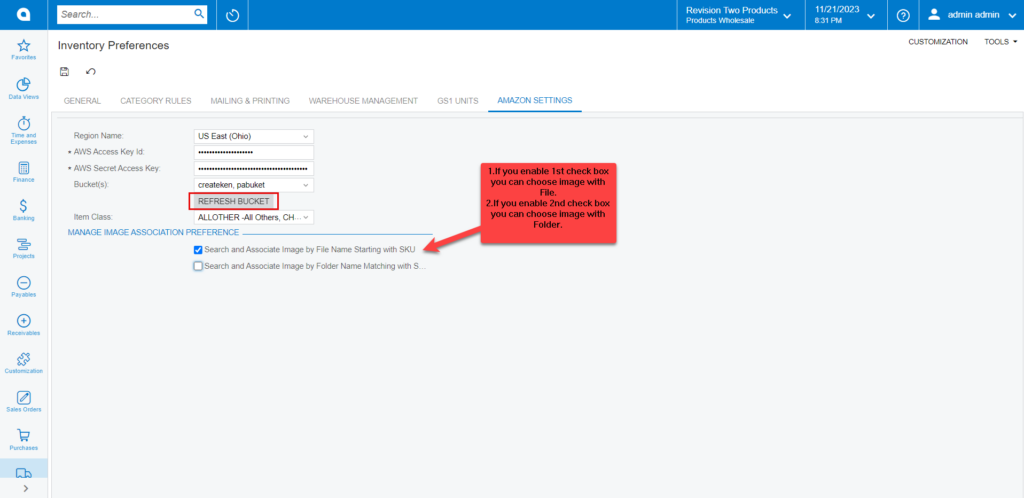
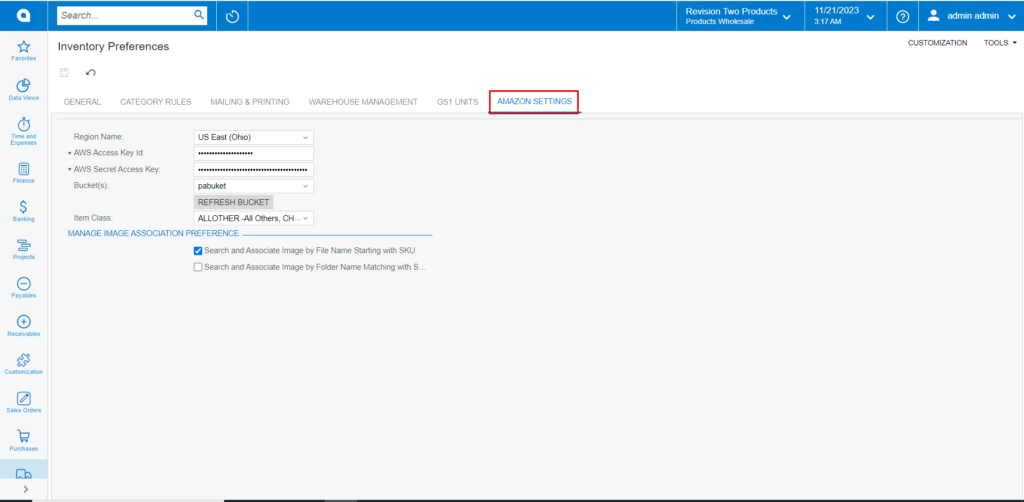
Click on [Amazon Settings] tab then you need to fill out the details below.
- Region Name: Select the region from drop-down.
- AWS Access Key ID: Provided by Amazon
- AWS Secret Access Key: Provided by Amazon
- Bucket: Created bucket in Amazon
-
Search for the item class
- Stock items
- Non-Stock items: You must select a non-stock items.
Search and Associate image by File
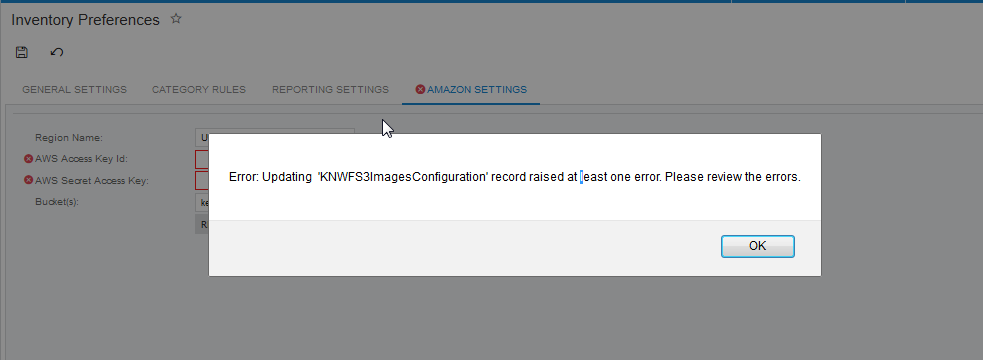
Note: If you do not Provide ACCESS KEY and SECRET KEY fields are not entered then a validation message will display as shown below.
- Click on [Refresh Bucket] this will retrieve all the available Buckets from Amazon irrespective of Time zone.
- You can also select the multiple buckets from the drop down.
