Payment Methods and PayPal Portal Details
The application allows you to get the payment refund that you have already made fully or partially. You can check the payment methods within Acumatica by entering [Payment Methods] in the Global Search box as illustrated below.
Follow the steps as described below:
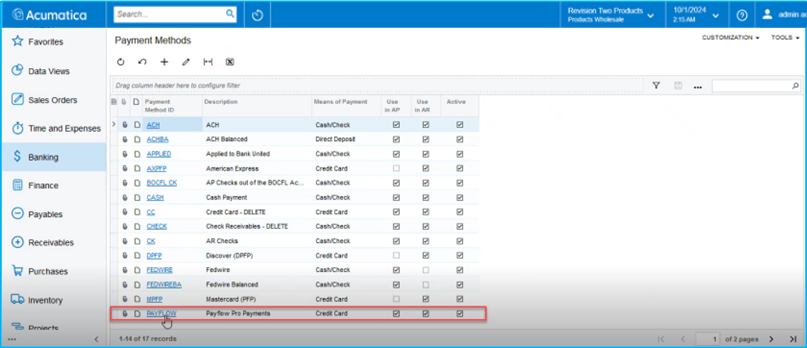
Step 1: In the Global Search Box type Payment Methods and you will be redirected to the following screen.
Step 2: Under the [Preferences] you will have multiple options. Go to Preferences and click on [Payment Methods].

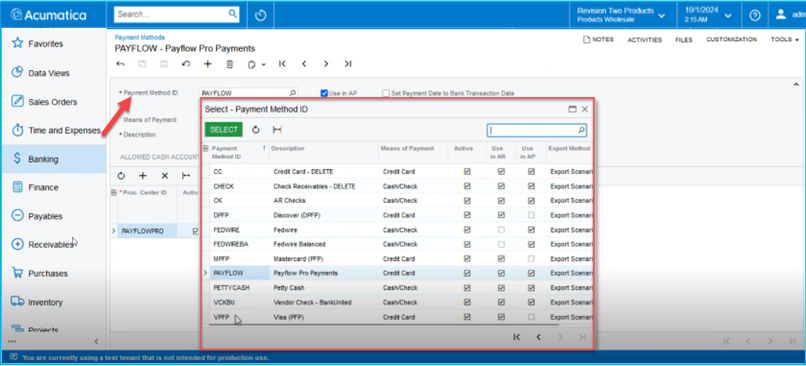
Step 3: You can view all the Payment Methods that you have already created within Acumatica. The Payflow Pro Payments will also be in the list of Payment Methods ID columns.
Step 4: When you select the payment method PAYFLOW, the application will redirect you to the Payment Method Details screen where you can review the configuration. Under [Processing Centre], you can check the Processing Centre ID, Status, Default setting, Funds Hold Period in days, and other relevant details as illustrated below.
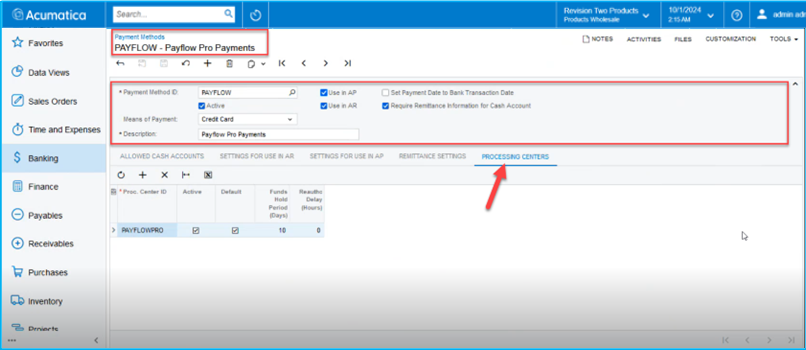
Step 5: Based on the card type VISA / Master you can configure the card and integrate it from the Payment Method ID look-up based on your business requirement and the type of the card that you want to integrate.
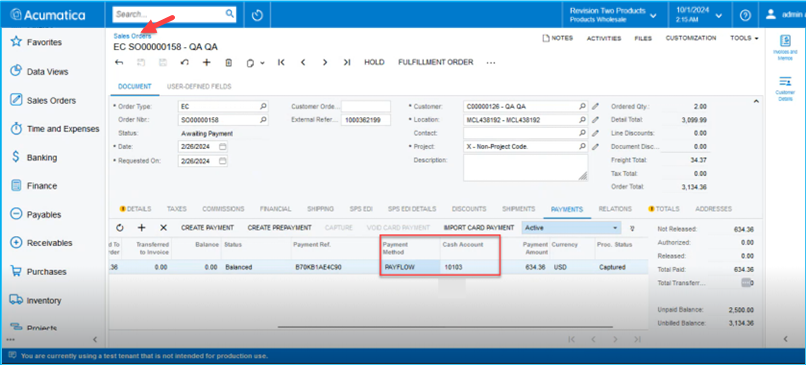
Step 6: Navigate to the Sales Order, and the payment method from the Magento Sales Order will be integrated into Acumatica. After syncing the order from Magento, the corresponding payment method will be replicated on Acumatica.
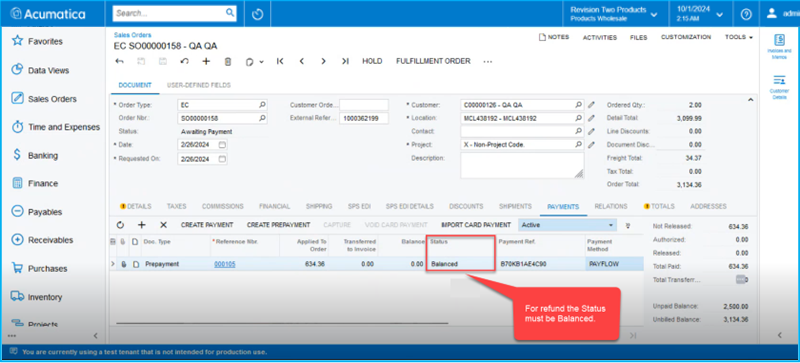
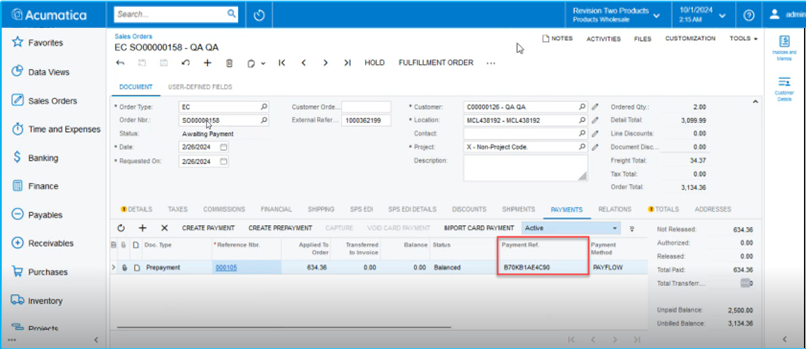
Step 7: Before initiating a refund on a Sales Order, ensure the Status of the Sales Order is Balanced. If it isn’t, the application will prevent you from starting a refund against that specific sales order, as shown in the illustration.
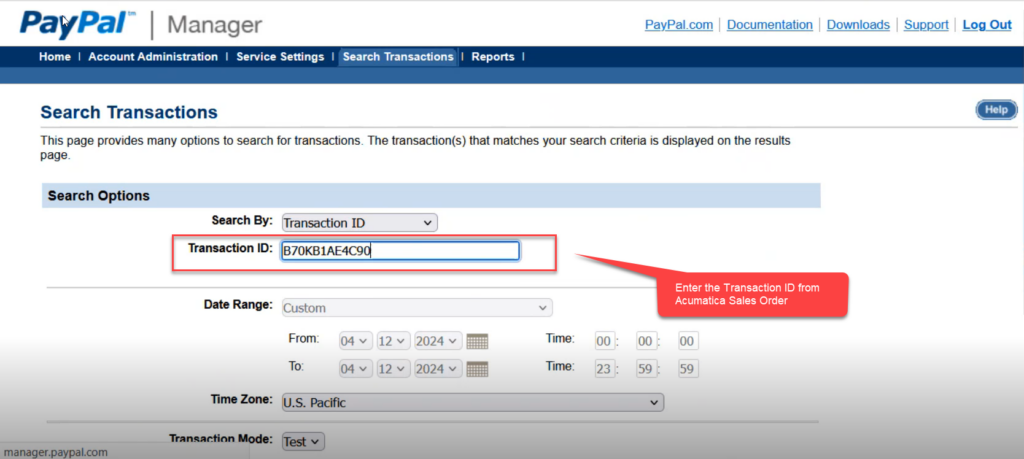
Step 8: Navigate to the PayPal Flow Portal. Get the Payment Reference Number handy from the Acumatica Sales Order screen as illustrated below.
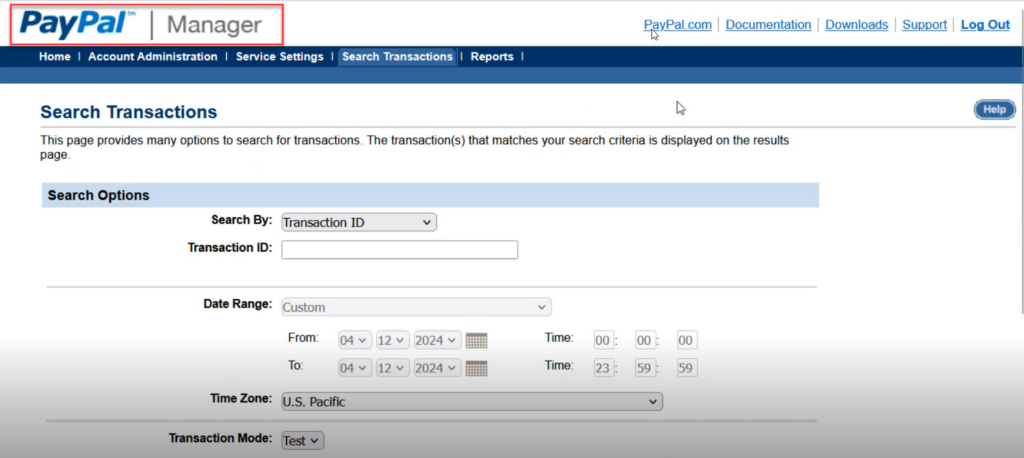
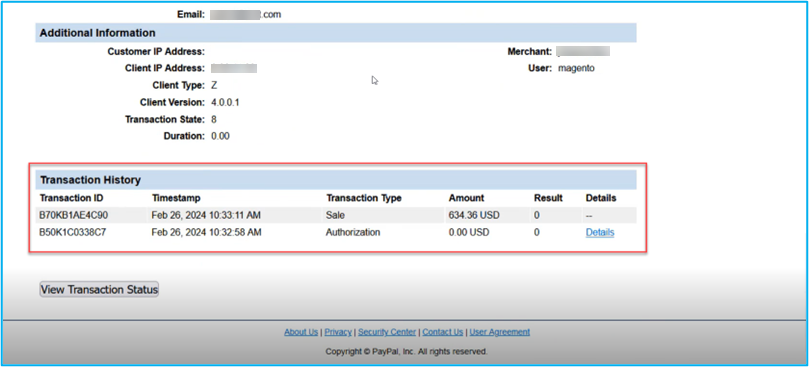
Step 9: Navigate to Search Transaction on the PayPal Portal screen and enter the [Payment Reference ID] from the Acumatica sales order.