
Syncing the Quotes in Acumatica
To sync the Quotes in Acumatica, you need to follow the steps
Step 1: Go to the B2B and select the Company.
Step 2: Within the company create a user role. If you already have User Roles, then you can use that. For explanation, we are creating another issue.
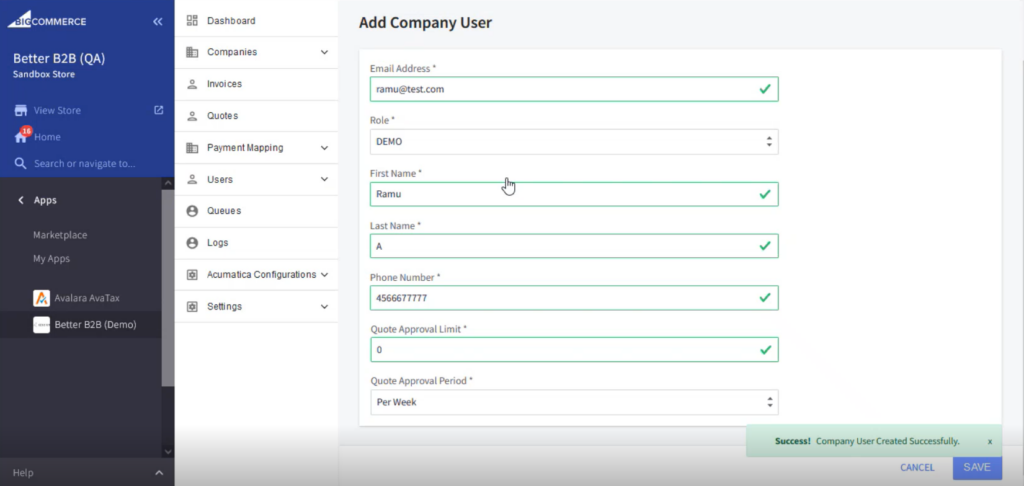
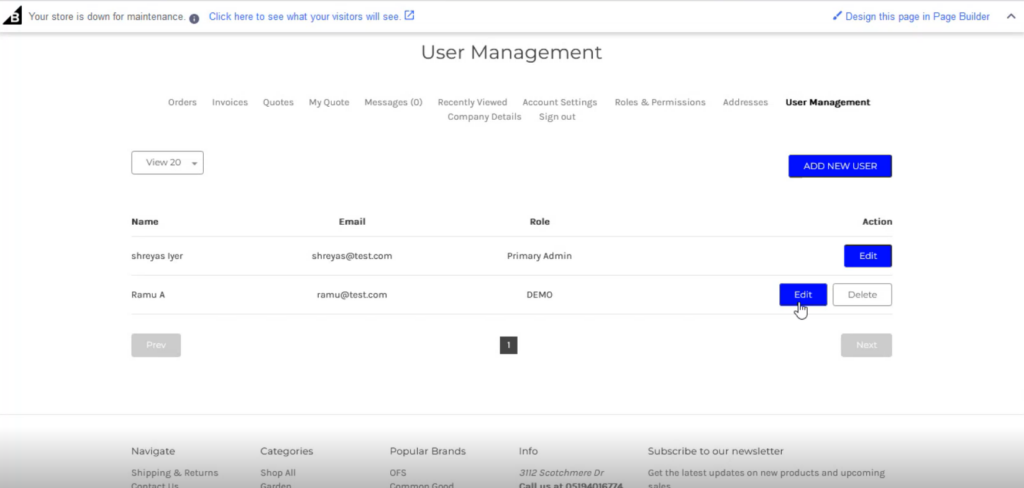
Step 3: Under User Management the [User] should be displayed.
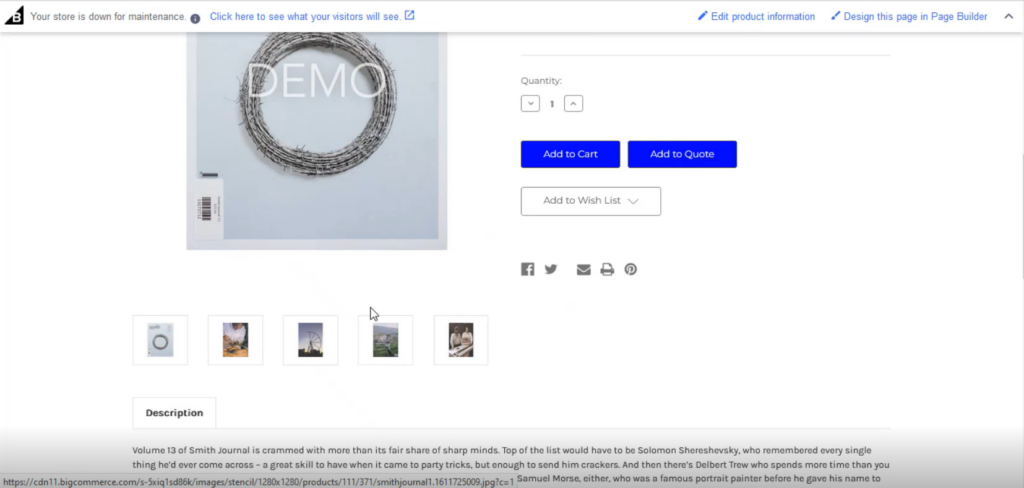
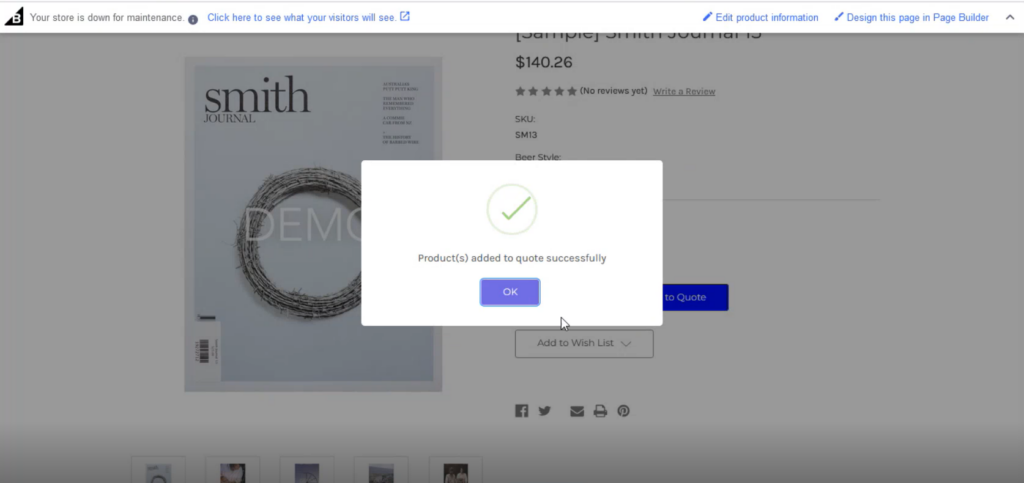
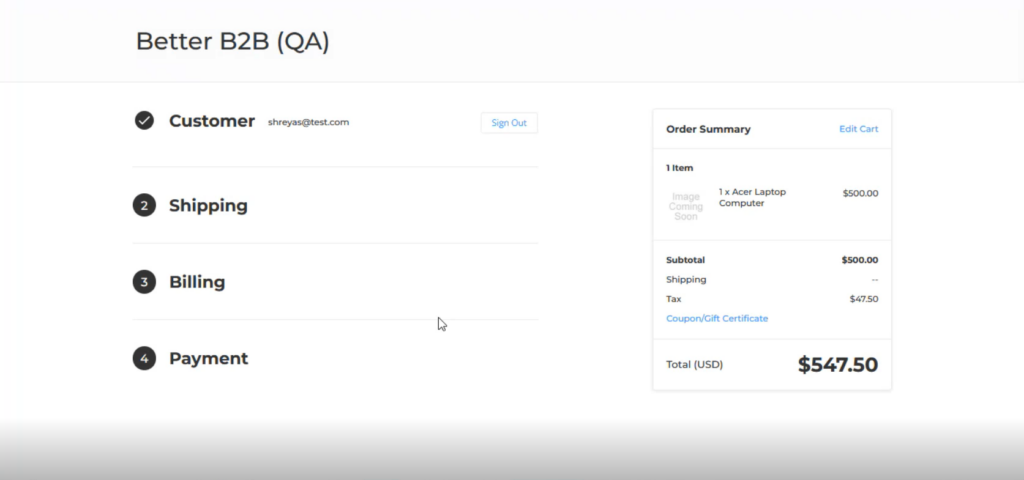
Step 4: Login with the newly created user. Select a Product and click on add to [Quote].
Step 5: Go to My Accounts and click on My Quotes. In the My Quote section, you can add and create a quote.
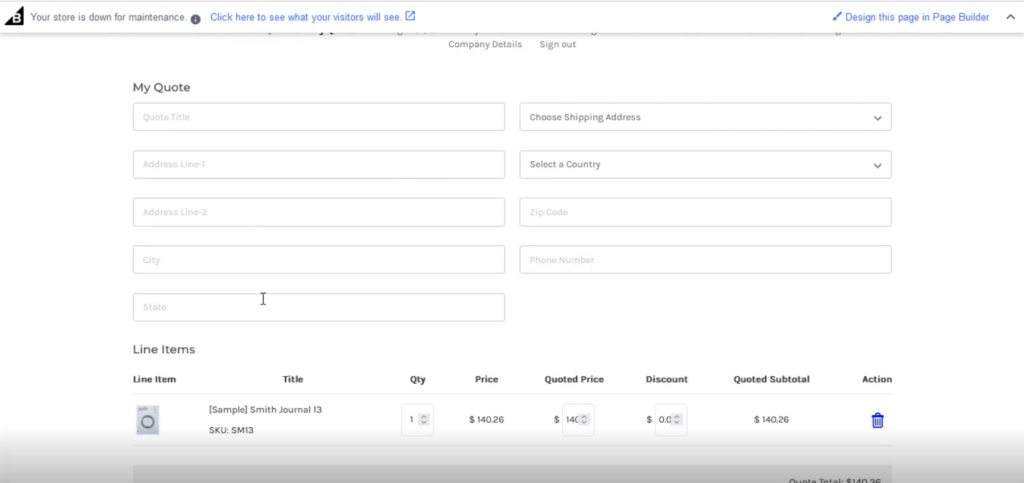
If you have already added the quotes, then you can see the details under the line items.

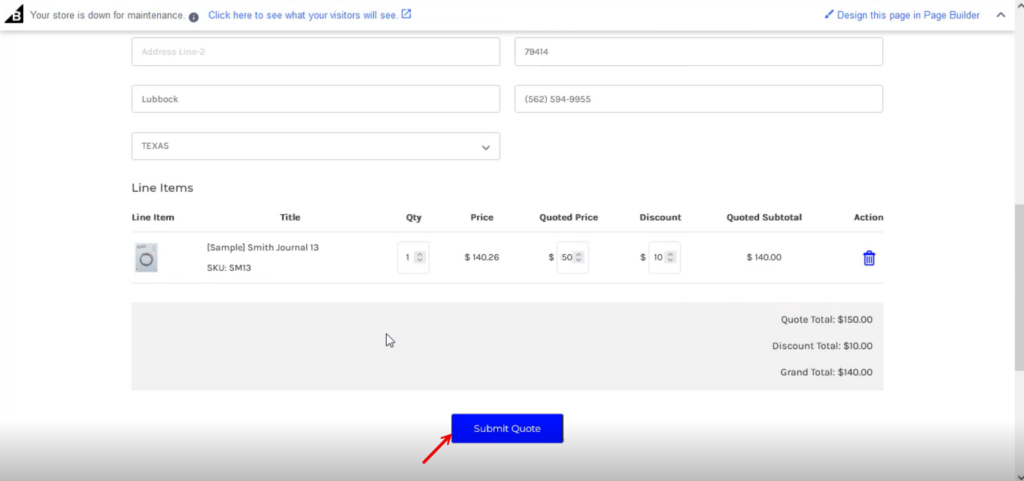
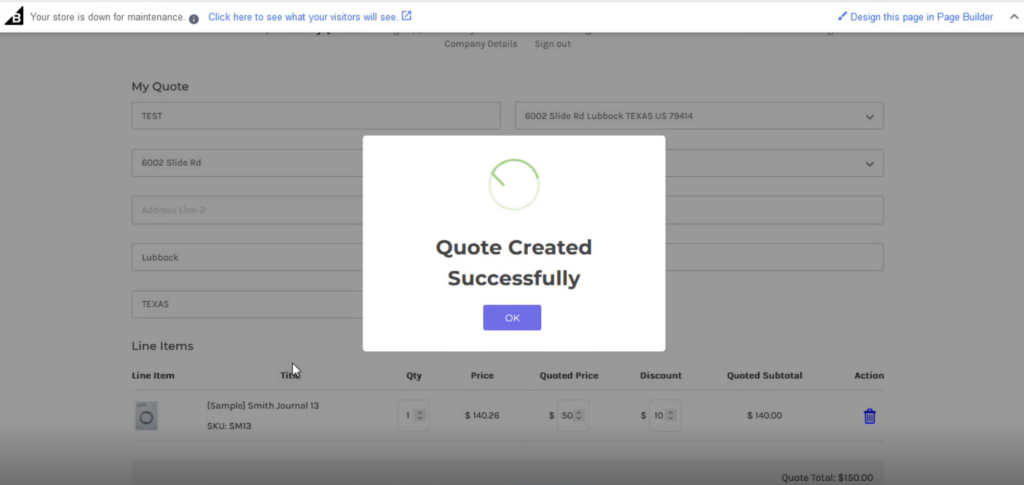
Step 6: Once you complete all the details click on [Submit Quote].
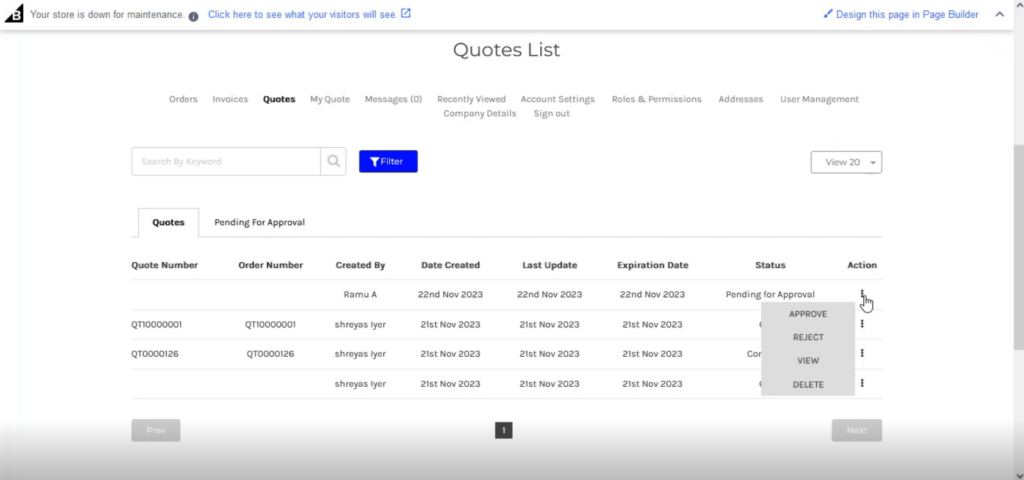
Step 7: On the Quote List you will be able to view the quote.
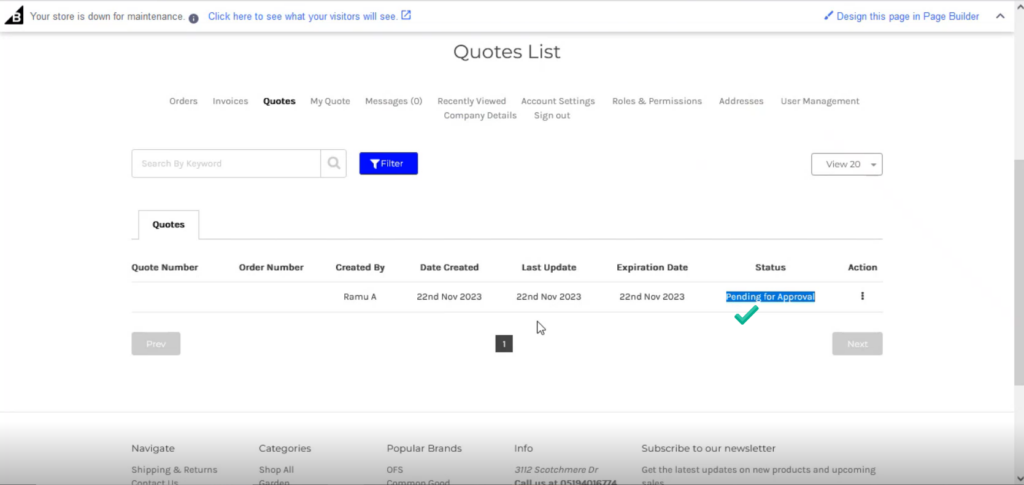
Note, that this user doesn’t have the quote approval. So, the Quote Number and the Order Number appear blank.
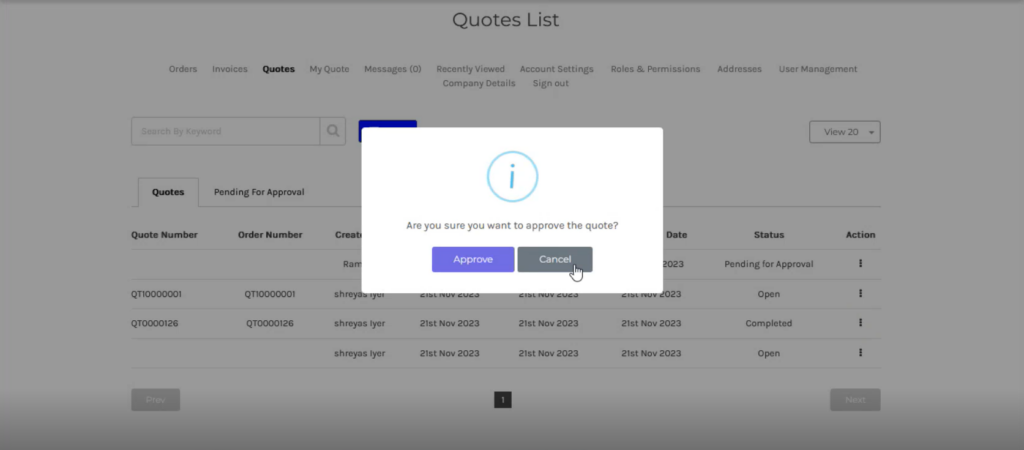
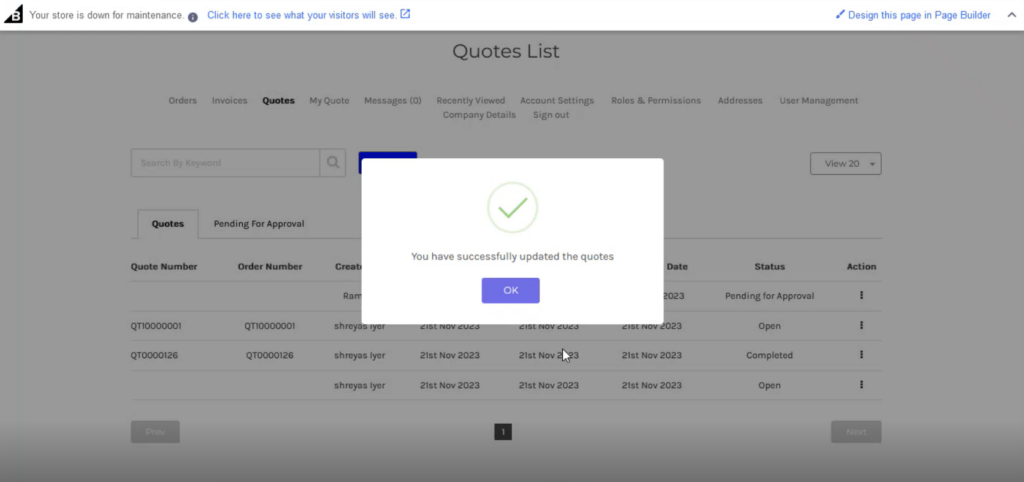
Admin can approve the [Quote Approval Limit].
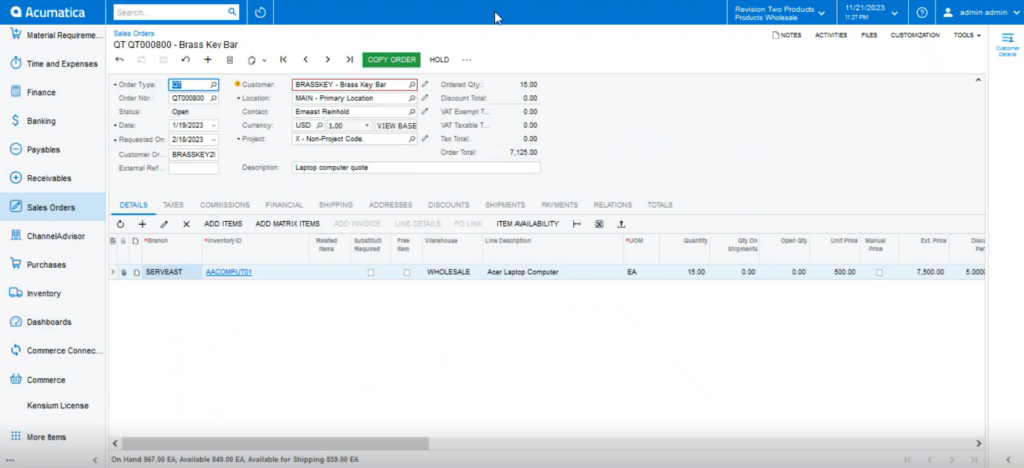
Step 8: Go to the Acumatica Sales Order Screen. The quote order will sync into the Acumatica Sales Order.
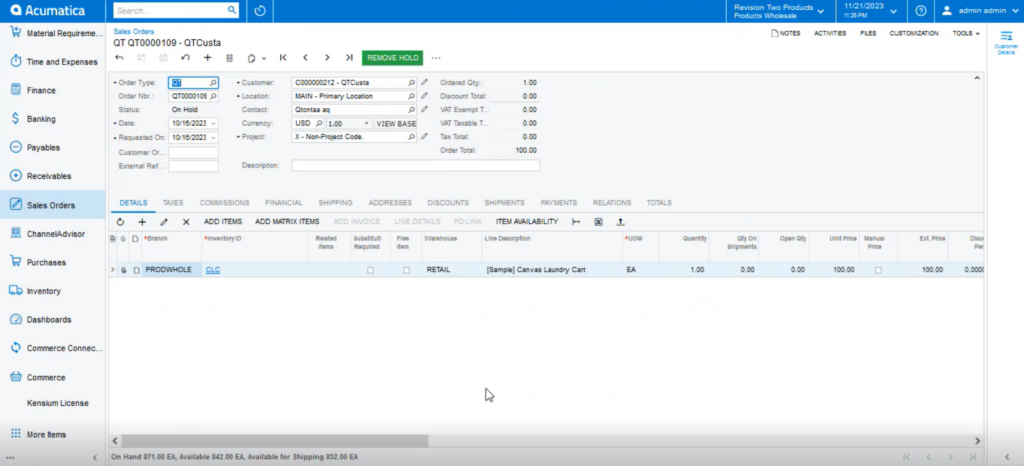
Step 9: Select the Quote and click on [Copy Order].
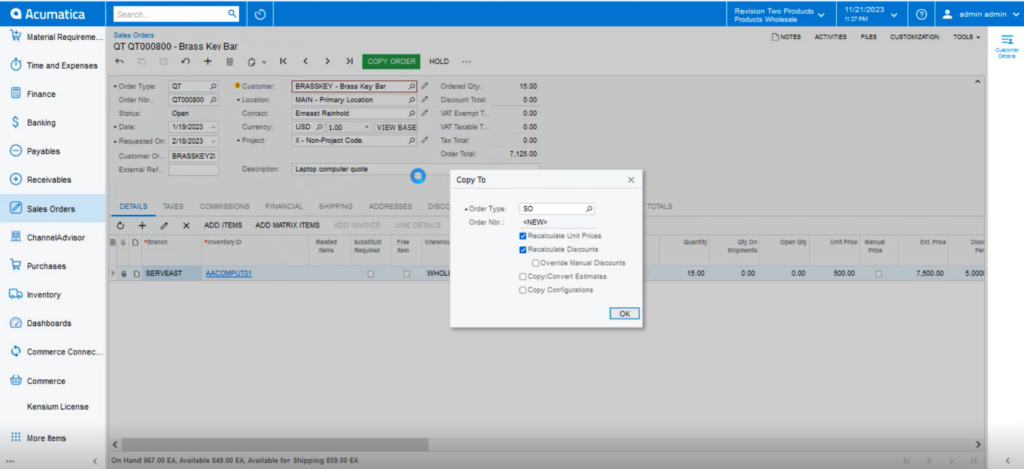
Step 10: Upon clicking on the [Copy Order] you will get a pop-up on the screen. This process will convert the Quote to a Sales Order in Acumatica.
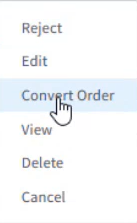
Step 11: After completing the process, the quote status will be in completed status. You can convert the quote to order from the B2B side also. By clicking on the Action button, you will get the option.
Step 12: Based on any of the quote’s status in Acumatica it will be reflected in B2B.
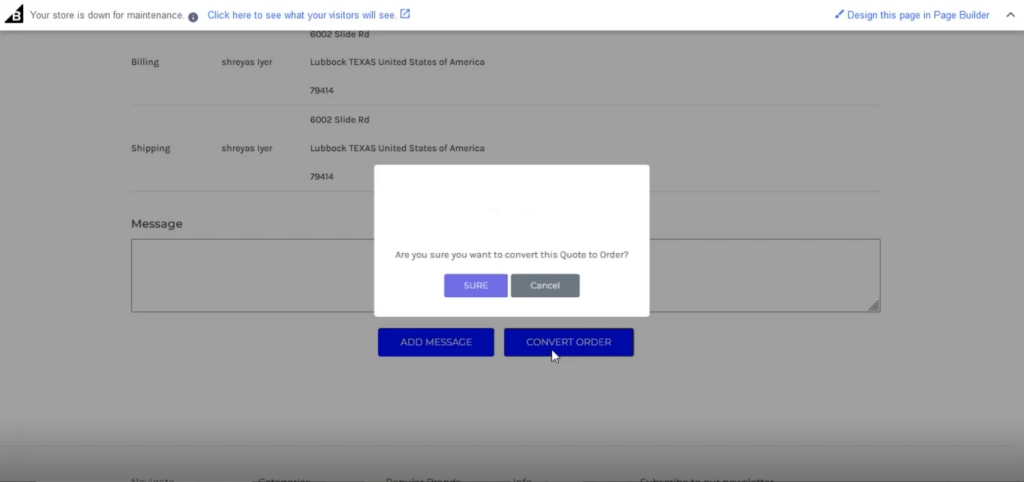
Step 13: If you [Convert Order] after syncing with Acumatica, the following screen will appear on the front end of B2B.
Note, that it’s a bi-directional sync. If you create the quote, it will be synced to B2B and vice versa.