Viewing the Synced Invoice in B2B
The Invoice will be displayed in B2B. You need to follow these steps.
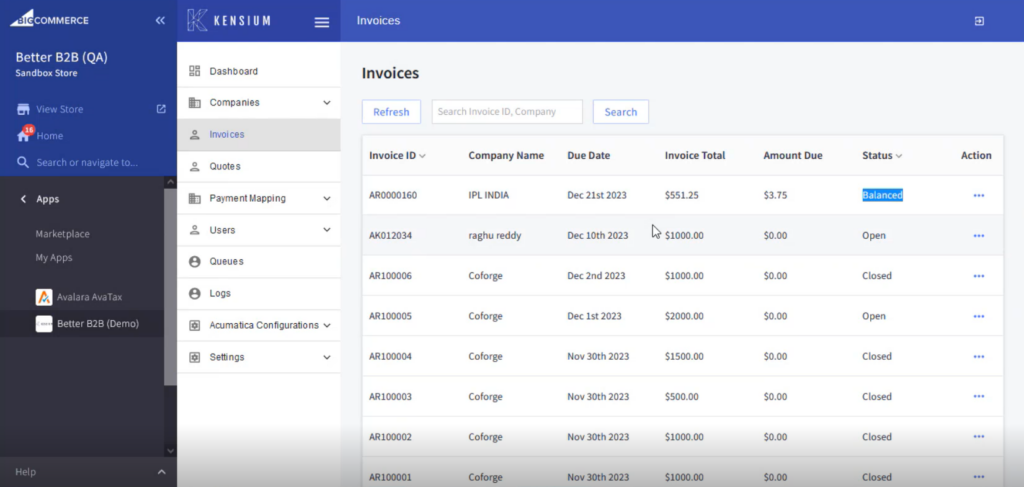
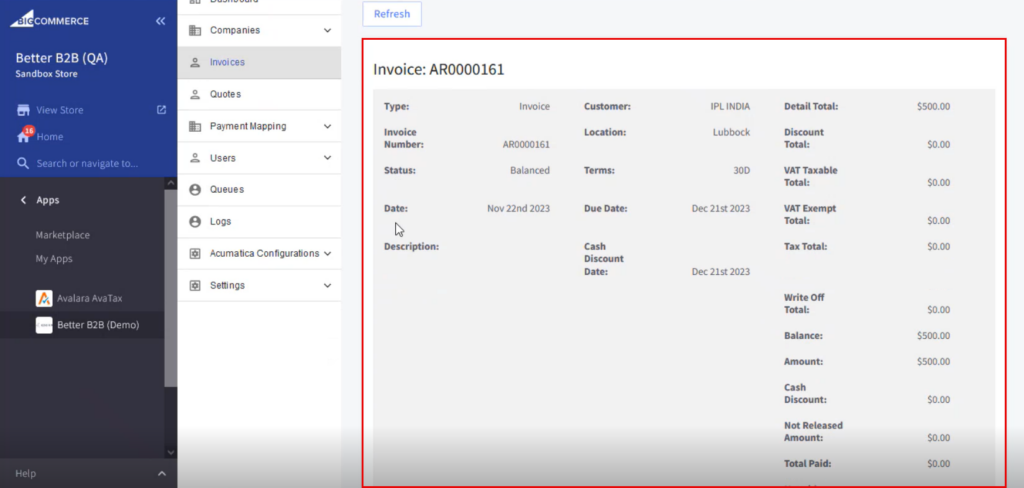
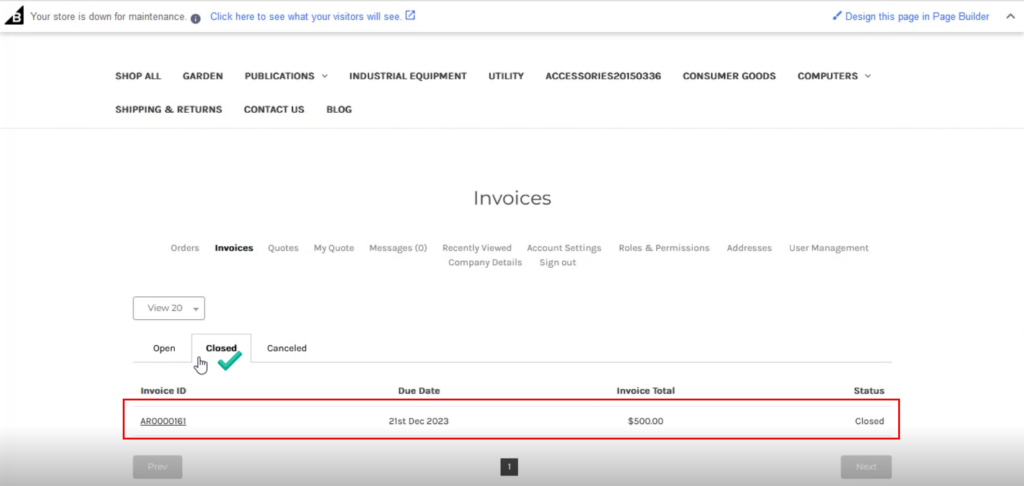
Step 1: Go to the Invoice Section in B2B.
Step 2: On the Invoices Screen, the Status will show Balanced.
Step 3: You can view the invoice details from the Action […] column.
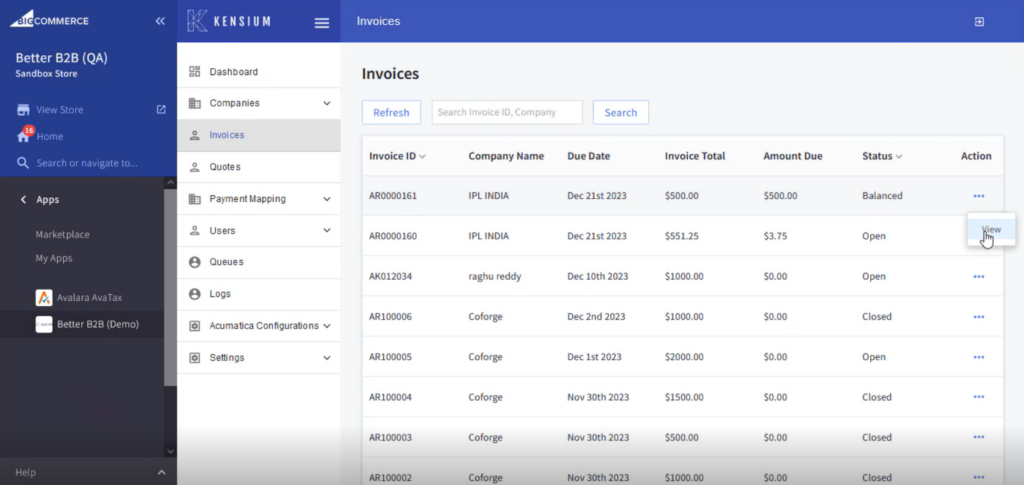
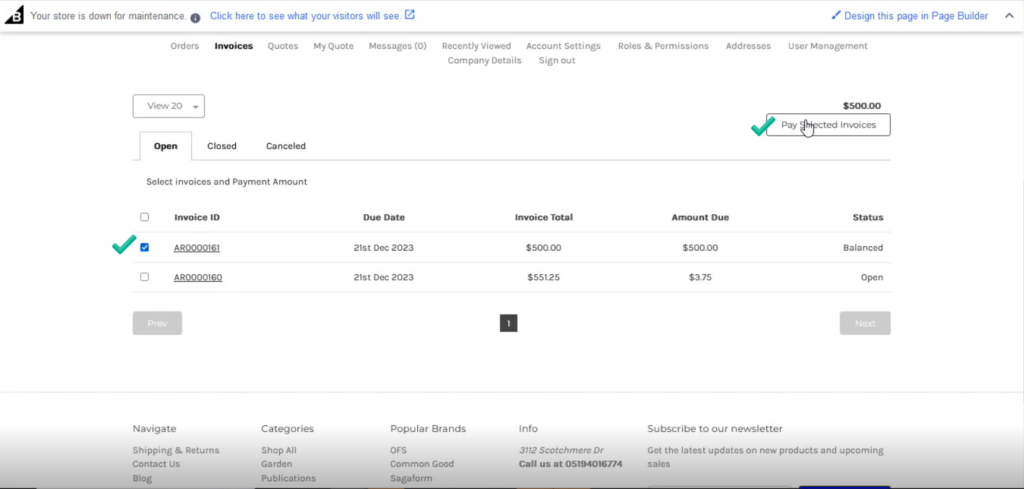
Step 3.1: Go to the Front End to view the Invoices.

Note that the status should be closed. Due to the nominal difference in taxes, you might see the status as open.
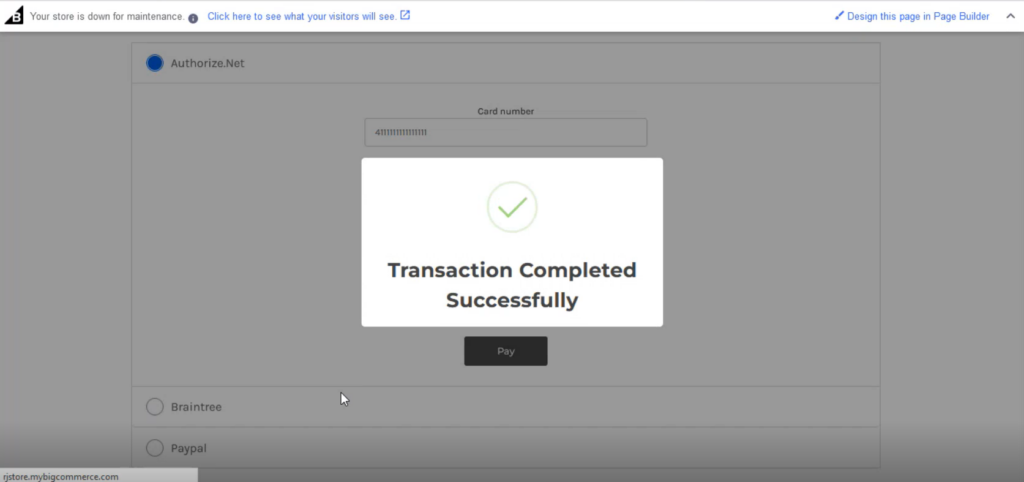
Step 4: Paying the Invoice from the B2B Front End. You need to select the Invoice and click on [Pay Selected Invoice].
Step 5: You will be redirected to Invoice Payment. You will get the Payment methods on the Screen.

The above payment methods are shown based on the mapping that you have done in B2B payment mapping.
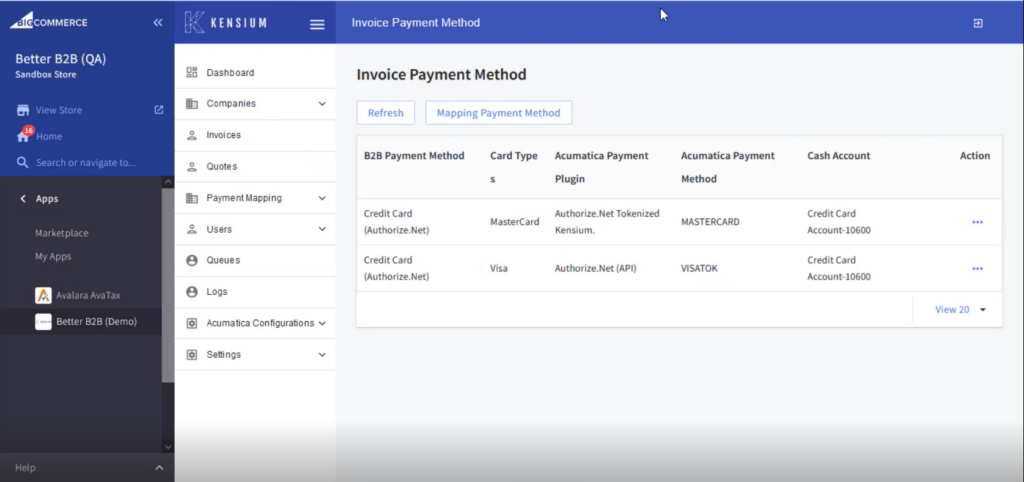
Based on the mapping you need to select the payment method on the front end.
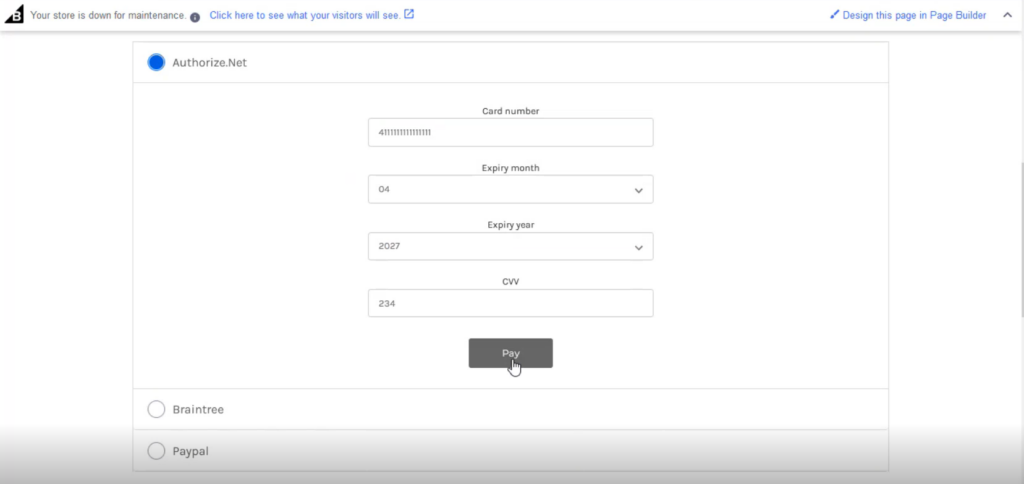
Step 7: On successful completion of the transaction, you will get the following screen.
Step 8: The invoice will be moved to the [Closed] Status.
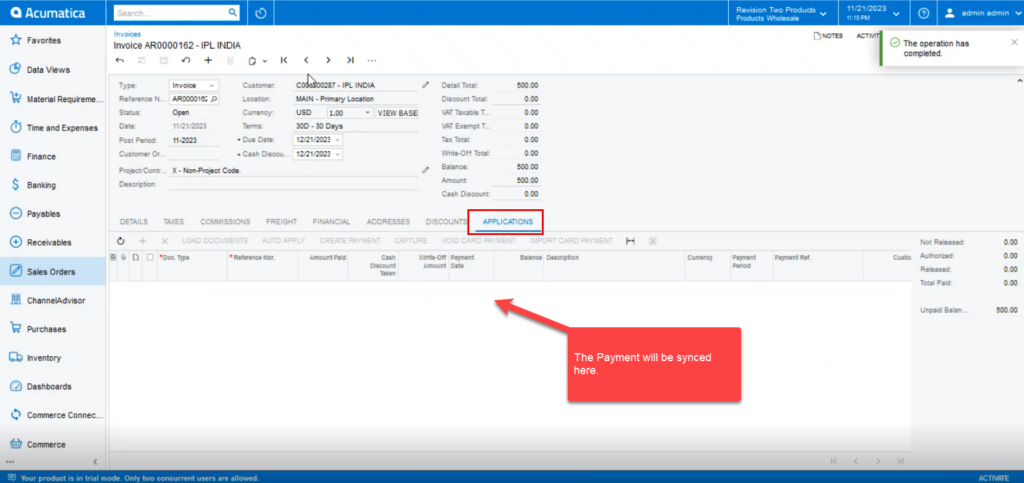
Step 9: In Acumatica the Payment will be synced to the Invoice.