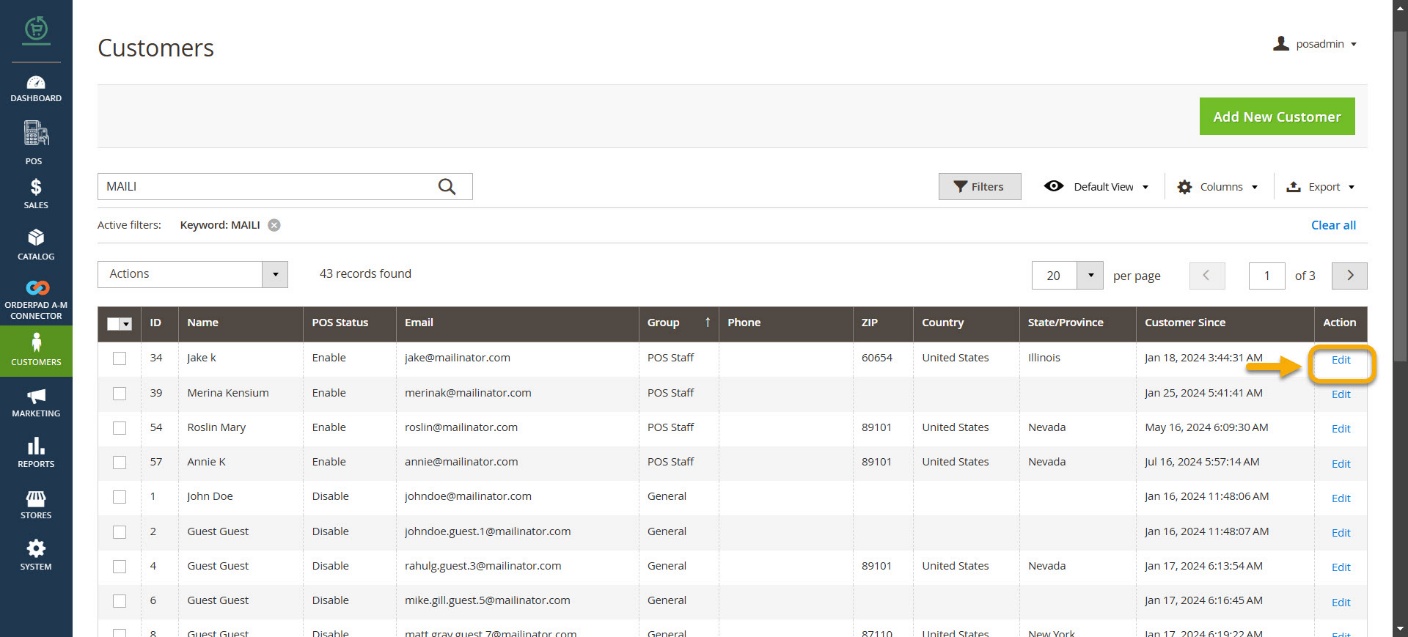
Identifying a Staff Admin
To locate the Staff Admin within the Customers screen, click on the [Edit] link under the [Action] column within the grid where the POS Group is set as [POS Staff].
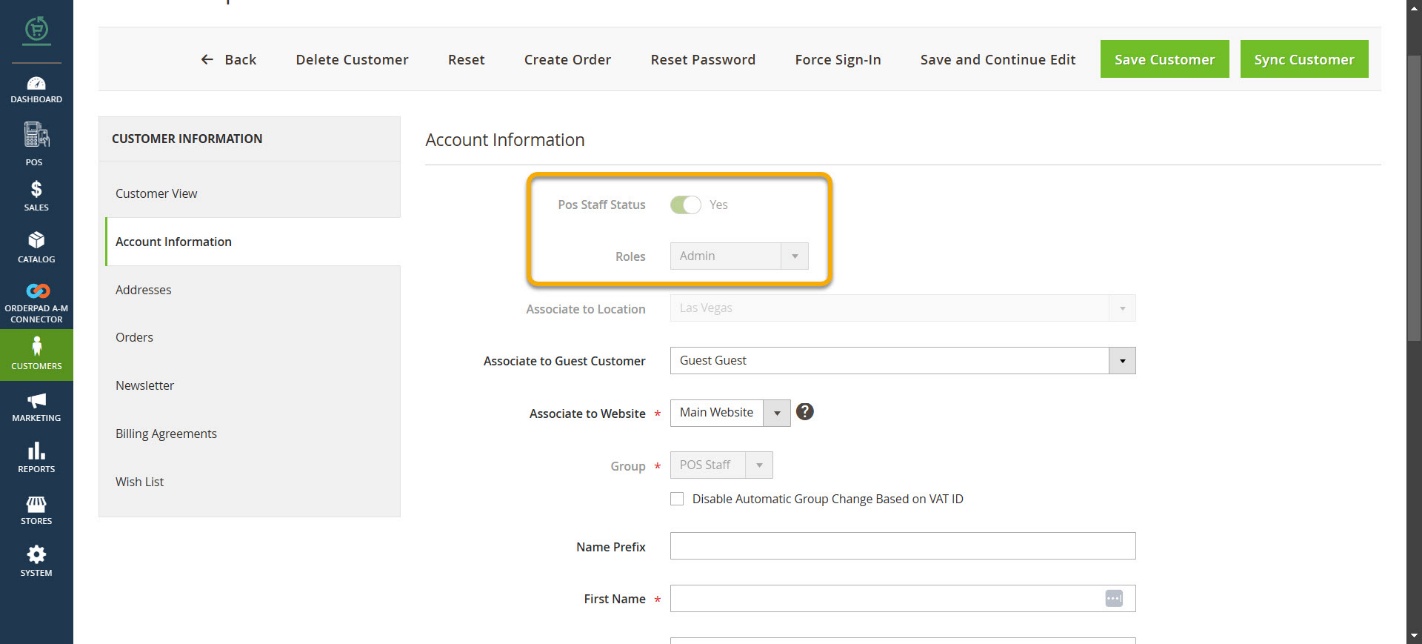
- After selecting the Edit button, you will be taken to the following screen, where you can navigate to the [Account Information] section.
- In the Account Information section, you will notice that the [Roles] and [Group] fields are greyed out or in read-only mode. However, the remaining fields are not disabled.
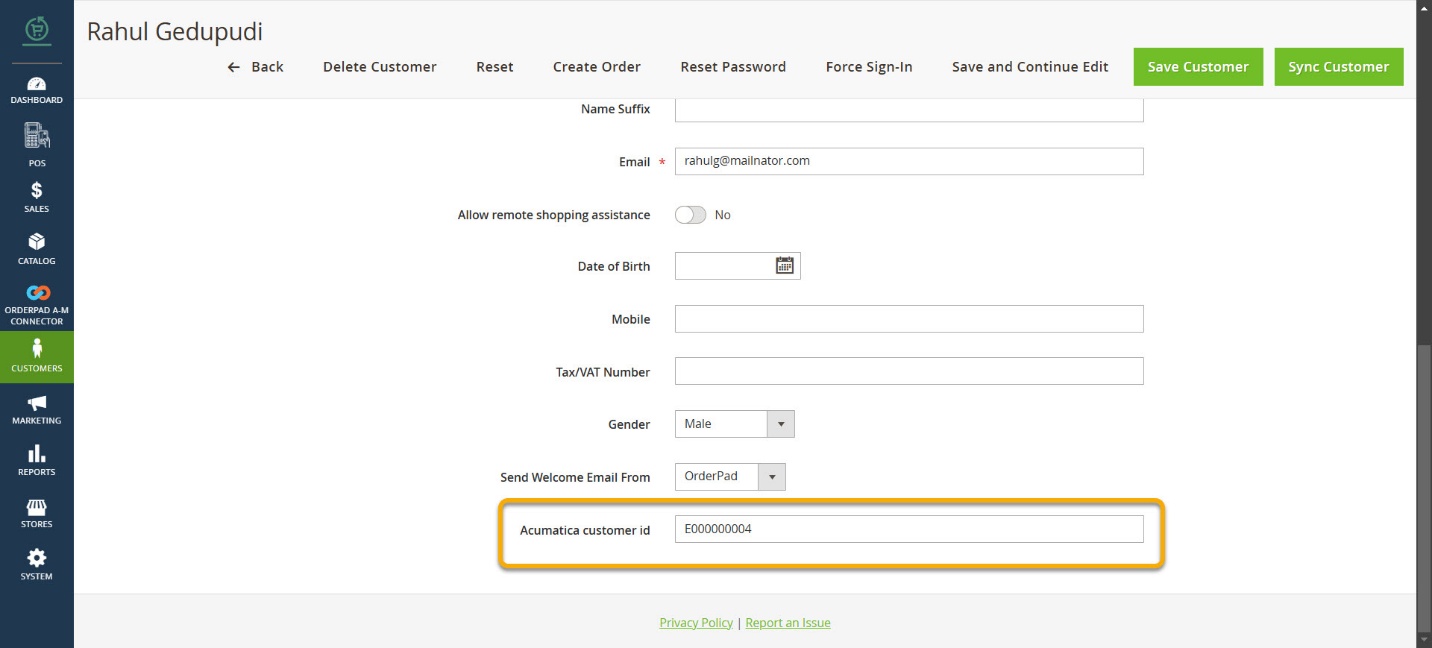
- The Acumatica Customer ID refers to the Customer ID synced from OrderPad Admin to Acumatica.
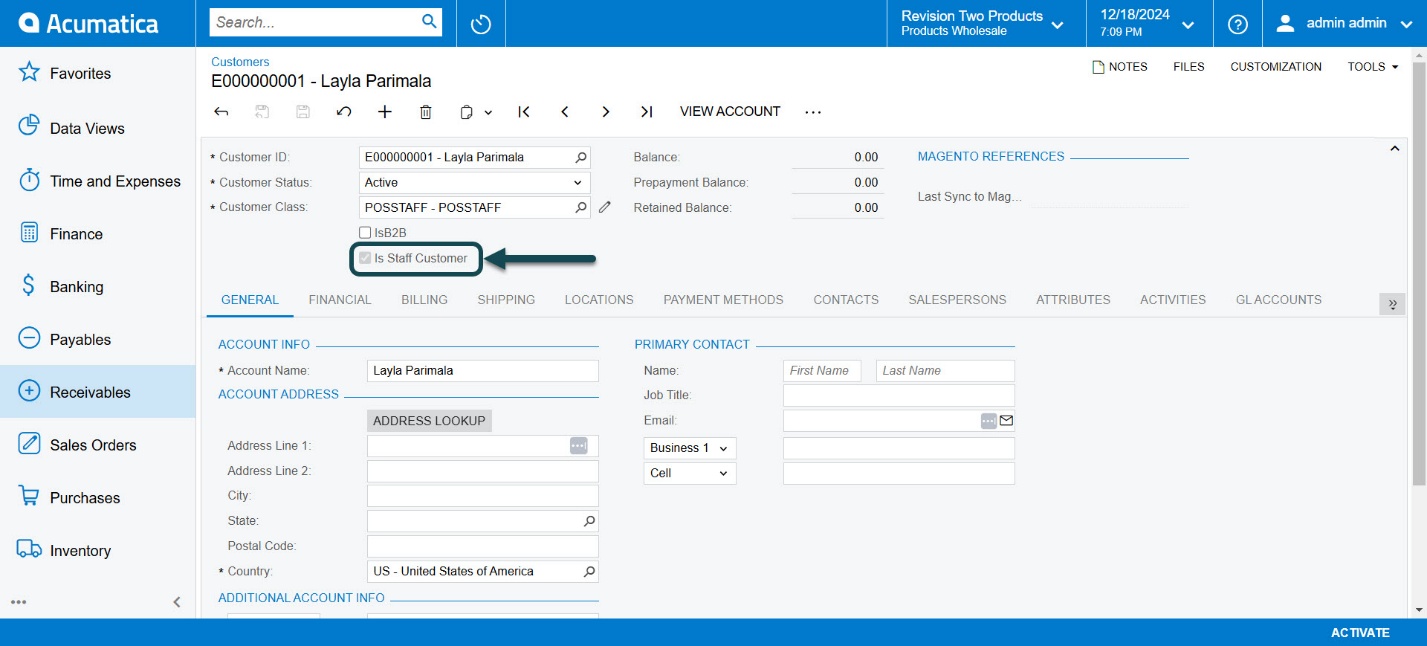
The next section outlines how this Staff Admin is represented in Acumatica.
- Generate a customer using the Acumatica Customer ID obtained from Magento.
- When you create the customer with the code in the Receivable Section of Acumatica, the records will automatically populate in the Customer Screen.
- Below the Customer Class is a check box or flag [Is Staff Customer] which will be checked and set in read-only mode. This allows you to distinguish between a regular customer and a staff user in Acumatica.
- In Acumatica, there is a single repository for storing Customer and Customer-related information. Staff Admin and POS staff, categorized as Customers, can be distinguished using a specific flag.