Print Receipt
After completing a transaction through the OrderPad, the customer receives a printed receipt from the store. This receipt includes details like the purchased product, amount, total, tax, etc. Configuring the Print Receipt option enables you to select the specific sections you want to include in the printed receipt.
In instances of multiple stores, you have the option to configure the print settings store-wise if you wish to. Clicking on [Print Receipt] will redirect you to the Configuration Screen.
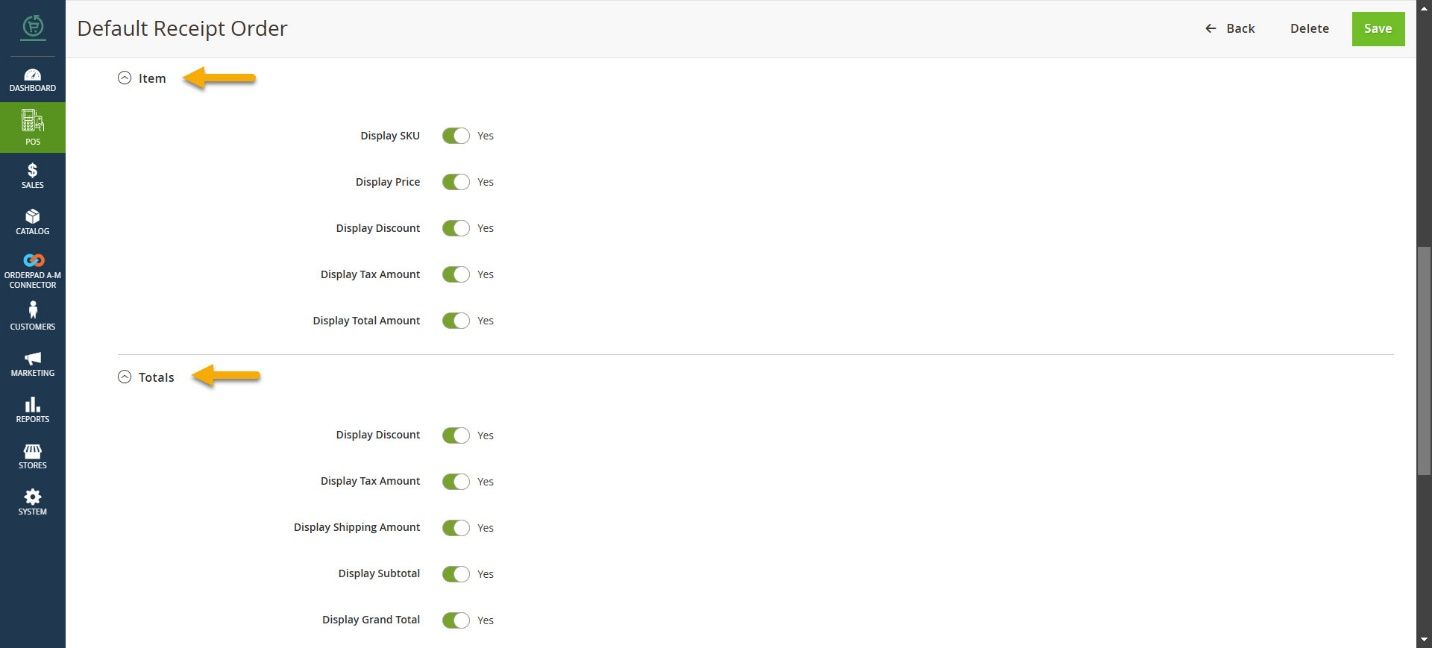
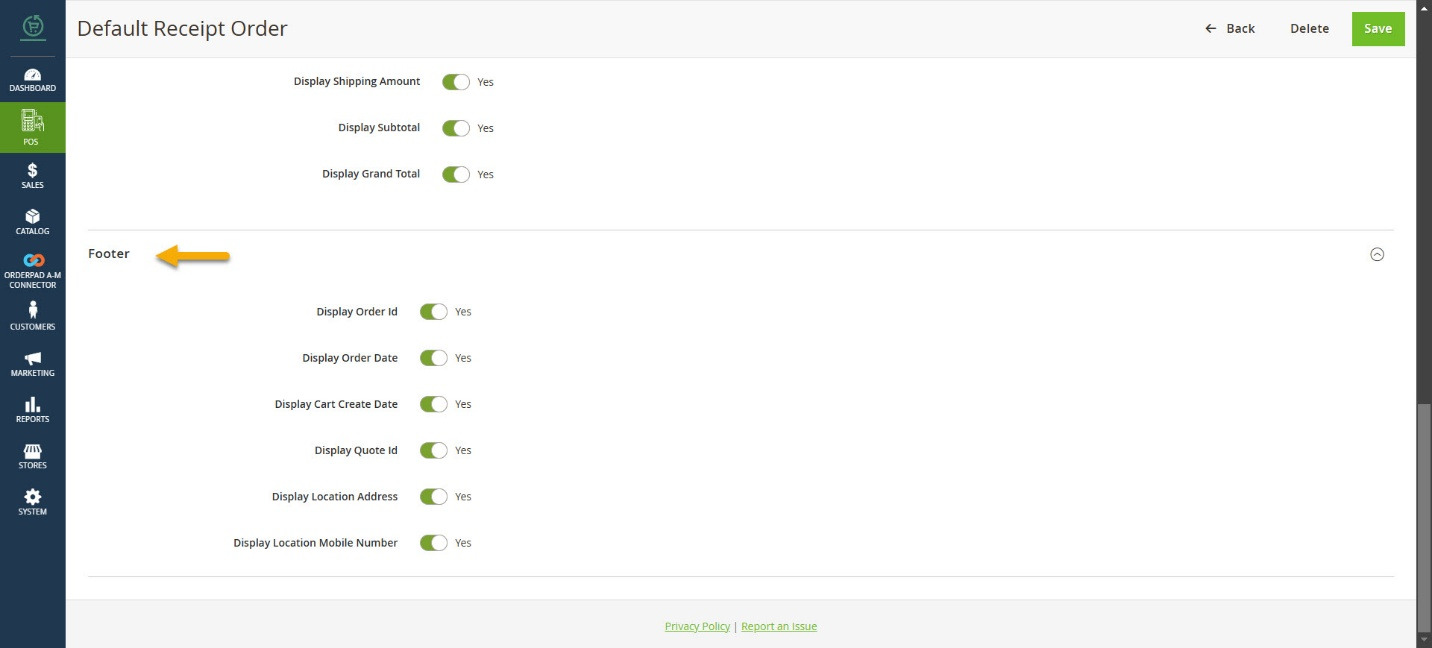
- You can choose to enable or disable individual details such as Header, Body, Item, Total, or Footer on the printed receipt.
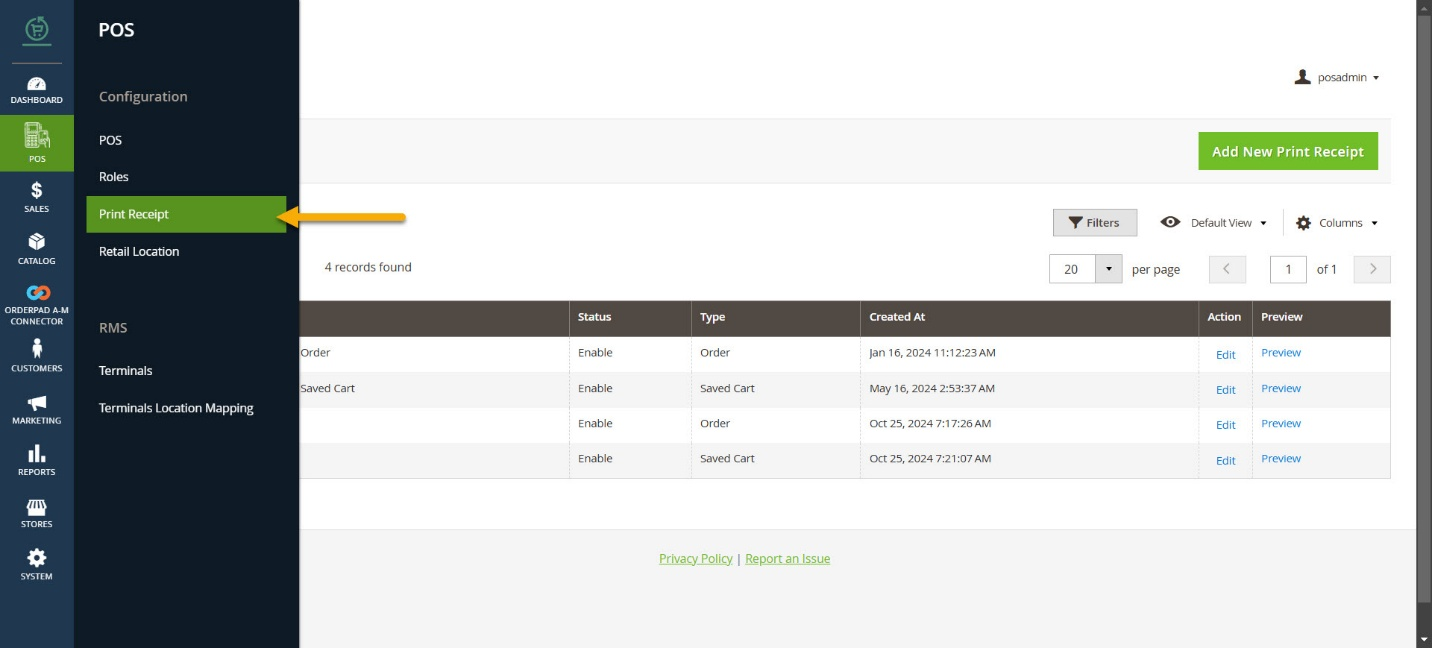
- You have the flexibility to generate different types of receipts tailored for distinct stores located at various locations.
- To update Receipts, click on [Edit]
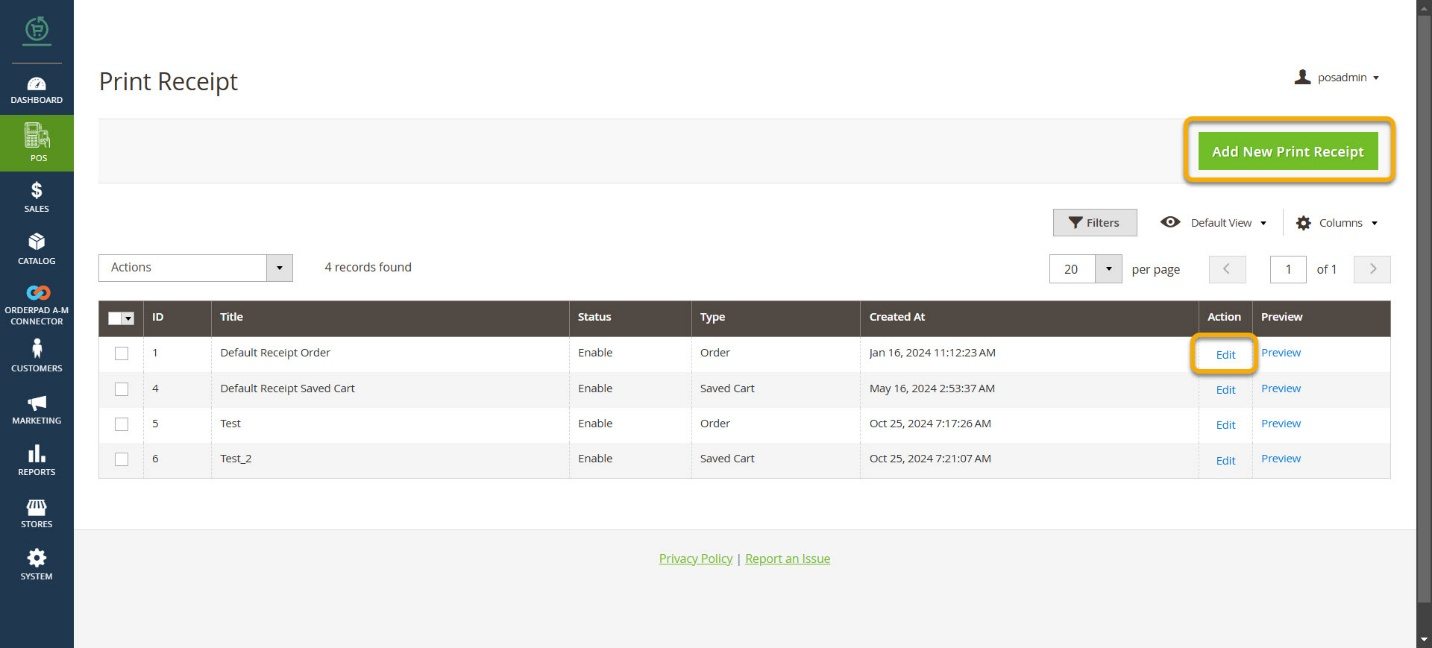
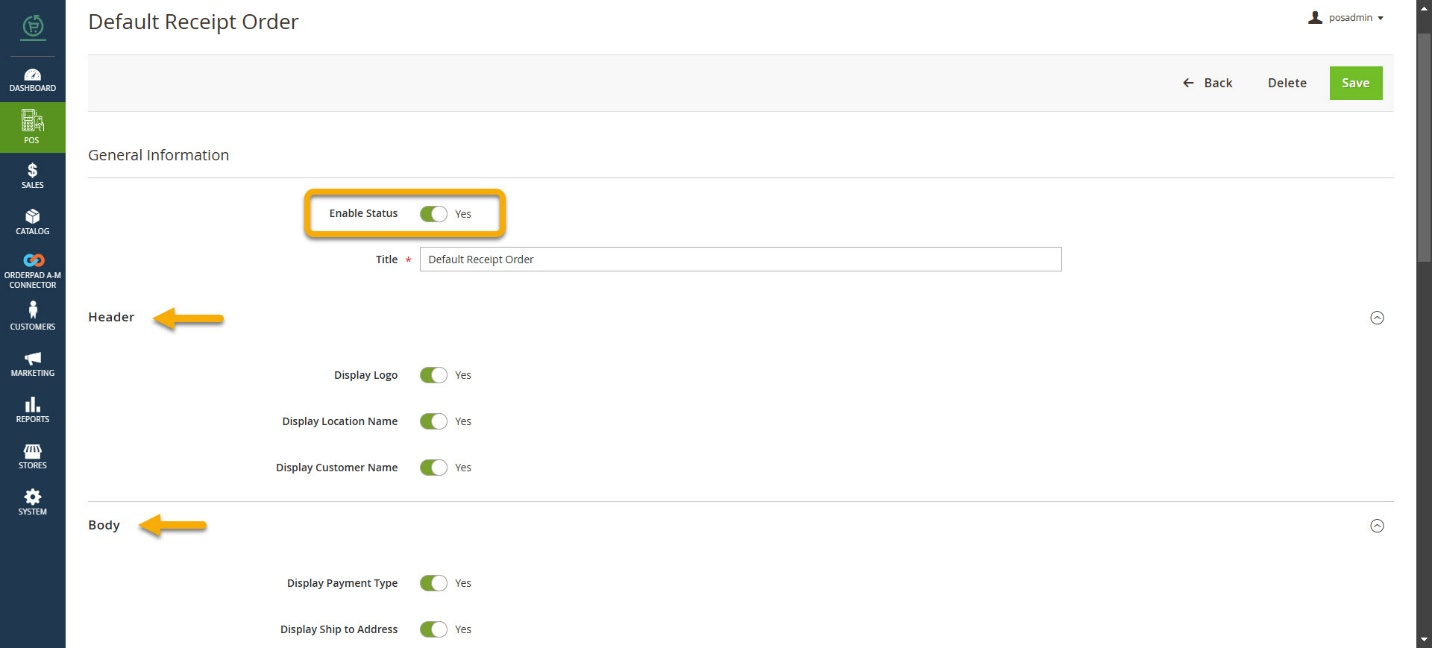
- You will be redirected to the following screen.
|
Field |
Field Type |
Description |
|
KENSIUM POS (General) |
||
|
Enable Status |
Toggle button |
Options available
If you select [Yes], the status will display as enabled, if you select [NO] it will display as disabled. |
|
Title |
Text box |
You need to enter the receipt’s Name |
|
Header Section |
Toggle buttons |
You can select “yes” or “no.” If you choose “yes,” the specific information will appear on the receipt; if you choose “no,” it won’t appear on the receipt.
|
|
Body Section |
Toggle buttons |
You can select “yes” or “no.” If you choose “yes,” the specific information will appear on the receipt; if you choose “no,” it won’t appear on the receipt.
|
|
Items Section |
Toggle button |
|
|
Totals |
Toggle button |
|
|
Footer |
Toggle button |
|
