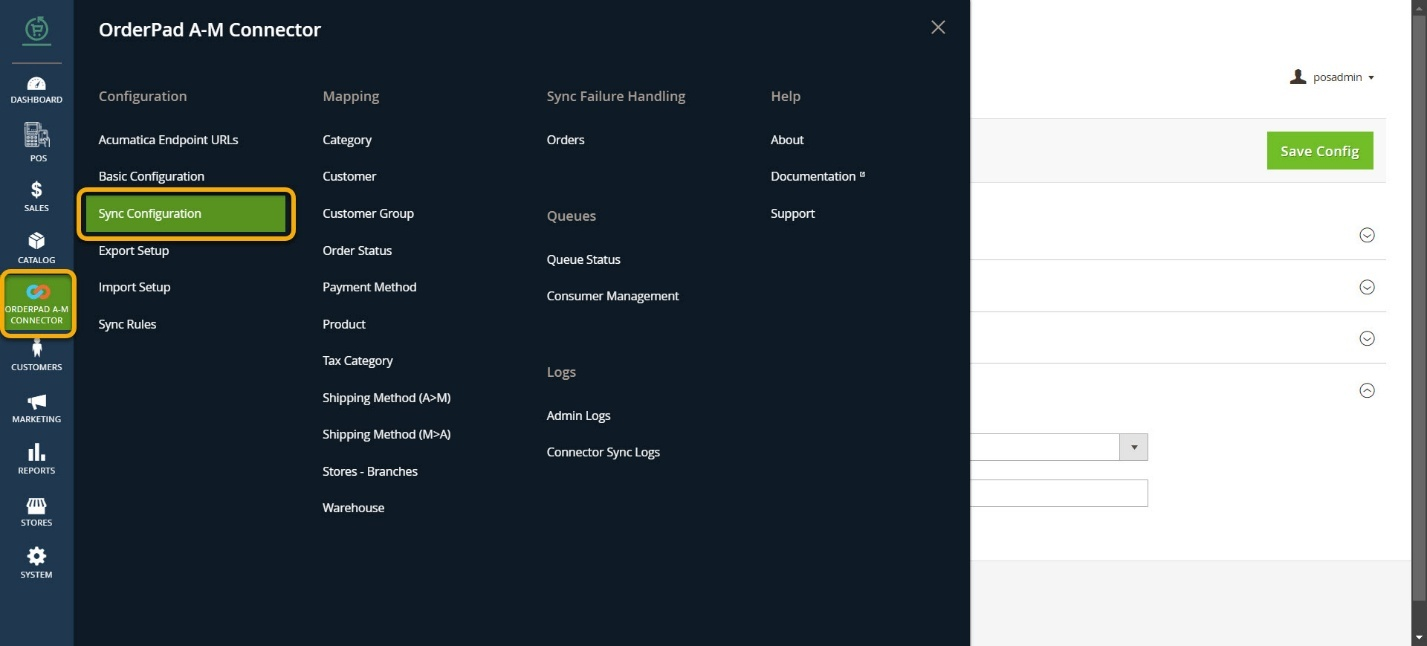
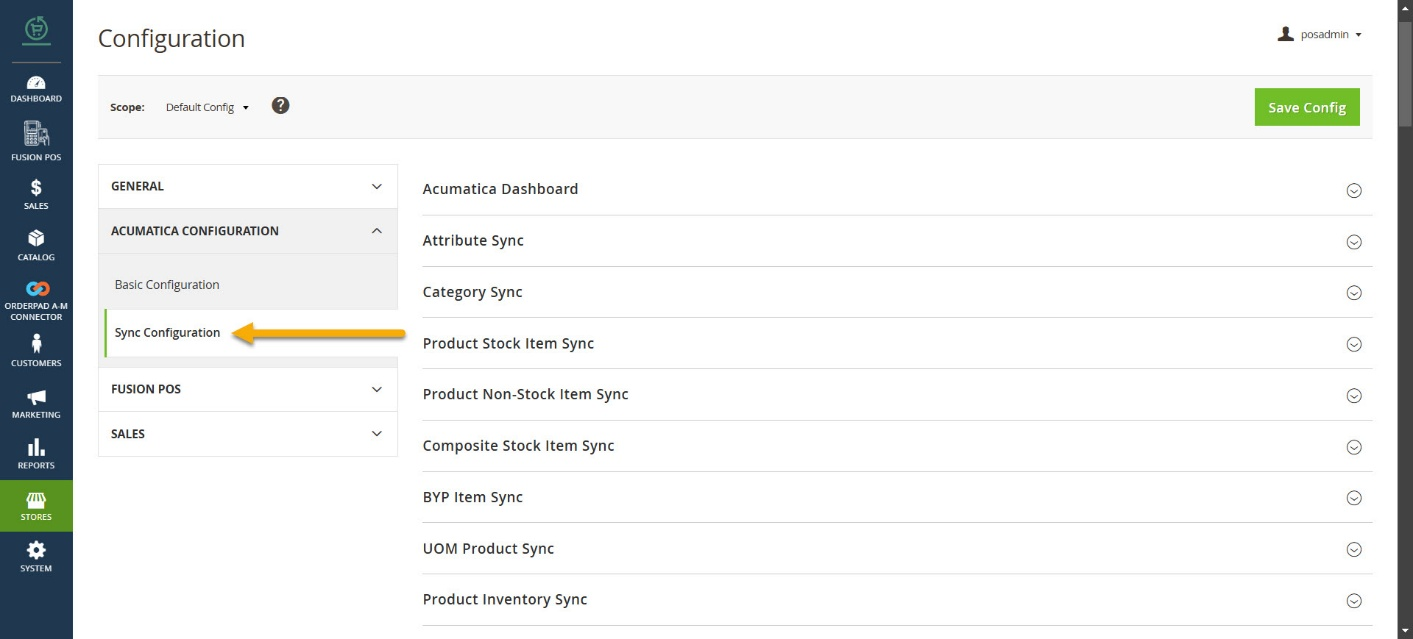
Home | Documentation | OrderPad | Usage Instructions Content > Product Overview Range of Functionality Benefits of Kensium OrderPad System Requirements Installation Guide Usage Instructions Licensing Process OrderPad Configuration Guide Configuring Kensium POS Configuring SMS Tool Configuring Emails Configuring Sales in Settings Roles in Kensium POS Configuration Adding New Roles Print Receipt Preview of Print Receipt OrderPad Settings in OrderPad Orders Saved Carts Customers Products Adding Staff Adding a Staff Admin About Guest Customer and POS Staff About Roles and Permissions Support Logout Configuring OrderPad with Acumatica General Acumatica Connection Settings Acumatica Logs Acumatica Admin Log Sync Configuration Order Sync Create POS Admin in KENSIUM Identifying a Staff Admin Actions in OrderPad Adding Products to the Cart Check the Availability and Switch Store Adding Products from a Different Store to the Cart Order exceeding the Available Quantity Adding Multiple Products View and Edit Cart Order Check-out Delivering the Product to the Store location Print the Receipt for the Saved Cart Configurable Product Supported in OrderPad Pay Later Payment Method Dynamic Menu Name Change Fortis Payment Integration Admin section for the Fortis Payment Custom Sale Product Download User Manual Download PDF Sync Configuration Download PDF Sync Configuration Navigate to the left side of OrderPad Admin select [ORDERPAD A-M CONNECTOR] and then Click on [Sync Configuration]. Sync Configuration To synchronize Acumatica with OrderPad, fill in the [Sync Configuration] fields with all the required information. Sync Configuration Order Sync Doc navigation < Configuring OrderPad with Acumatica Create POS Admin in KENSIUM >