Product Schema in Acumatica
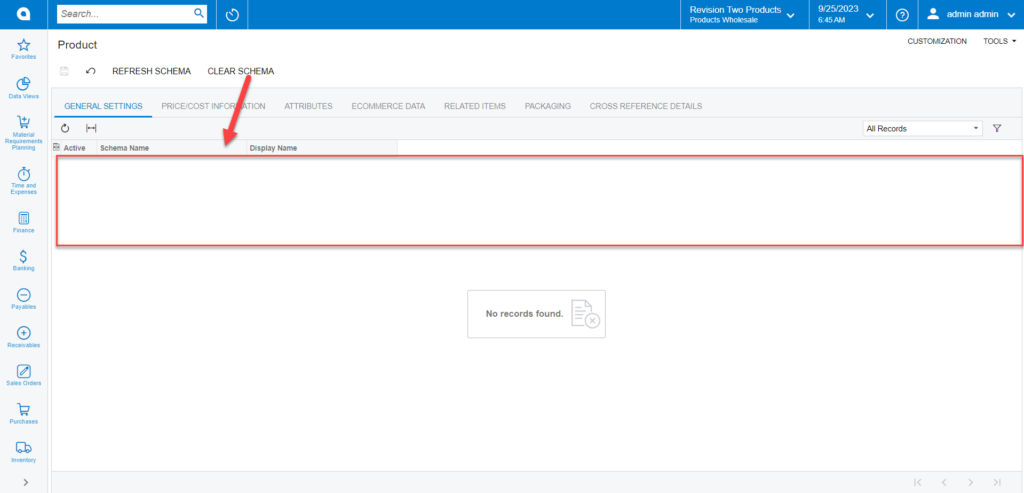
By clicking on the Product Schema Acumatica will open the [Product Schema] screen which includes [Refresh Schema] and [Clear Schema]. In the first place, the screen should appear blank. All the tabs like [General Settings], [Price/Cost Information], [Attributes], [Ecommerce Data], [Related Items], [Packaging], and [Cross Reference Details] should be banked. They should not contain records under all these columns.
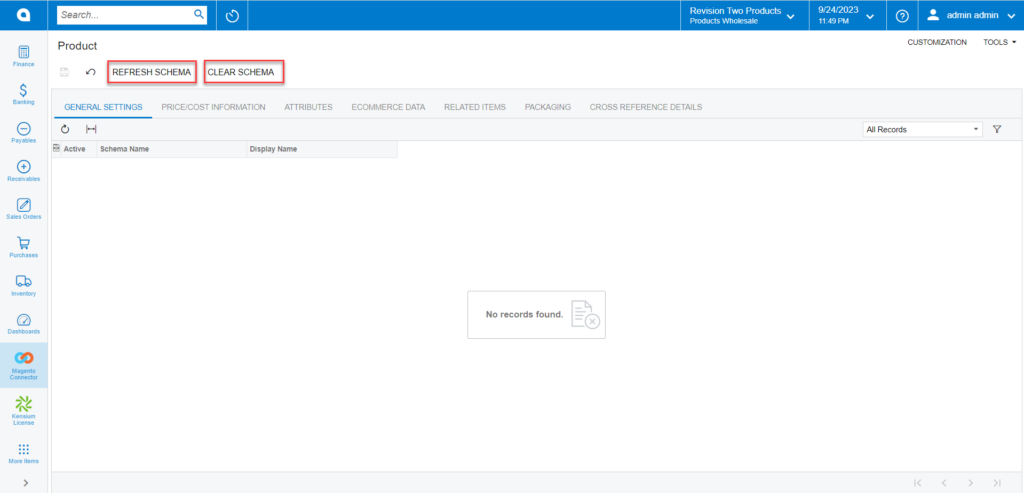
- Refresh Schema: By clicking on this option, the application will run a process and pull up all the fields. This will retrieve all the field names which have been used in the application. Under the General Settings, the application will show the Schema Name and Display Name. Display Name is the field label name used in Acumatica.
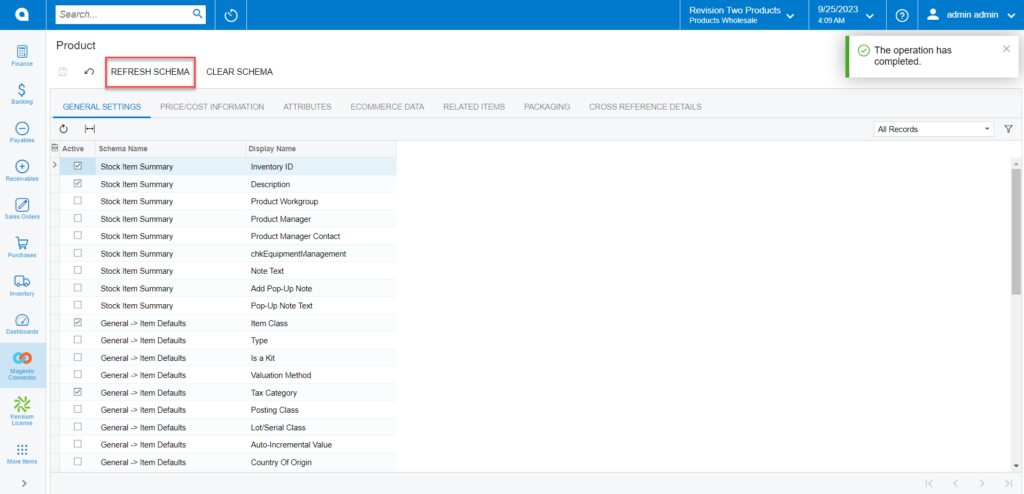
Once the [Refresh Schema] routine is performed, you will get a message [The operation has completed].
For, if you open the stock item browse in Acumatica, you will have General, Price/Cost, Warehouses, Vendors, Attributes, Ecommerce Data, Packaging, Cross-References, Related Items, Replenishment, Deferral, GL Accounts etc. tabs. At the same time, you will have some mandatory fields like Inventory ID, Item Class etc. as shown below.
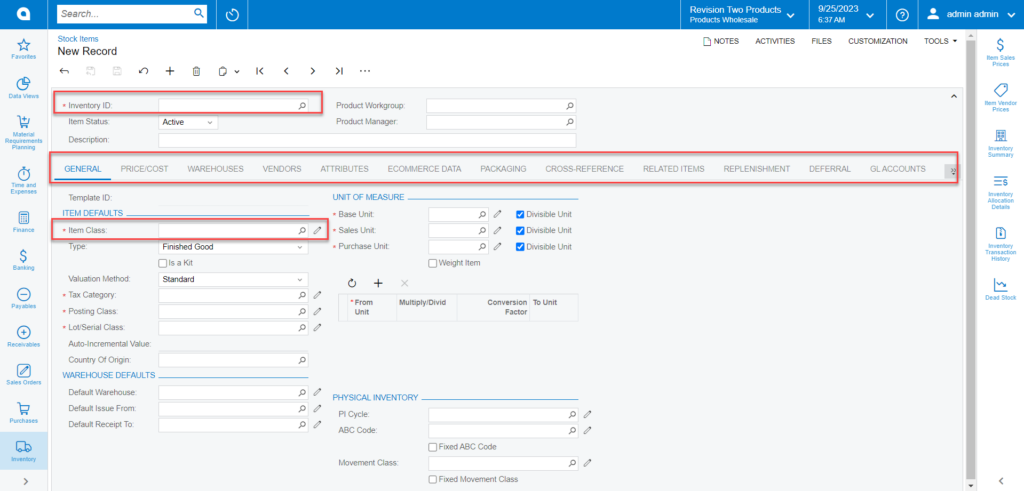
In both columns, you can view the Schema names and the Display Name which indicates the field label name as shown in the above figure.
- Clear Schema: By clicking on the Clear Schema option, the application will clear all the [Schema Name] and the [Display Name].
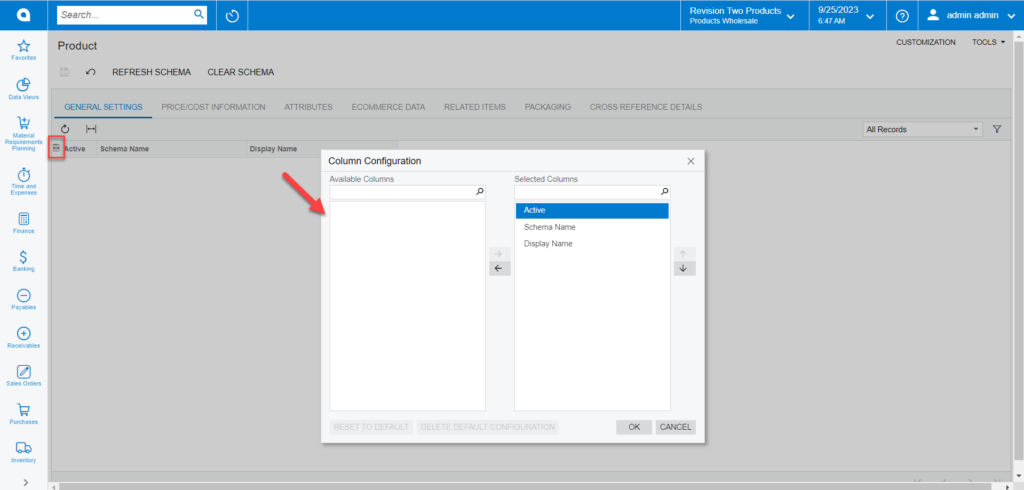
- Column Configuration: This option will allow you to configure the columns. You can customize the column by clicking the [Active] button on the left of the grid. A popup will appear on the screen for [Column Configuration]. You can include or exclude columns as per your requirement.
- Price/Cost Information: The [Price/Cost Information] followed by the [General Settings] will show all the Price Management-related schema names along with the display name. See the following figures.
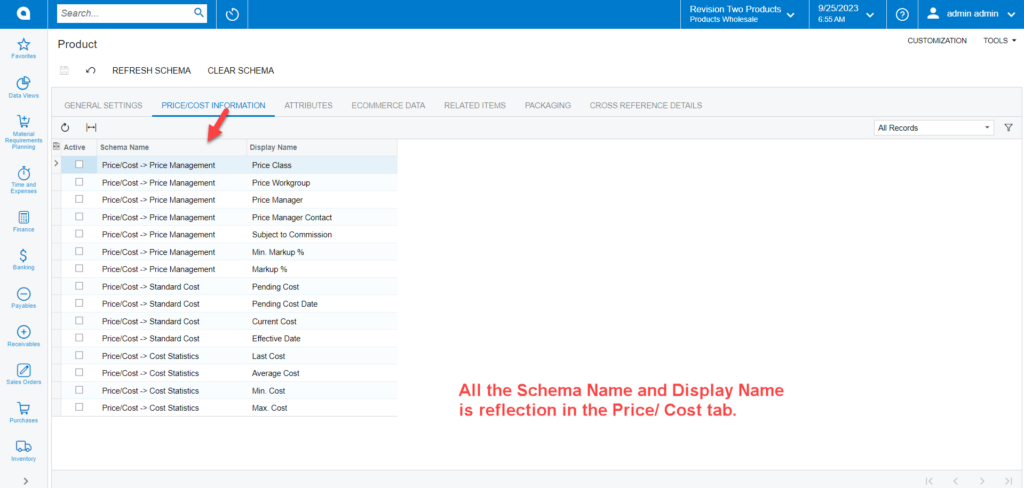
![Price / Cost tab includes all the schema and display name[/caption]](/wp-content/uploads/2023/12/Price-Cost-Information-in-Product-Schema-1-1024x488.png)
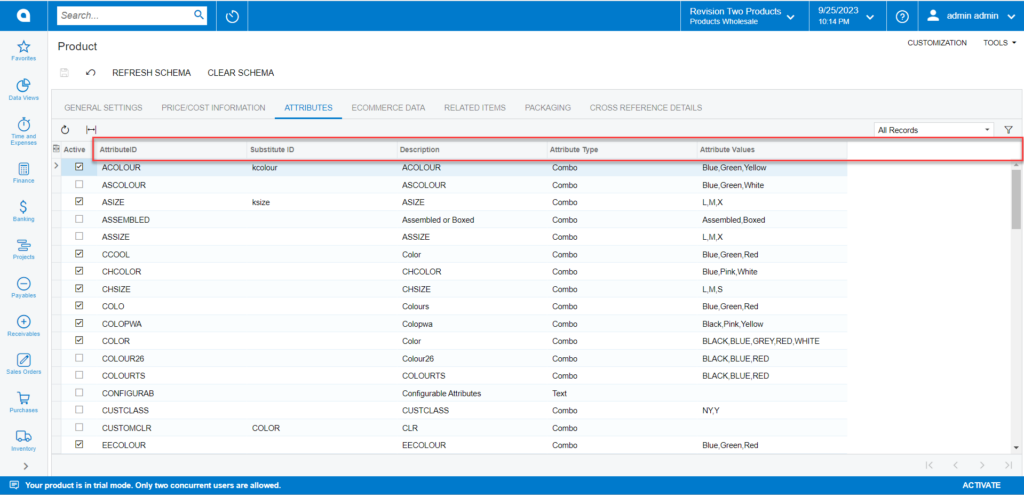
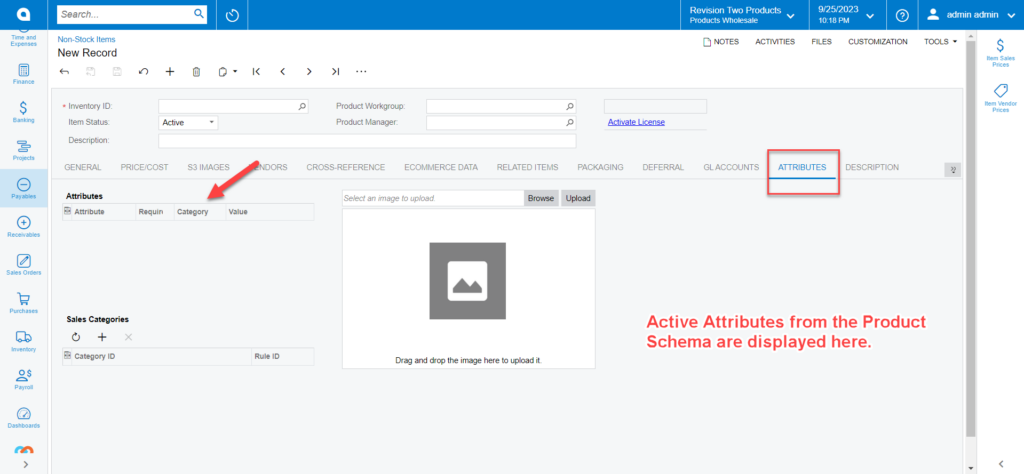
- Attributes: The [Attributes] in the Product Schema section is followed by the [Price/Cost Information]. This will show the Attribute ID, Substitute ID, Description, Attribute Types, and attribute values. The [Active] check box in the schema indicates the active attributes which are reflected in the in-stock item browse while creating a new product.
The Attributes which are selected as Active will be displayed in the Product browse. You need to define the attributes you want to see in the Product browse.
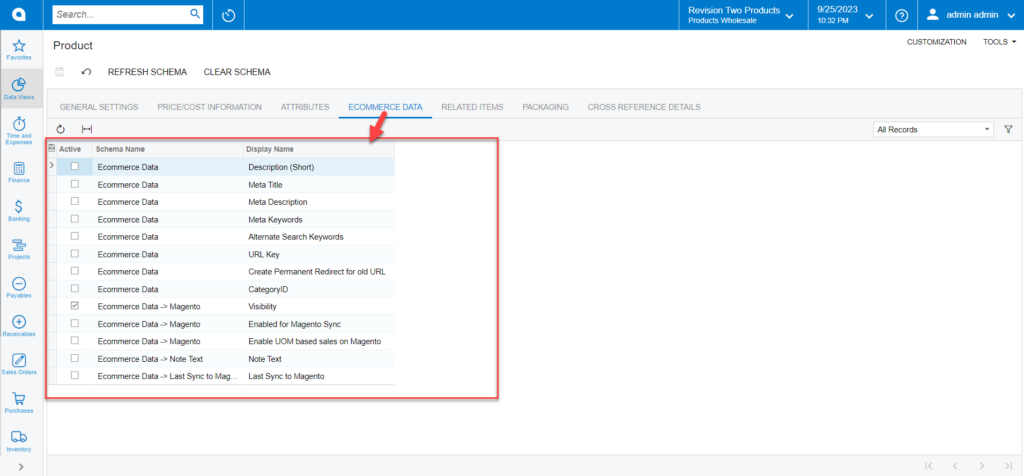
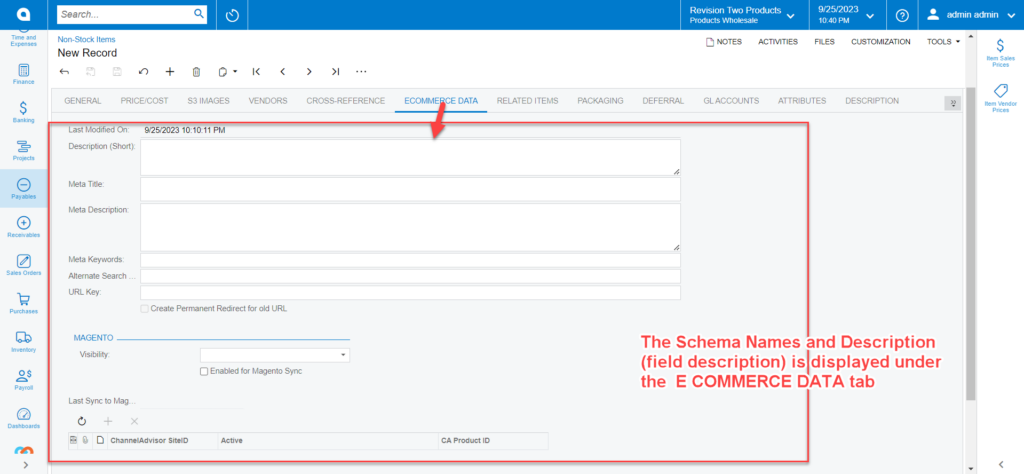
- E-Commerce Data: The [E-Commerce Data] in the Product Schema section is followed by the [Attributes]. This will show the Schema name and the Display name. The same will be displayed in the Product browser when you click on the E-commerce Data tab.
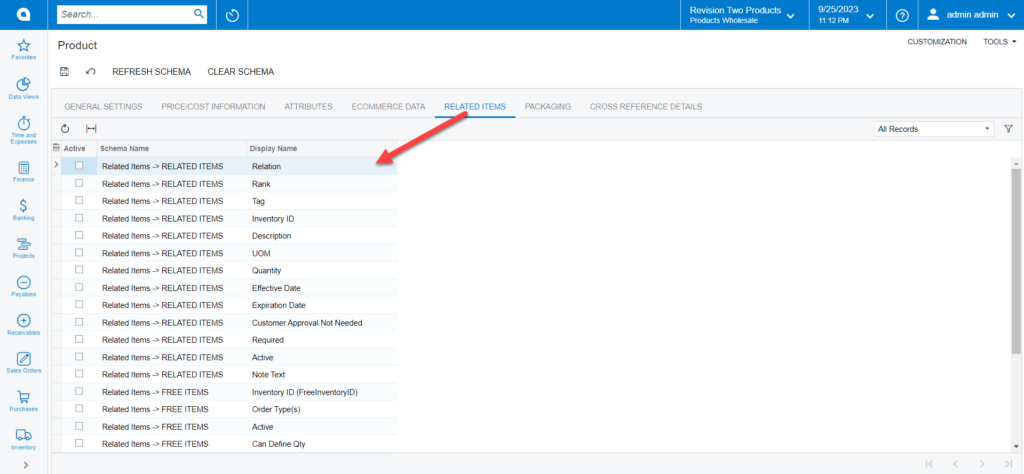
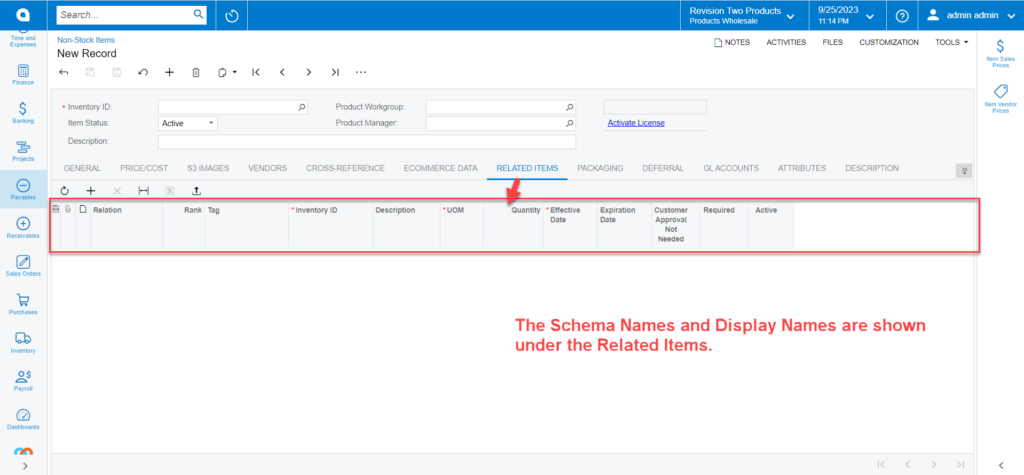
- Related Items: The [Related Items] in the Product Schema section is followed by the [Ecommerce Data]. The [Schema Names] and the [Display Names] are displayed here. The same is reflected in the Stock Item browse under the [Related Items] tab. See the following screenshots.
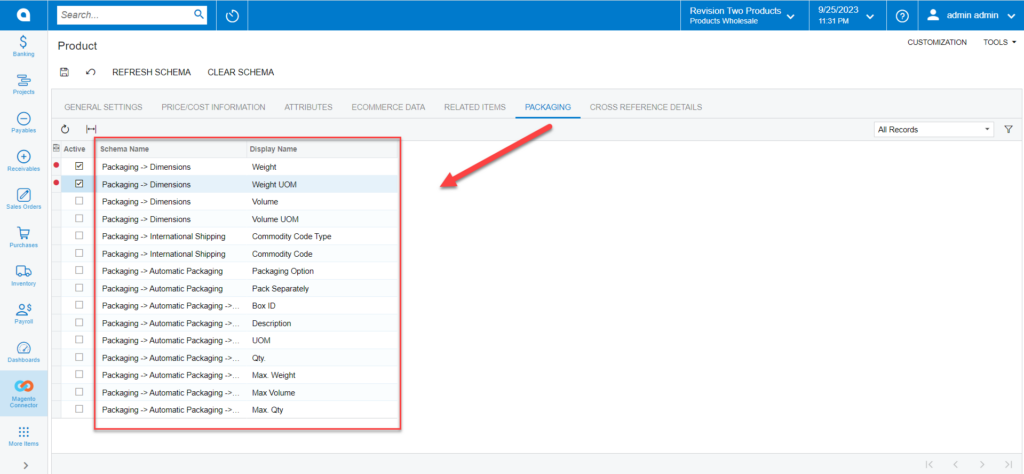
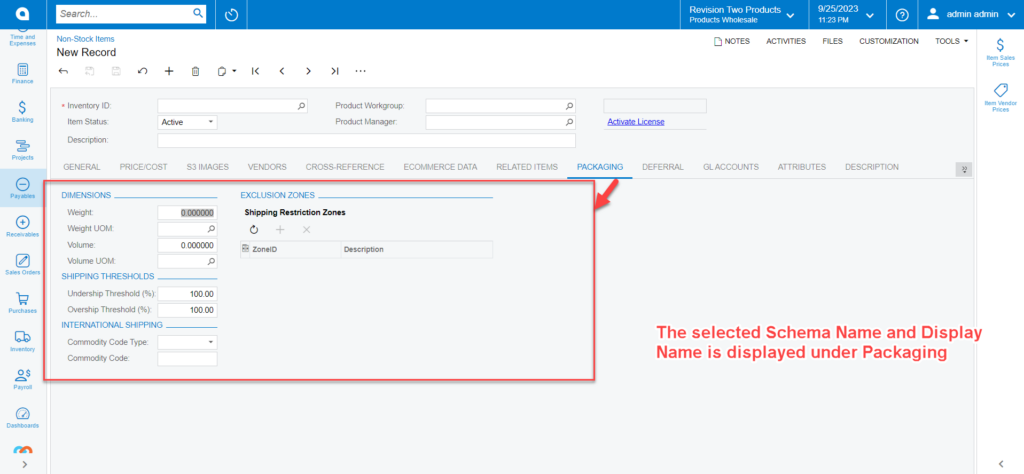
- Packaging: The [Packaging] in the Product Schema section is followed by the [Related Items]. The [Schema Names] and the [Display Names] are displayed here. The same is reflected in the Stock Item browse under the [Packaging] tab.
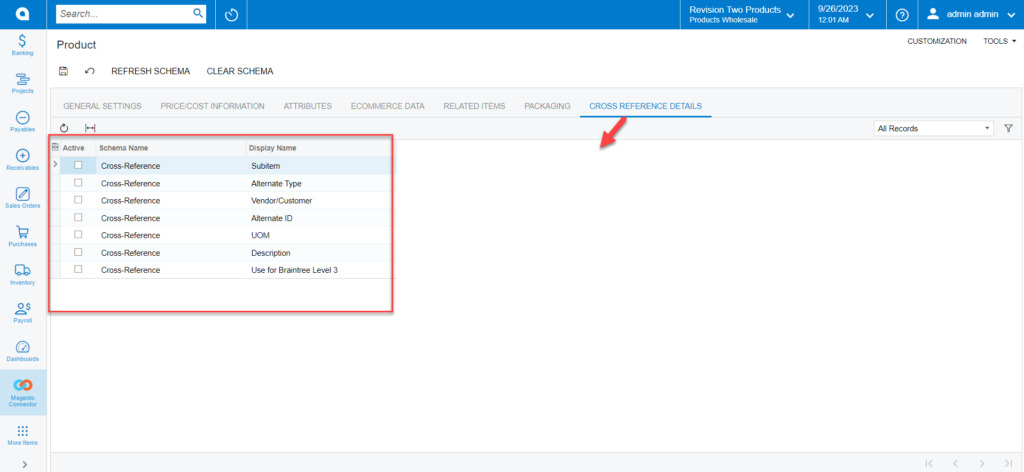
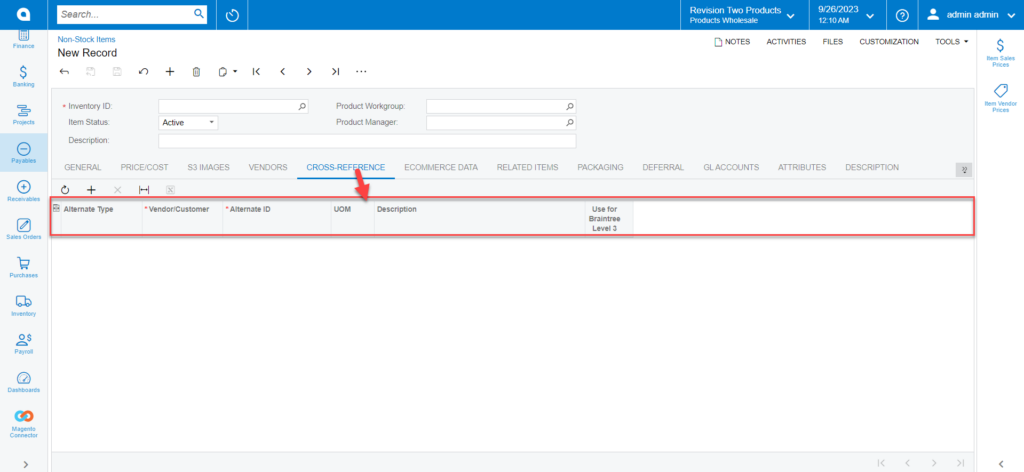
- Cross Reference Details: The [Cross Reference Details] in the Product Schema section is followed by the [Packaging]. The [Schema Names] and the [Display Names] are displayed here. The same is reflected in the Stock Item browse under the [Cross-Reference ] tab in the Stock browse.
