Initialization under Configuration
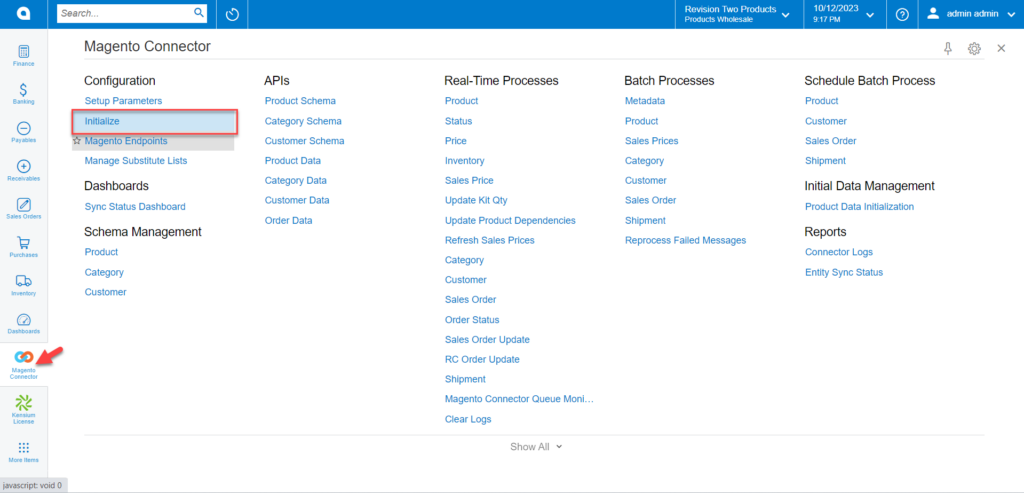
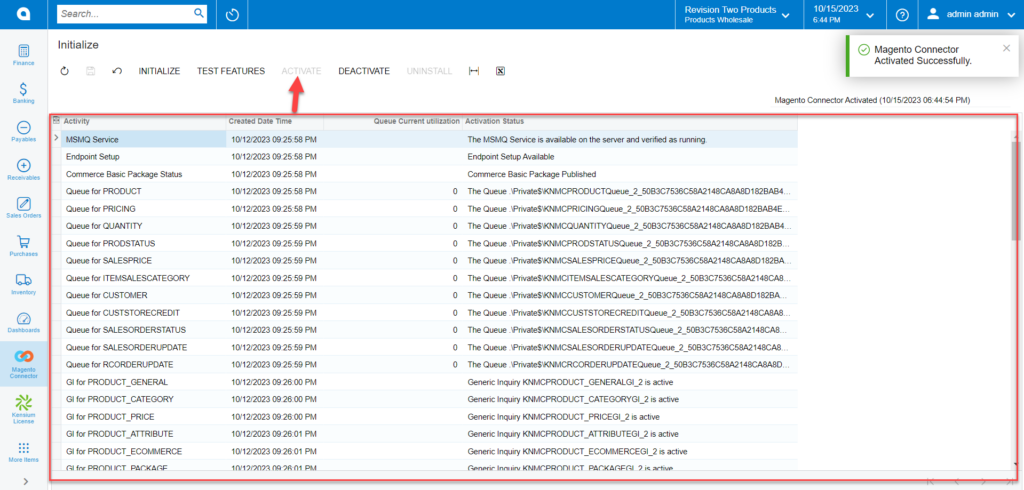
To initialize for the first time, you need to click on the [Magento Connector] on the left side panel and click on [Initialize] under [Configuration] as shown in the following screen.
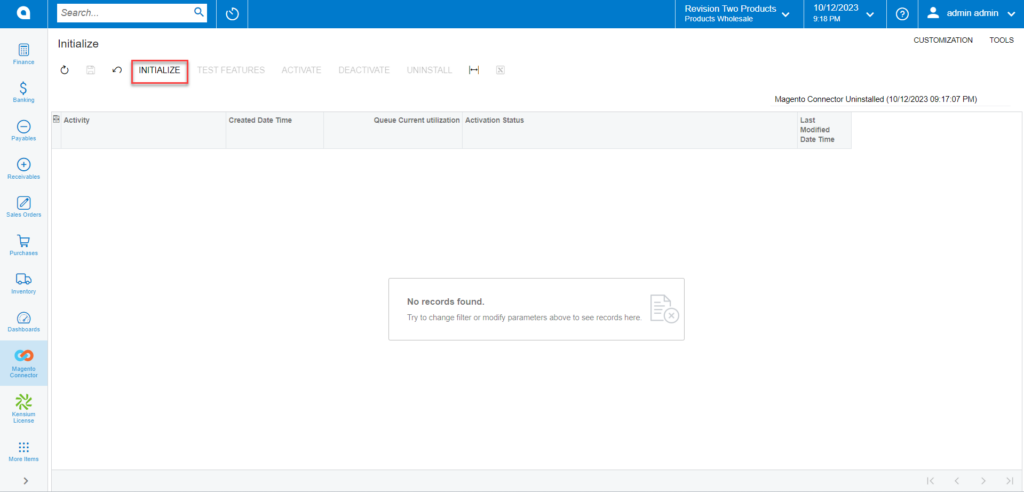
In the first place, you will only see the [Initialize] button activated. Rest all the buttons should be deactivated, and the screen will appear blank. See the following screenshot.
![To initialize all features in Magento Connector click [Yes]](/wp-content/uploads/2023/12/To-initialize-all-features-in-Magento-Connector-click-Yes-1024x493.png)
Click on the [Initialize] button. Upon clicking on Initialize a smart pop-up appears on the screen as [Are you sure you wish to initialize all features for Magento Connector] with a [Yes] and [No] option. Click on the [Yes] option.
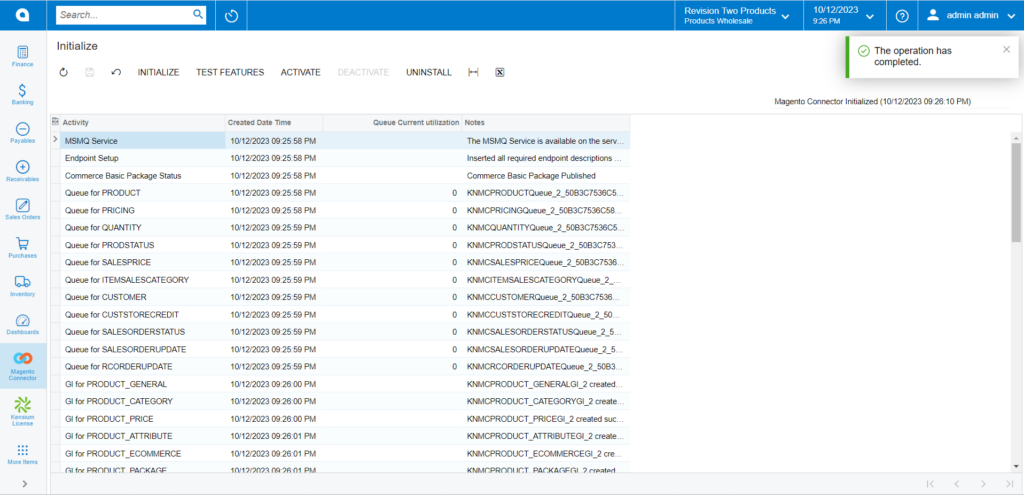
By package publish MSMQ Service and Endpoint Setup will be published. Then the connector will check whether the Commerce Basic package is published or not. The rest of the Generic enquiries will be published. The connectors will create automatically necessary GIs, Push Notifications and Schedulers.
Push Notifications are used to send the data from the connector. GI is used to filter data. Automate schedulers are used to process the data through the connector to sync from Magento to Acumatica.
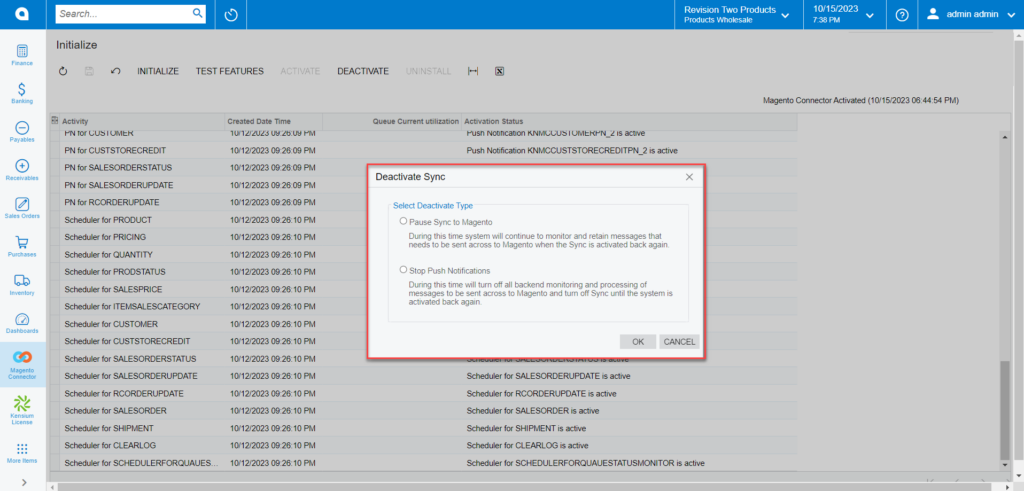
To deactivate, a pop-up will appear on the screen. You need to click on [Yes] to deactivate.
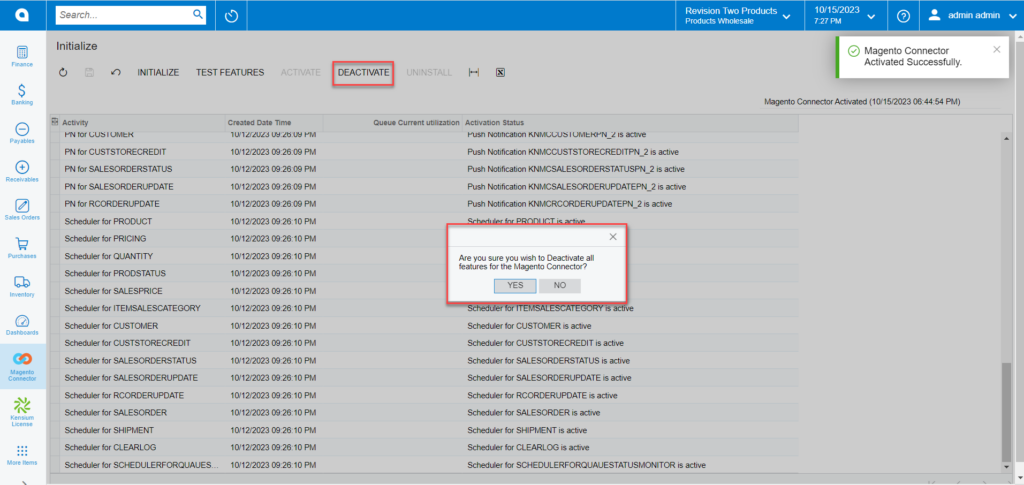
In the Deactivate Sync pop-up, you will have two options.
- Pause Sync to Magento: If you select this radio button to enable it, the system will continue to monitor and retain the messages that need to be sent to Magento when the Sync is activated again.
- Stop Push Notification: If you select this radio button to enable it, the system will turn off all the backend monitoring and processes of messages to be sent across to Magento and turn off Sync until the system is activated again.