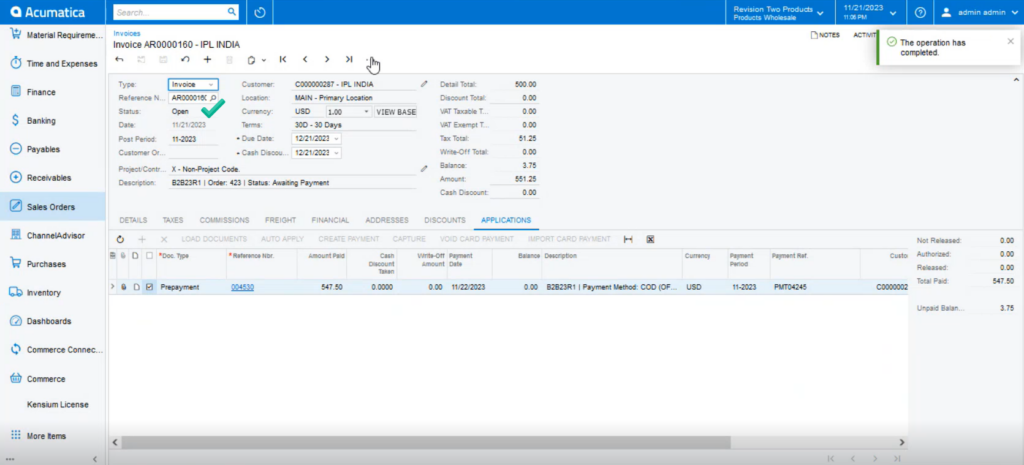
Invoice Sync in Acumatica
This section will show you how the Invoices are getting synced.
Steps to be followed:
Step 1: You need to click on the option for [Create Shipment] from the Sales Order Screen.
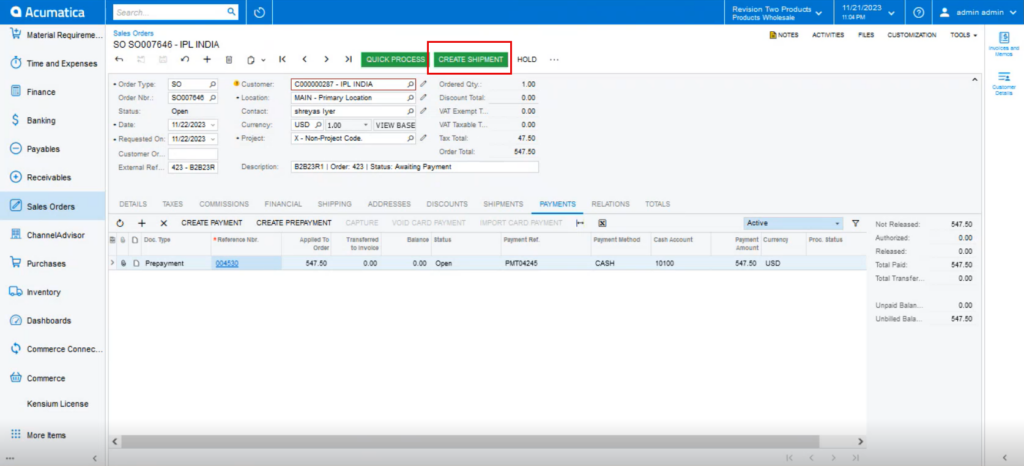
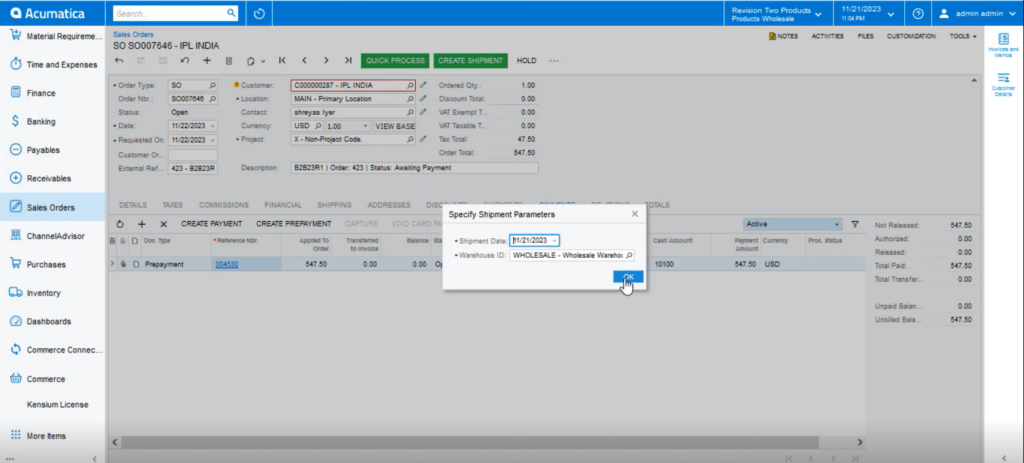
Step 2: Upon clicking the Create Shipment you will get the following screen.
Step 3: This will enable the [Confirm Shipment] button.
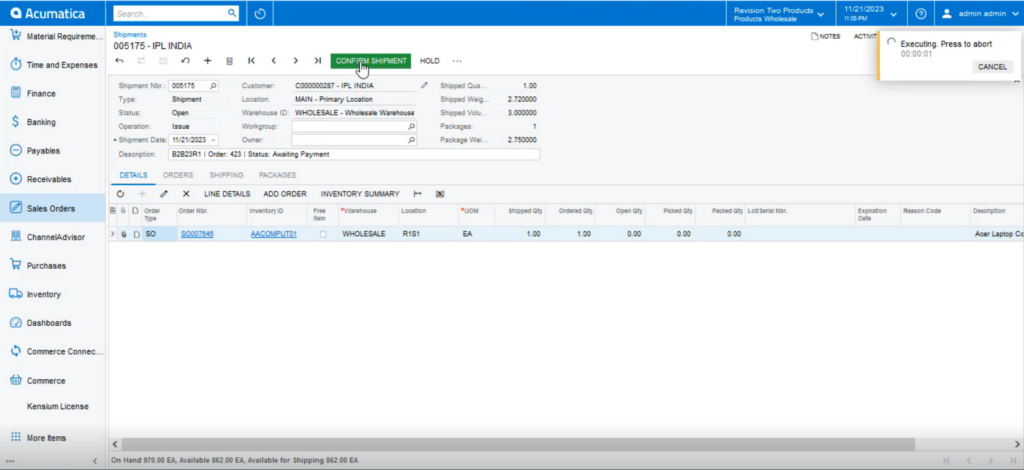
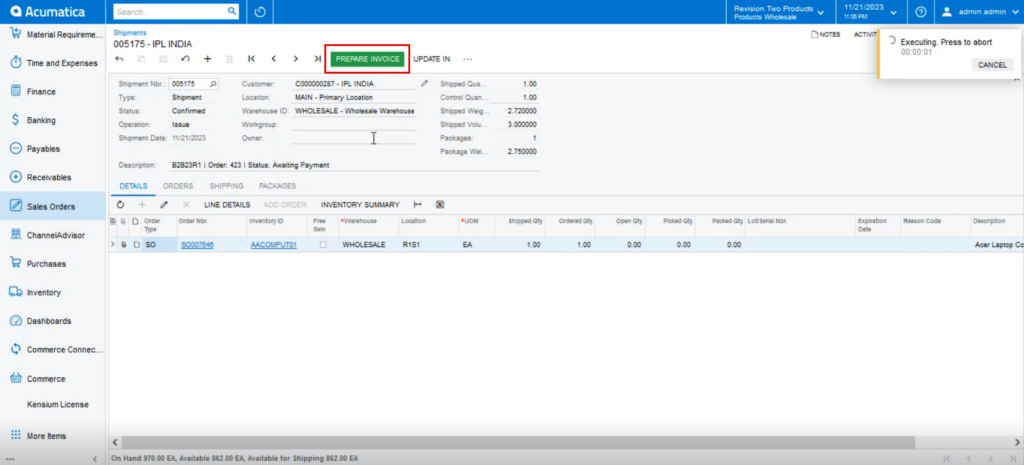
Step 4: Acumatica will start [Preparing Invoice].
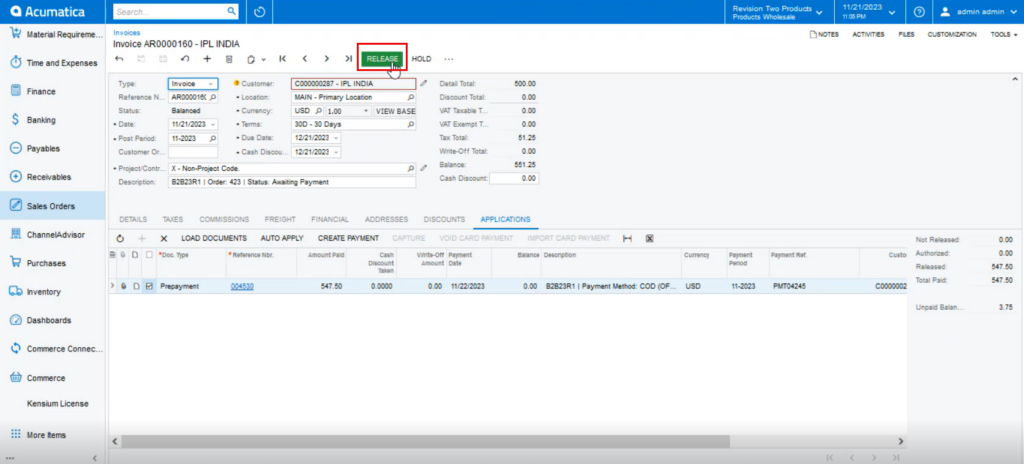
Step 5: Release the Invoice.
Step 6: After [Release] the invoice is going to sync with the B2B app. Go to the Logs under the Report section of Acumatica.
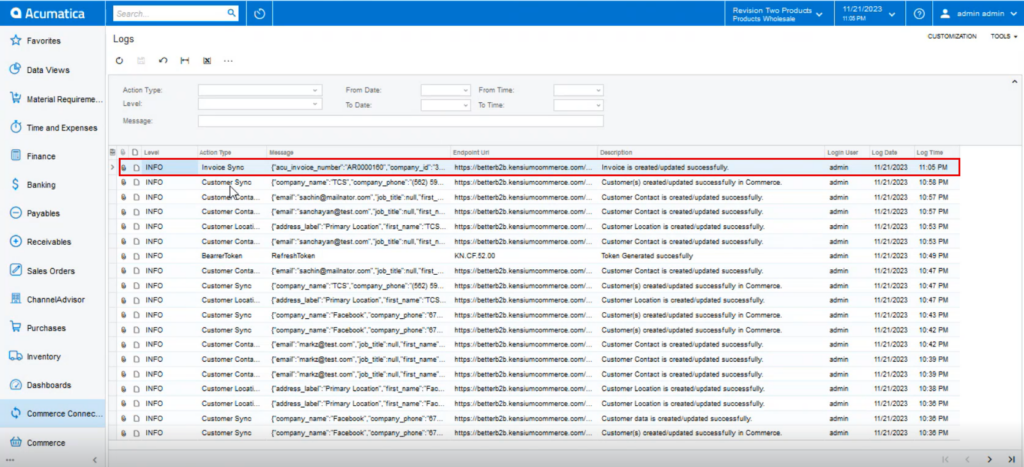
Note that, all the statuses will be supported, like Balan, Closed etc.
