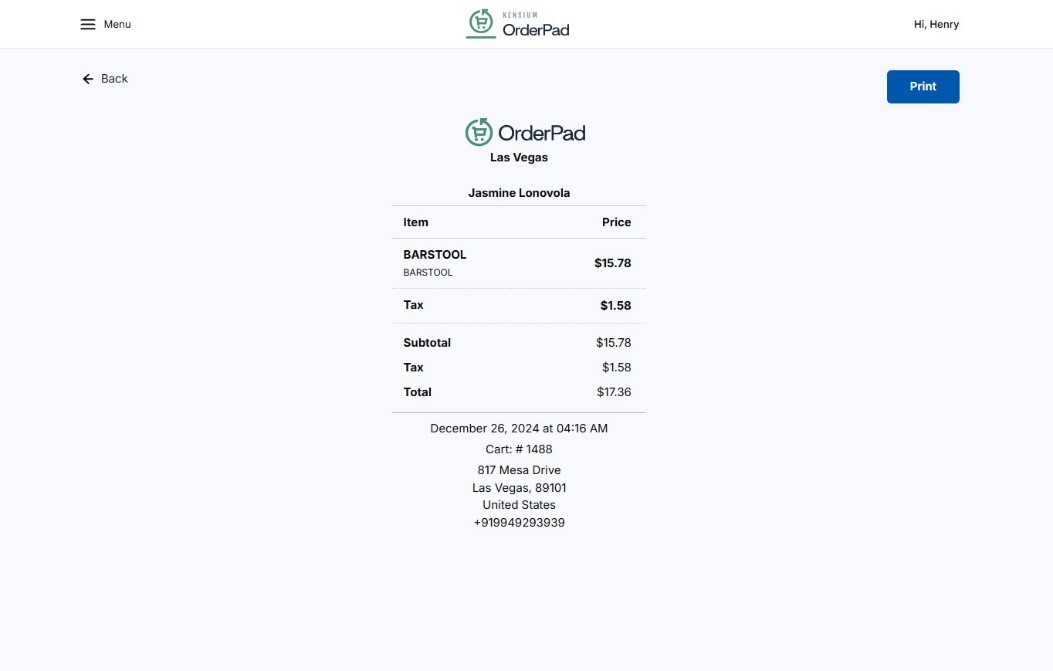
Print the Receipt for the Saved Cart
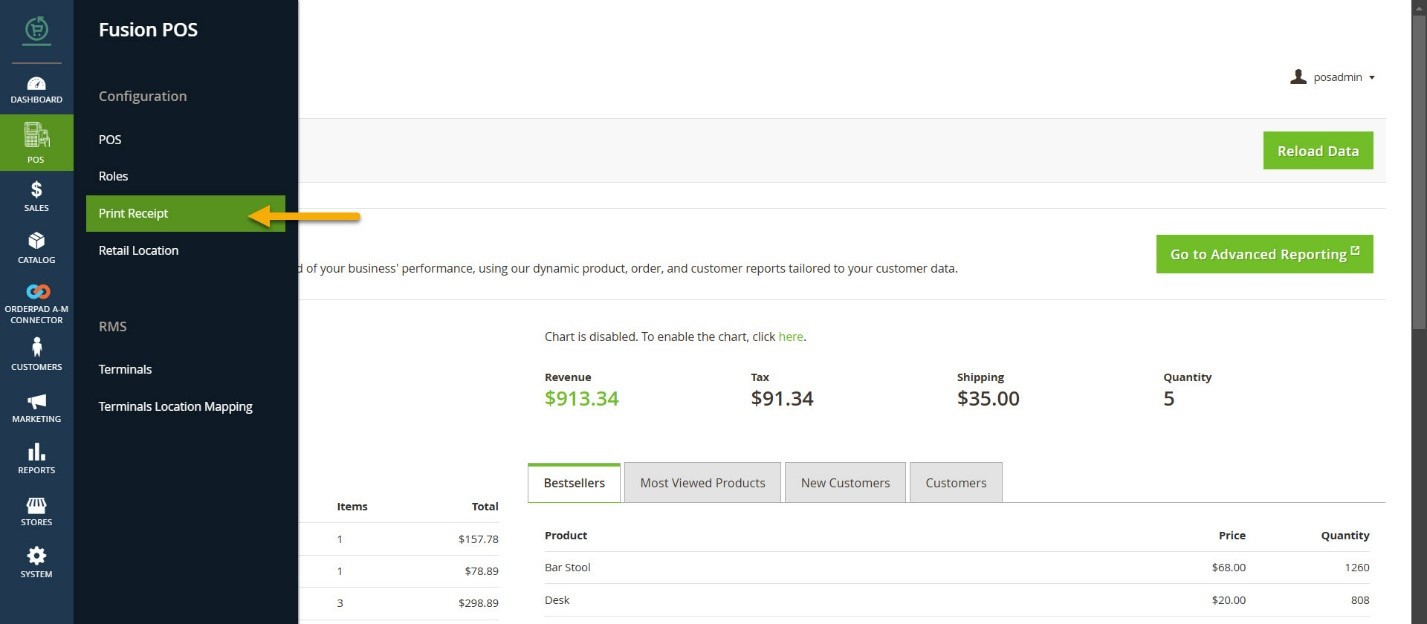
Login to the OrderPad, navigate to the Kensium POS, and click on the [Print Receipt] you will be redirected to the [Print Receipt] Screen.
- The [Add New Print Receipt] option will be available on the top right-hand side of the screen.
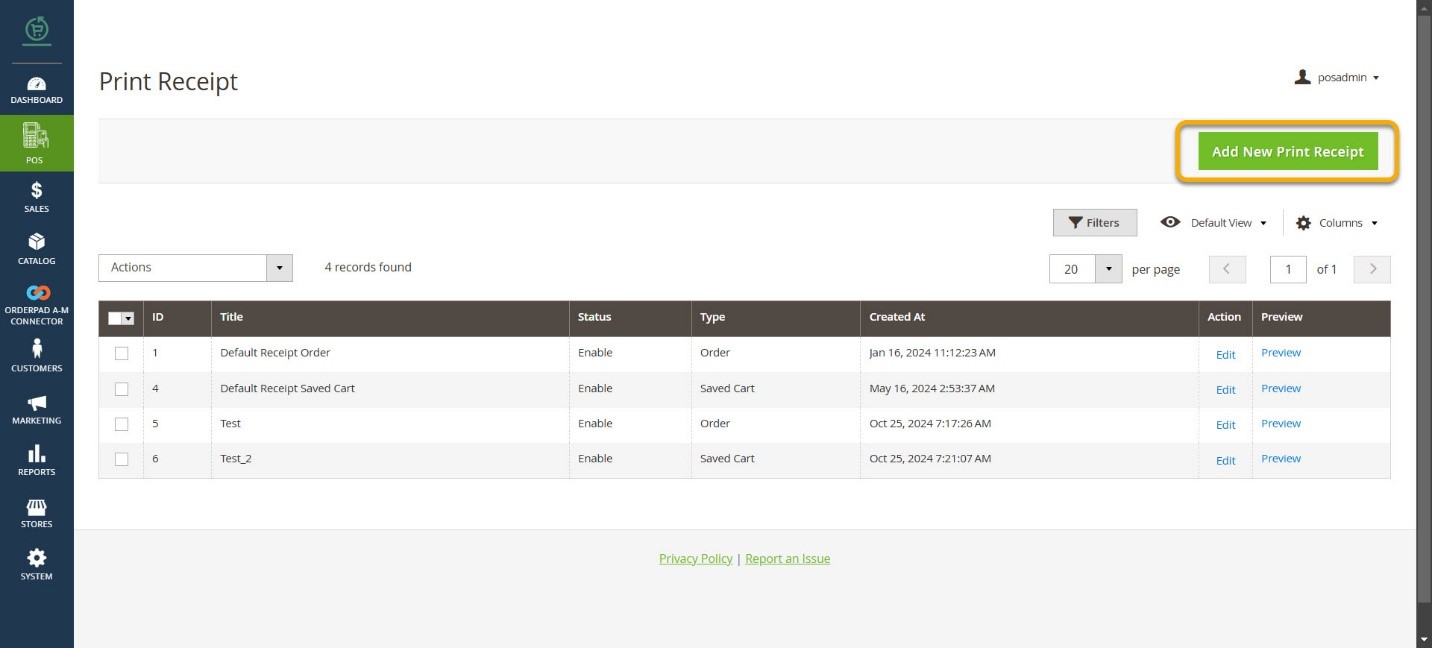
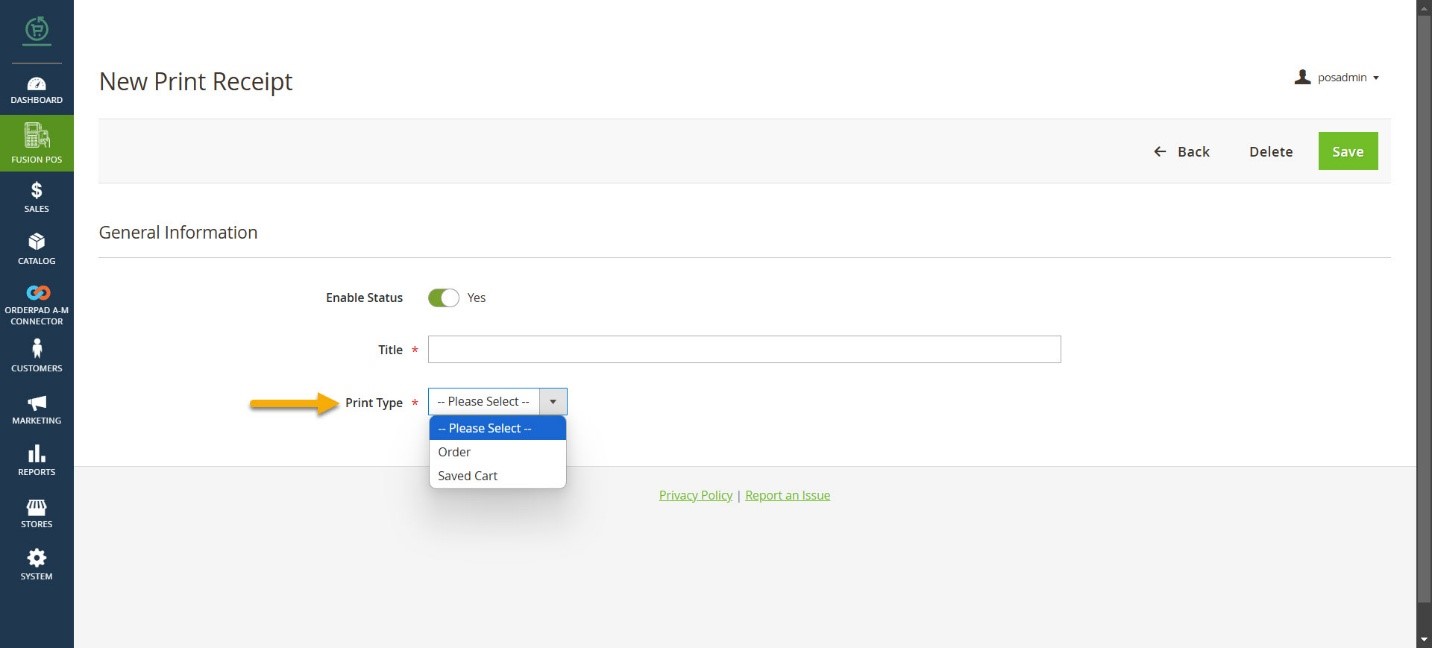
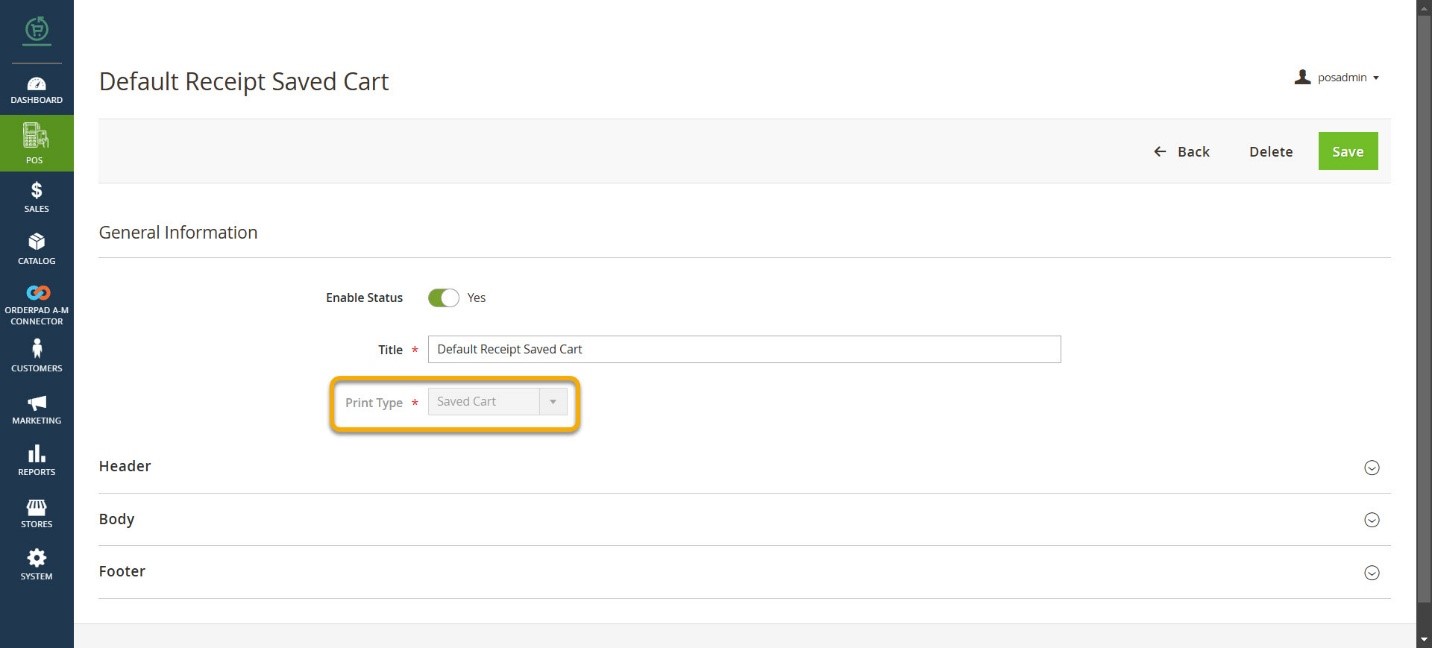
- We have two types of Receipts. Upon clicking on the [Add New Print Receipt] under the General Information the two available options for [Print Types] are as follows:
- Order
- Saved Cart
- If you select “Order” from the dropdown menu, you can view the menus for Header, Body, Items, Totals, Footer, and more.
![Print Type is selected as [Order].](/wp-content/uploads/2024/12/word-image-19964-4.jpeg)
- If you select [Print Type] from the dropdown menu, you can view the menus for Header, Body, Items, Totals, Footer, and more.
- In OrderPad the application provides a [Default Print Receipt] for the Saved Cart that you can’t edit.
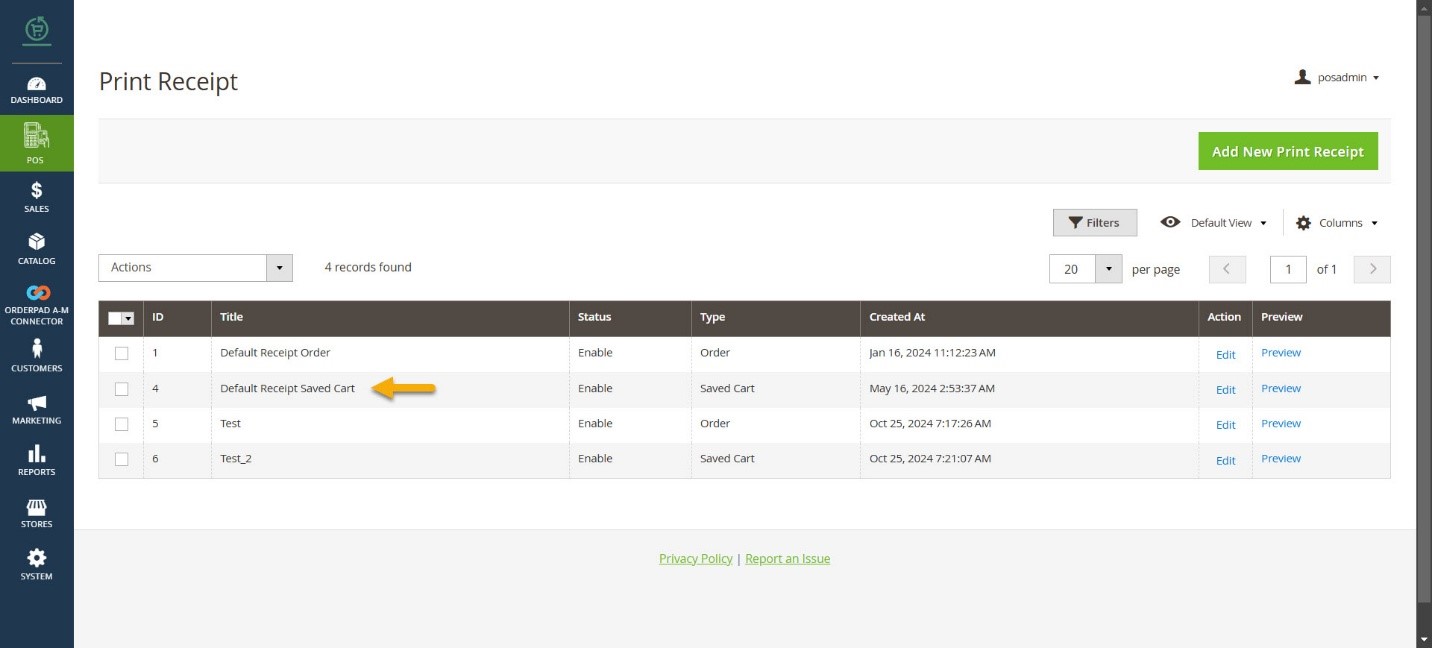
On the Print Receipt Screen, you can view the default print receipt for the saved cart on the grid. Upon clicking the Edit option, you can view the setup for the [Default Receipt Saved Cart].
An alert message will appear if you wish to edit the default receipt.
Illustration:
To create a new print receipt with [Save Cart] follow the steps.
- Create a new print receipt with [Save Cart] type and enable all the options. The Print Type must be [Saved Cart].
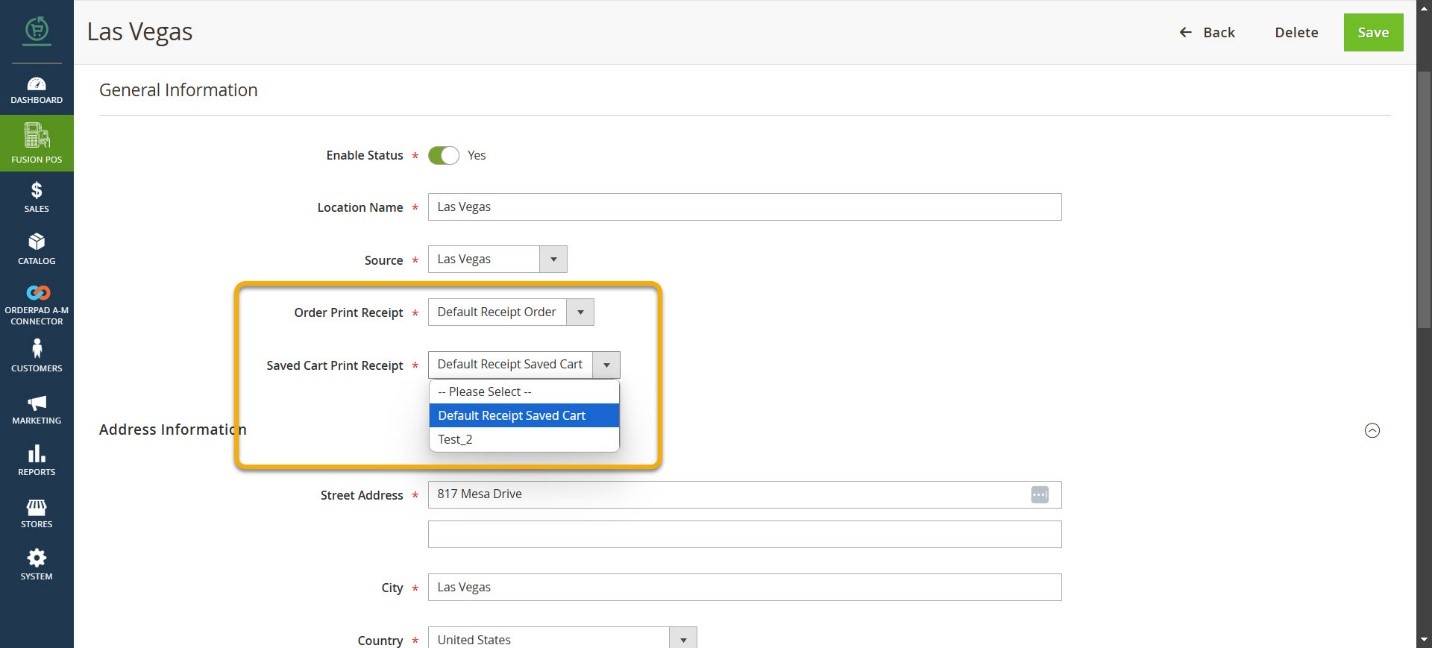
- Navigate to Kensium POS -> Retail Location to add a new receipt. Create a Receipt with the Location.

- Now you will have 2 dropdowns. One is for the Order Print Receipt and the other is for the Save Cart Print Receipt.
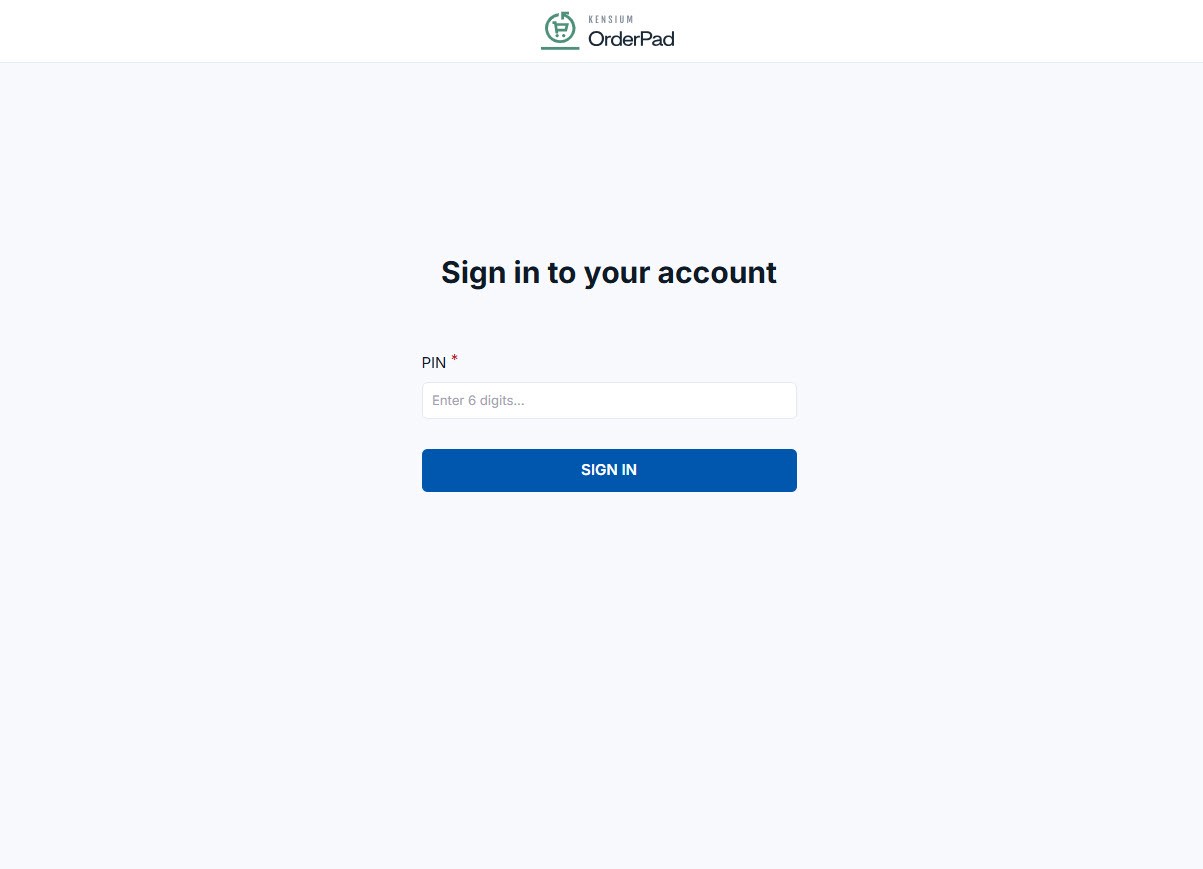
- Once the configuration is done, navigate to OrderPad and log in to the OrderPad.
- Select a Product from the OrderPad and select a customer.
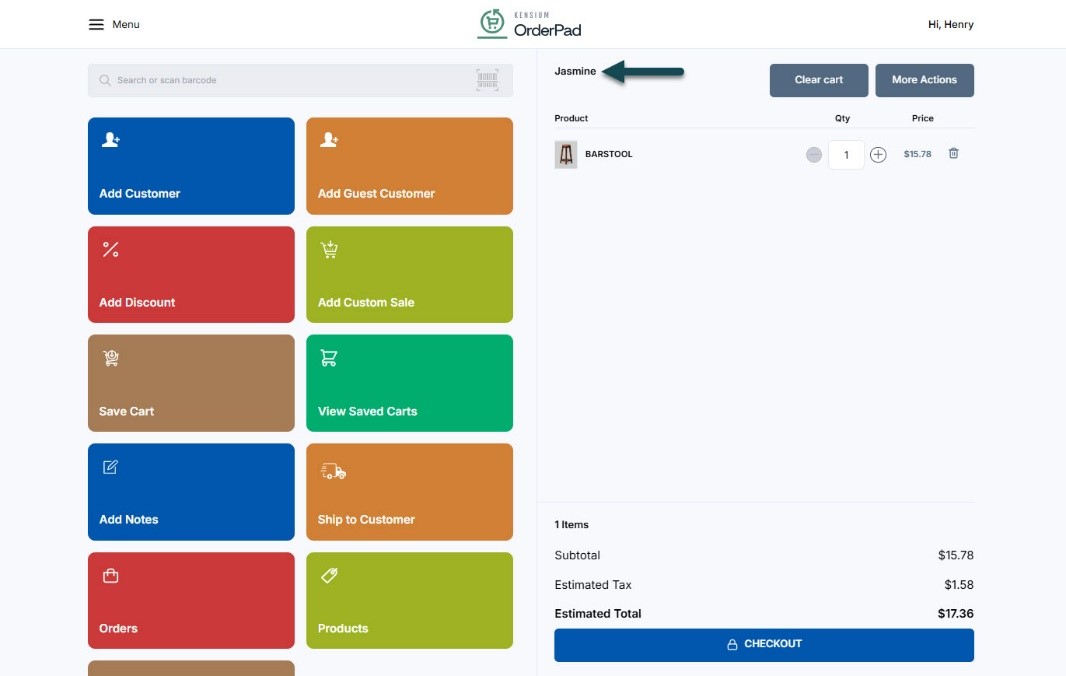
- Add some more products, allow a discount and save the cart. From the Menu, you can view the cart.
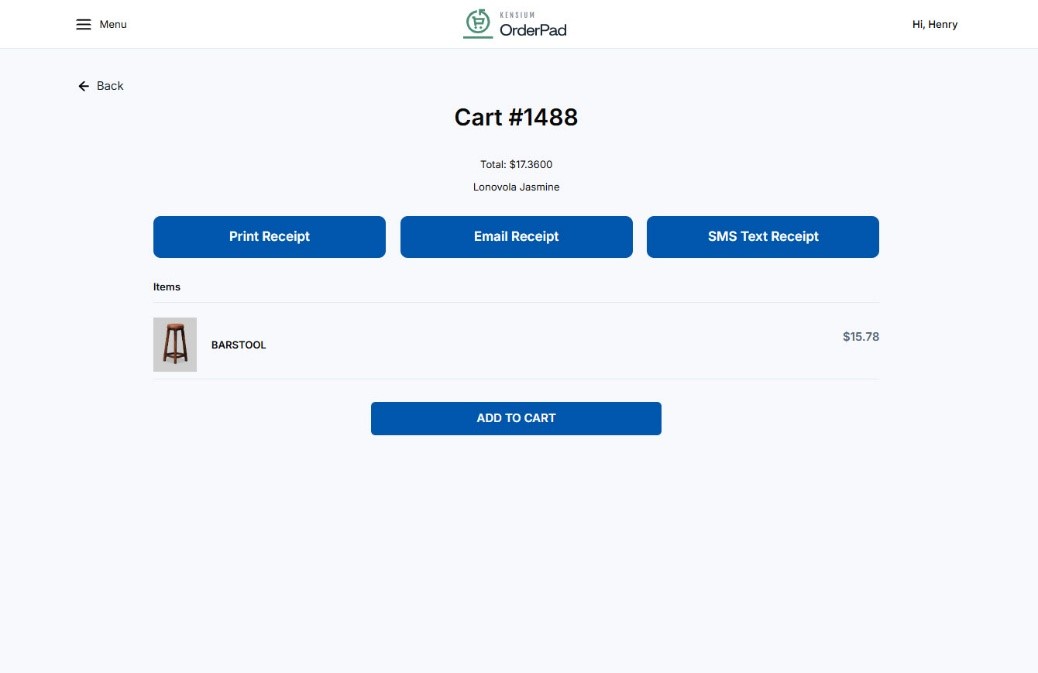
- Click on the [Print Receipt}. Based on the configuration you can view the Print Receipt of the Saved Cart.