View and Edit Cart
On the main page of OrderPad, you can view the cart on the right-hand side. You can view products added to the cart and price breakdown and the order total at the bottom of the cart. The tax is displayed based on the OrderPad Admin settings.
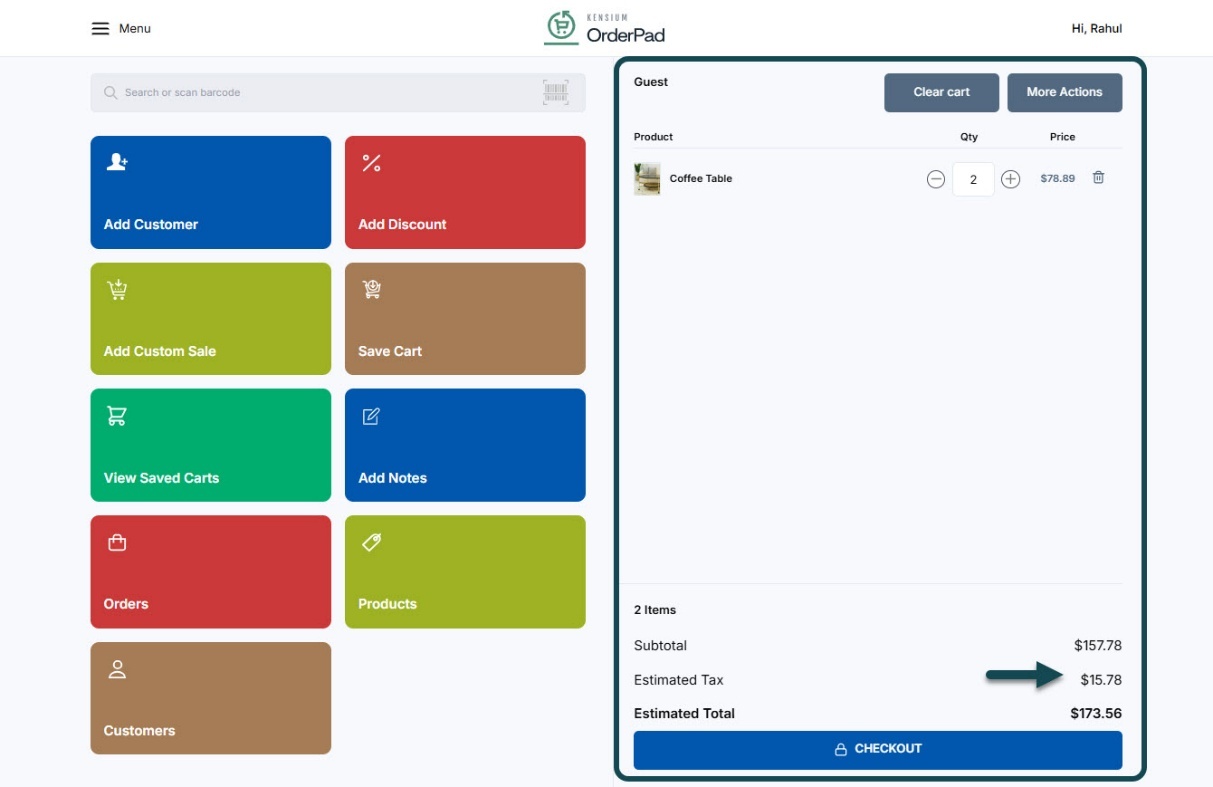
On the same screen, you will have a couple of options.
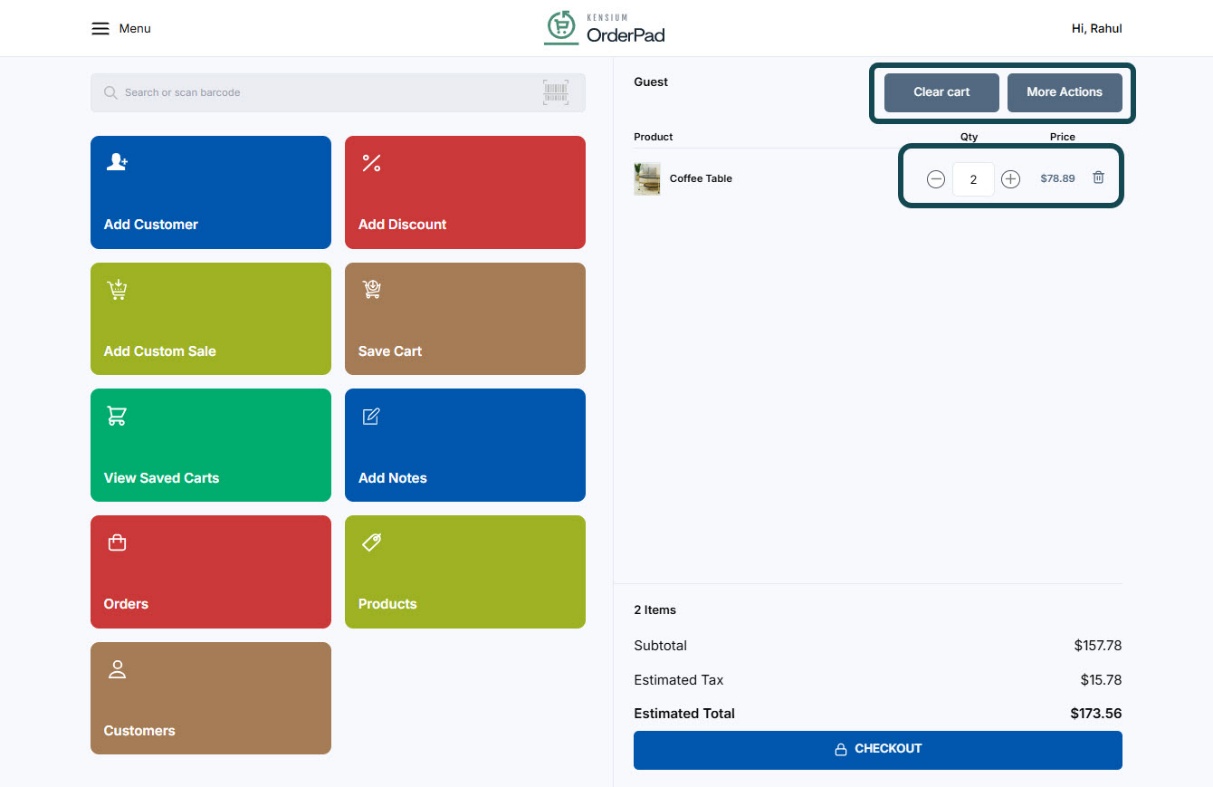
- Increase/ Decrease the Quantity: You can use the [+] and [-] symbols to increase or decrease the quantity of the products.
- Delete Item: You can use the delete icon on the right of the item price to delete the item.
- Clear Cart: To remove all items/ products use the Clear Cart option.
- More Actions: Selecting this option on the OrderPad screen will take you to the following screen with Cart Modifiers.
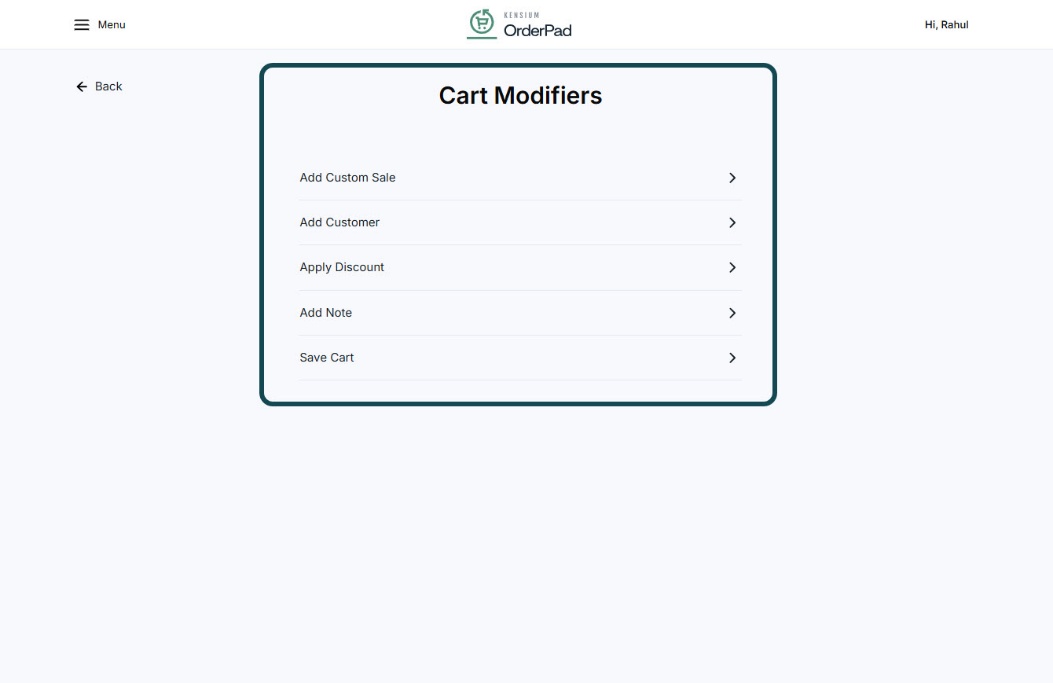
This includes the following options:
- Add Custom Sale
- Add Customer
- Apply Discount
- Add Note
- Save Cart
Add Custom Sale
|
Field |
Description |
|
|
Add Custom Sale |
||
|
Item Details |
Products that are not available for display are included in this section. For instance, items like carry bags, covers, gift wrappers, etc. |
|
|
Title* |
Text Field |
Enter the item name. For instance, Bag. |
|
Price * |
Text Field |
Enter the price of the item you have added. |
|
Quantity |
Text Field |
Enter the quantity of the product. You can use the [+] sign to increase the quantity and vice versa. |
|
ADD |
Button |
To save the product details, price and quantity click on [ADD]. The record will be saved. |
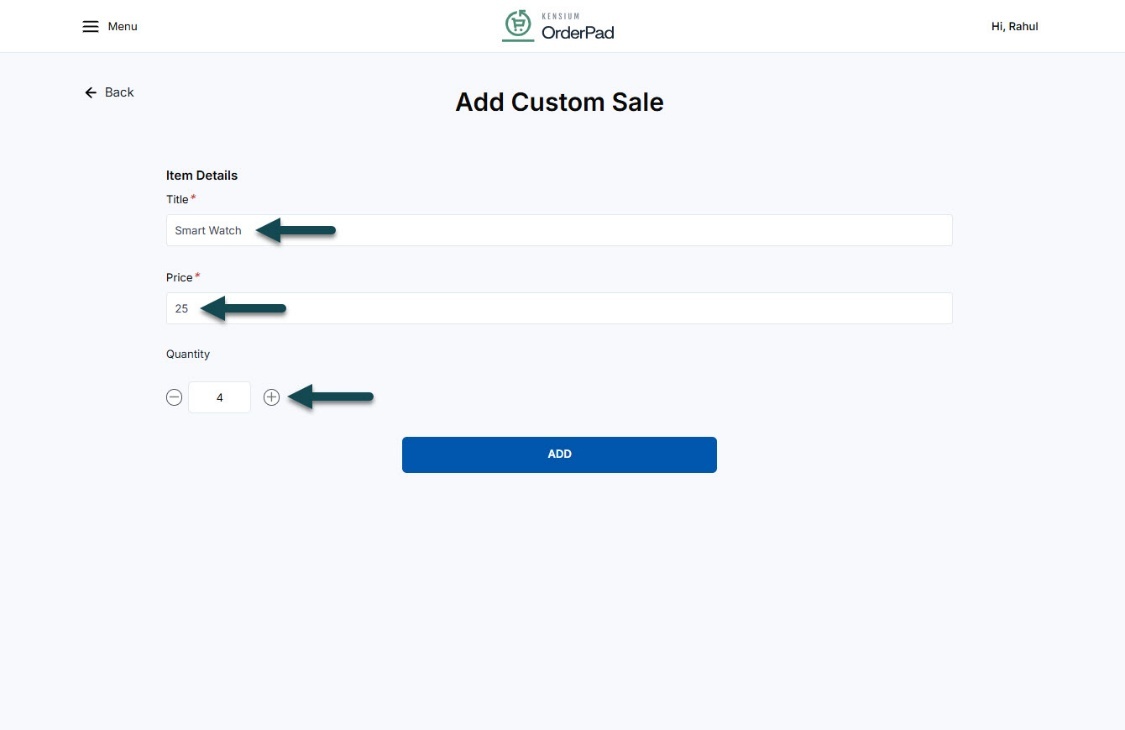
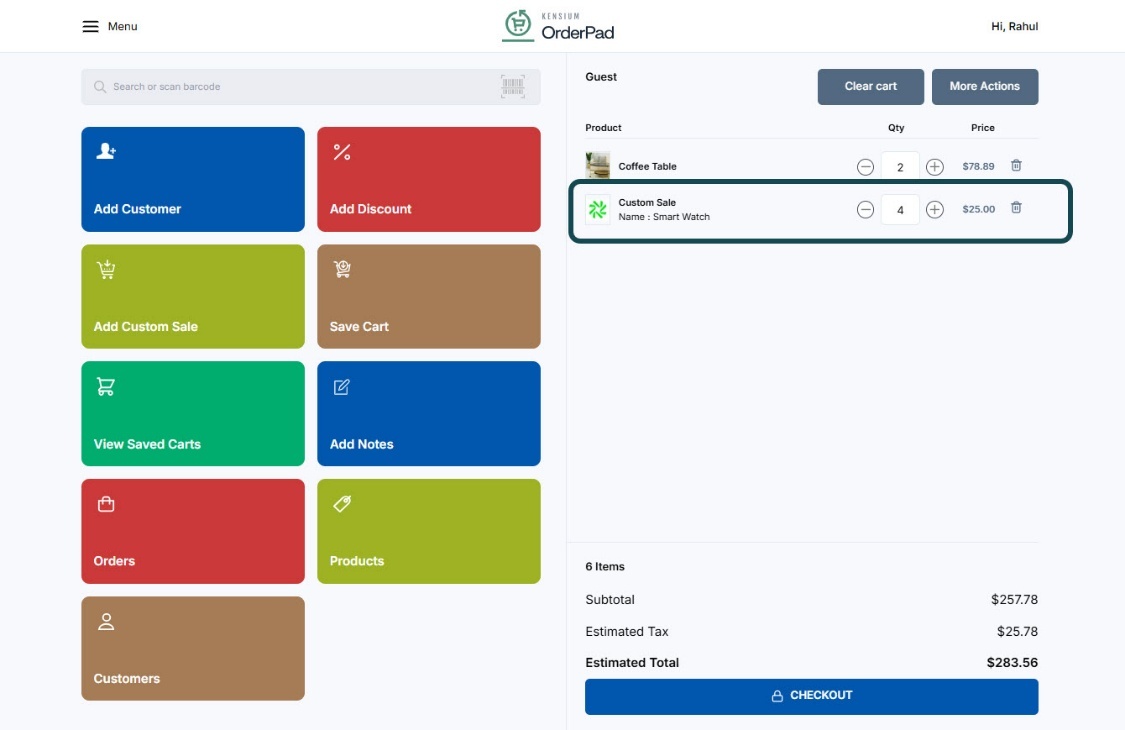
- You can see the added product on the cart as follows:
Add Customer
You can link a customer to the cart using this section.
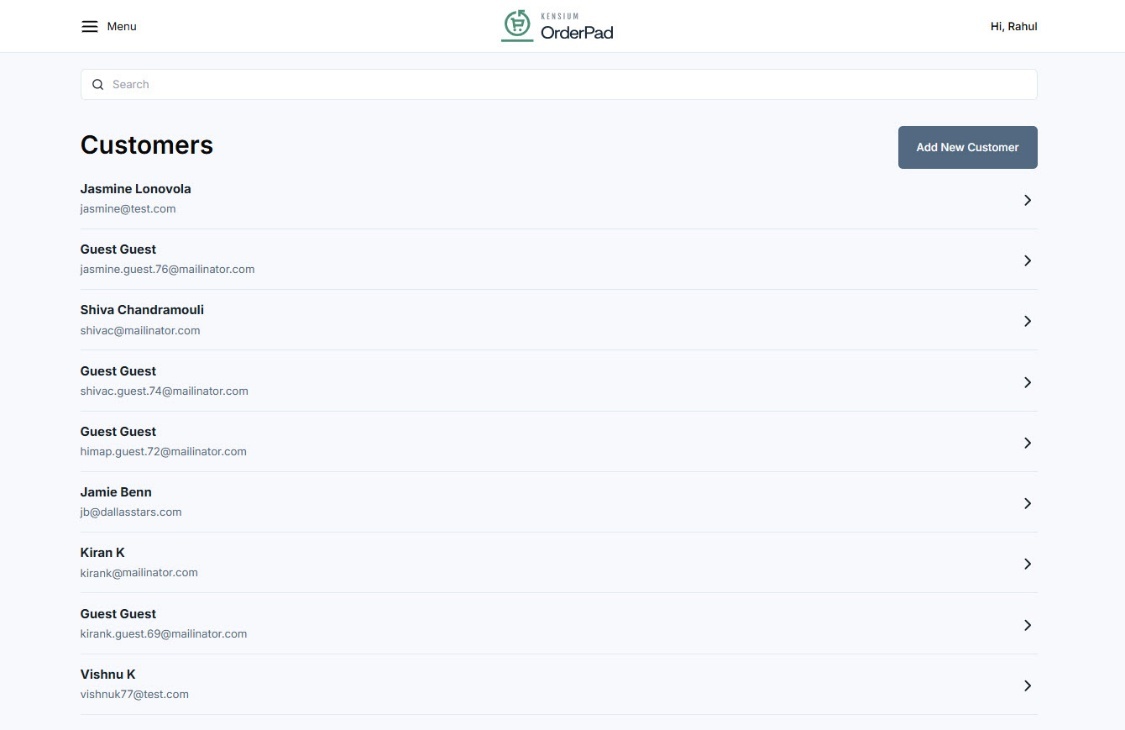
- Click on Add Customer on the Cart Modifier screen to view a list of existing customers.
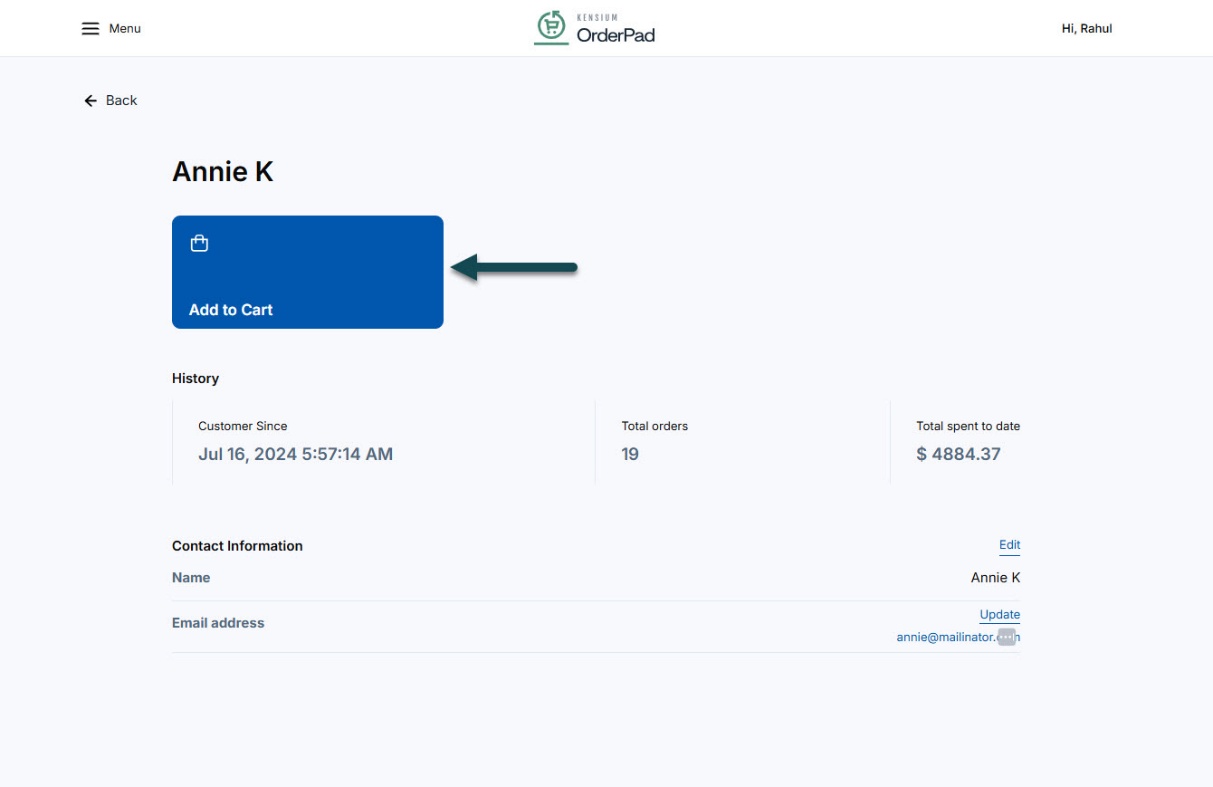
- Select a customer to open the customer details page and click [Add to Cart].
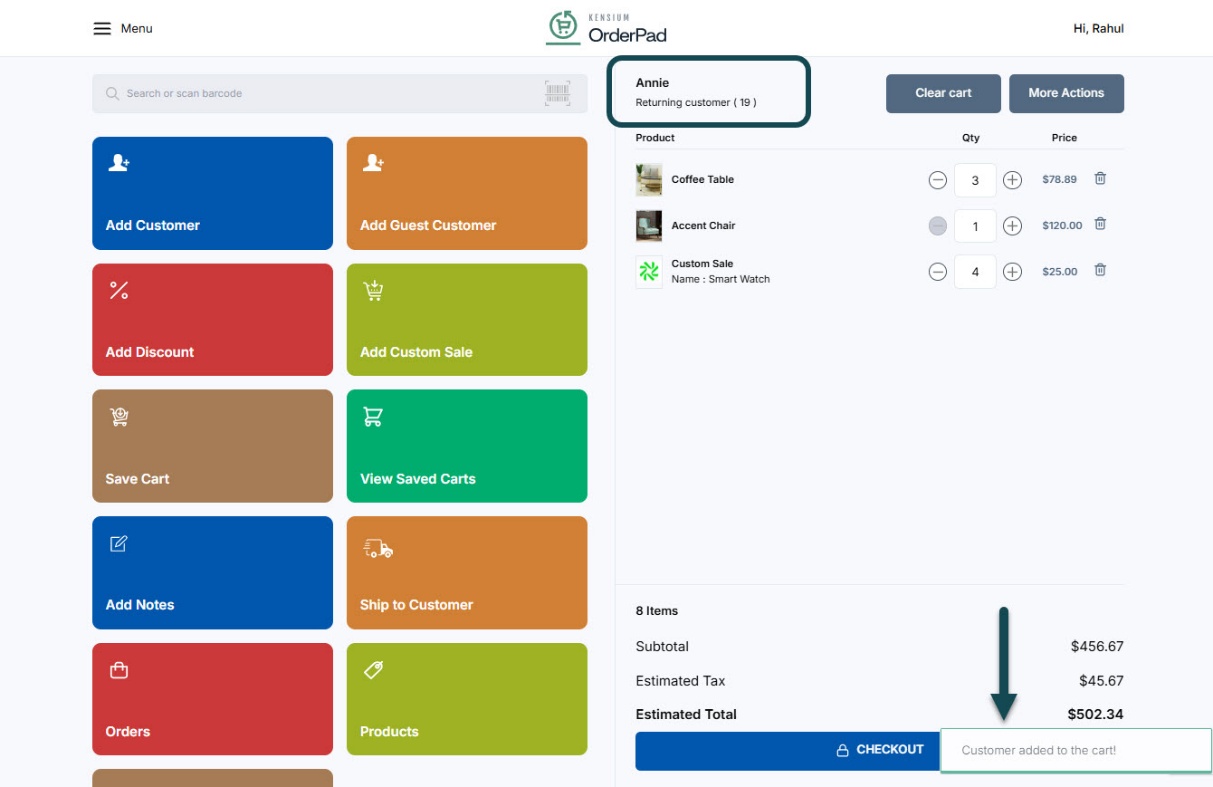
- The Customer name is now visible in the cart and a toast message will appear confirming that the customer is linked to the cart. The number of orders placed by the customer is denoted by the number beside the Returning Customer.
-
Once a customer is added to the cart, you can see the following additional options
- Add Guest Customer – visible on the Smart Grid
- Ship to Customer – Visible on Smart Grid and More Action
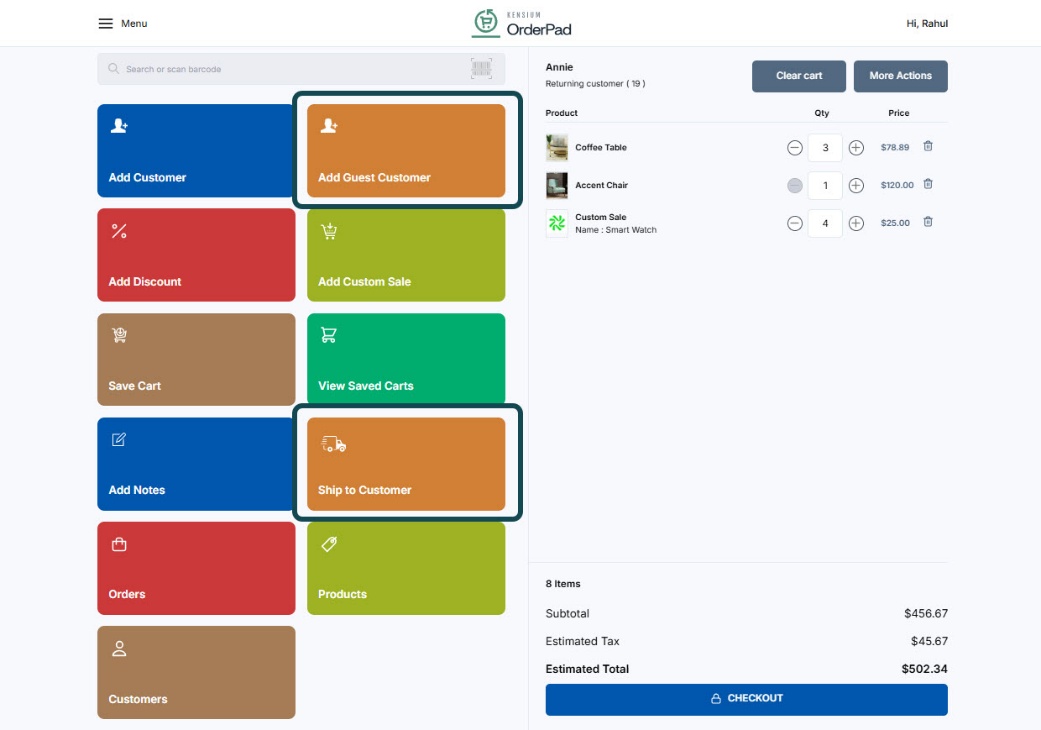
- You can click on [Add Guest Customer] to unlink the cart from a registered customer and continue the checkout process as a guest customer.
- [Ship to Customer] can only be used for a registered customer to enter Shipping information as a part of the Checkout process.
Apply Discount
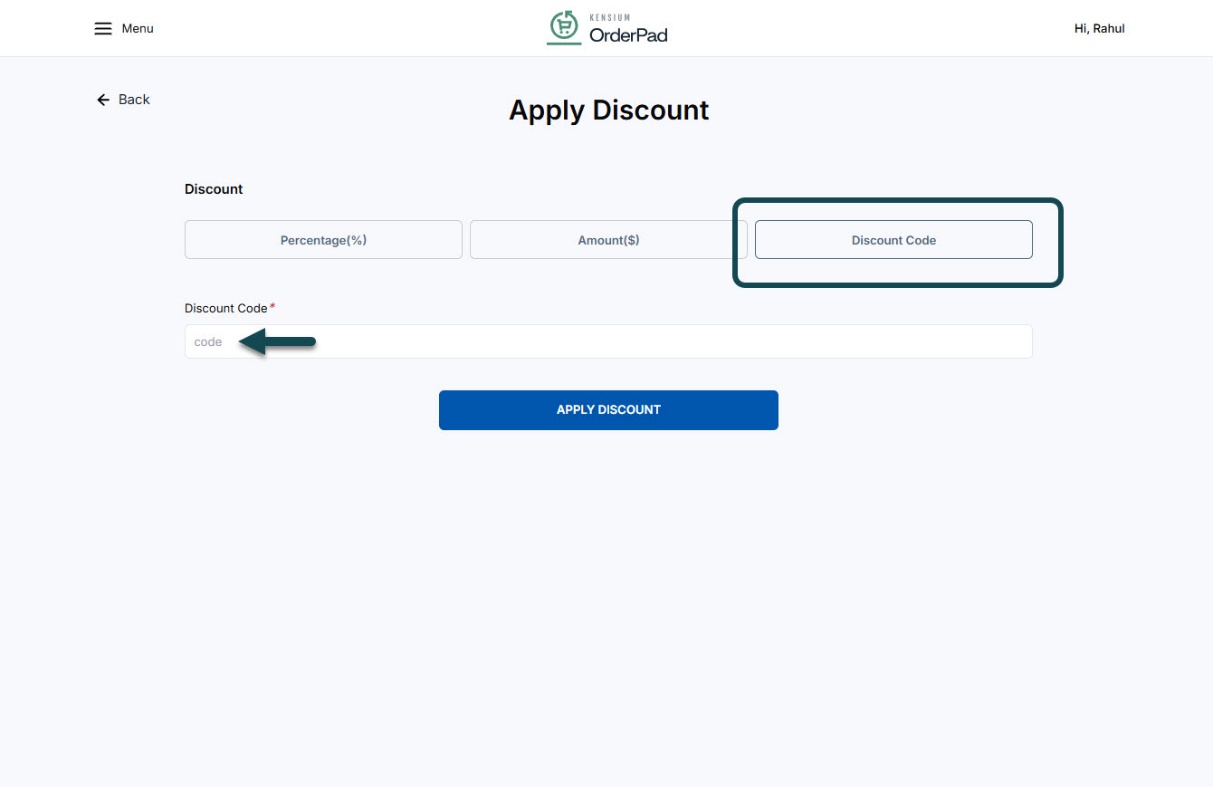
You can use this section to offer a discount to the customer. In OrderPad, you have three options for applying the discount.
- Percentage
- Amount ($)
- Discount Code
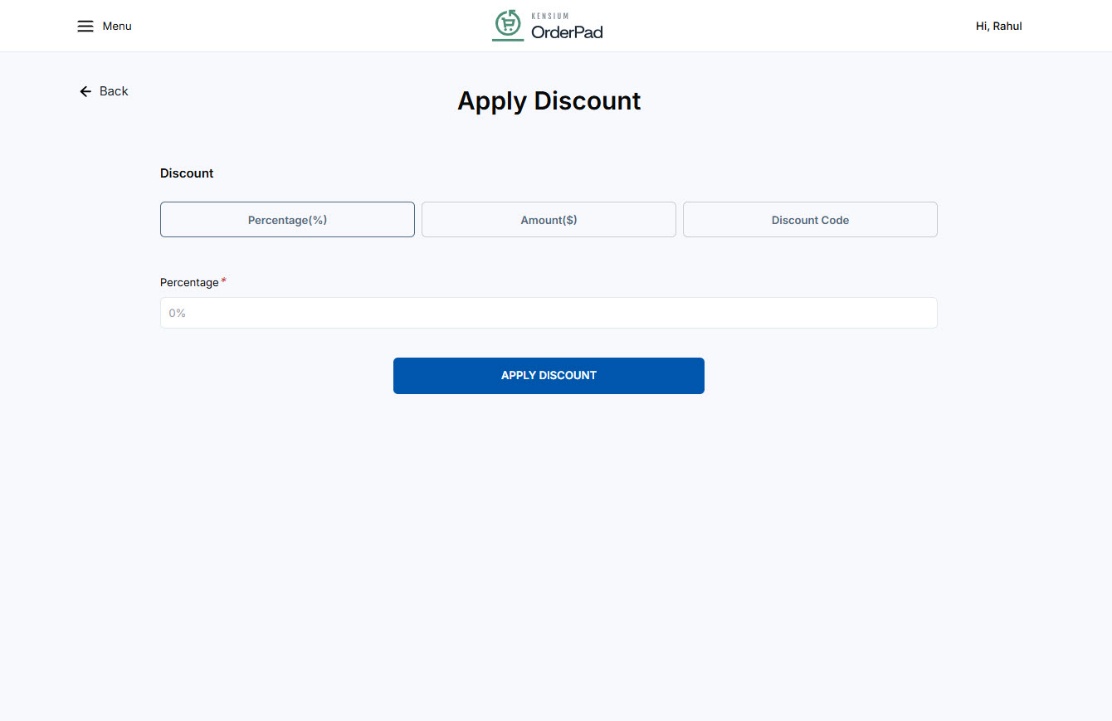
- Percentage%: Select the percentage button and a text field will be activated where you can enter the discount percentage you wish to apply as shown in the above screenshot.
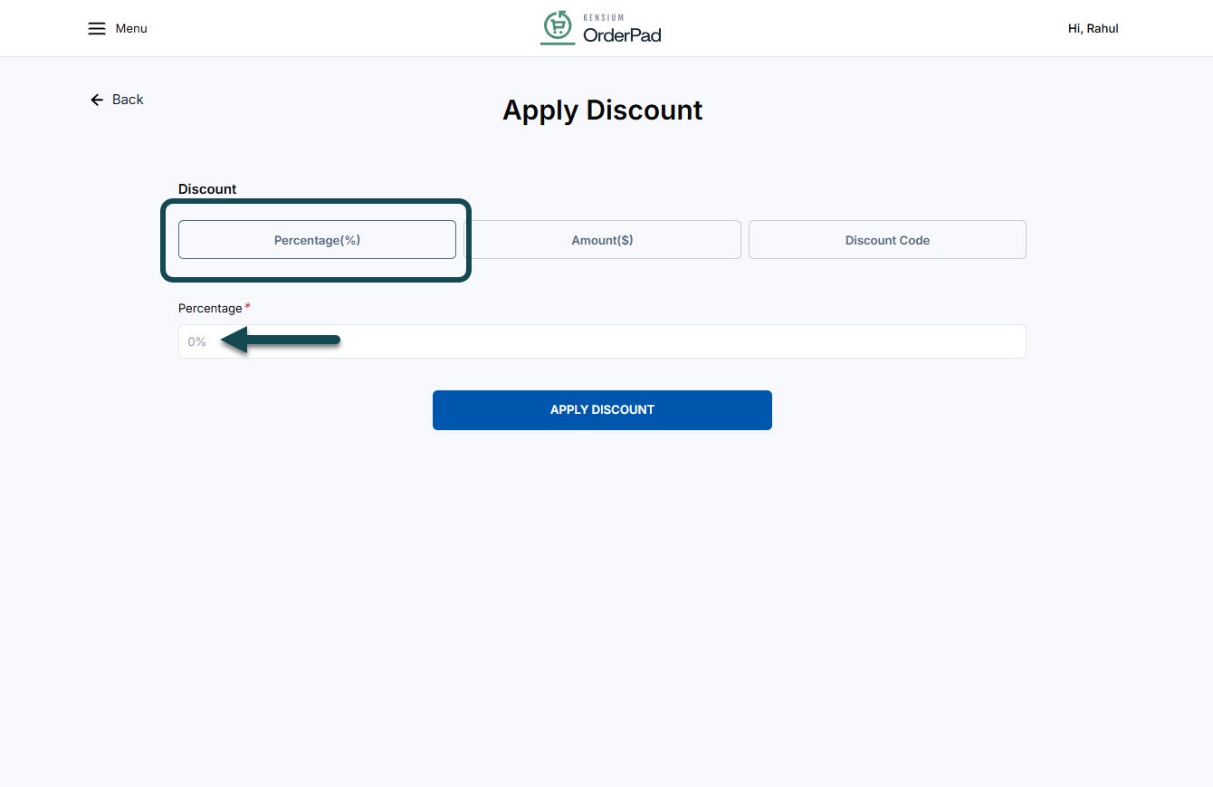
- Amount ($): Select the amount button, and a text field will be activated for entering the discount amount. If you have a coupon code, you can also apply it here in the amount column.
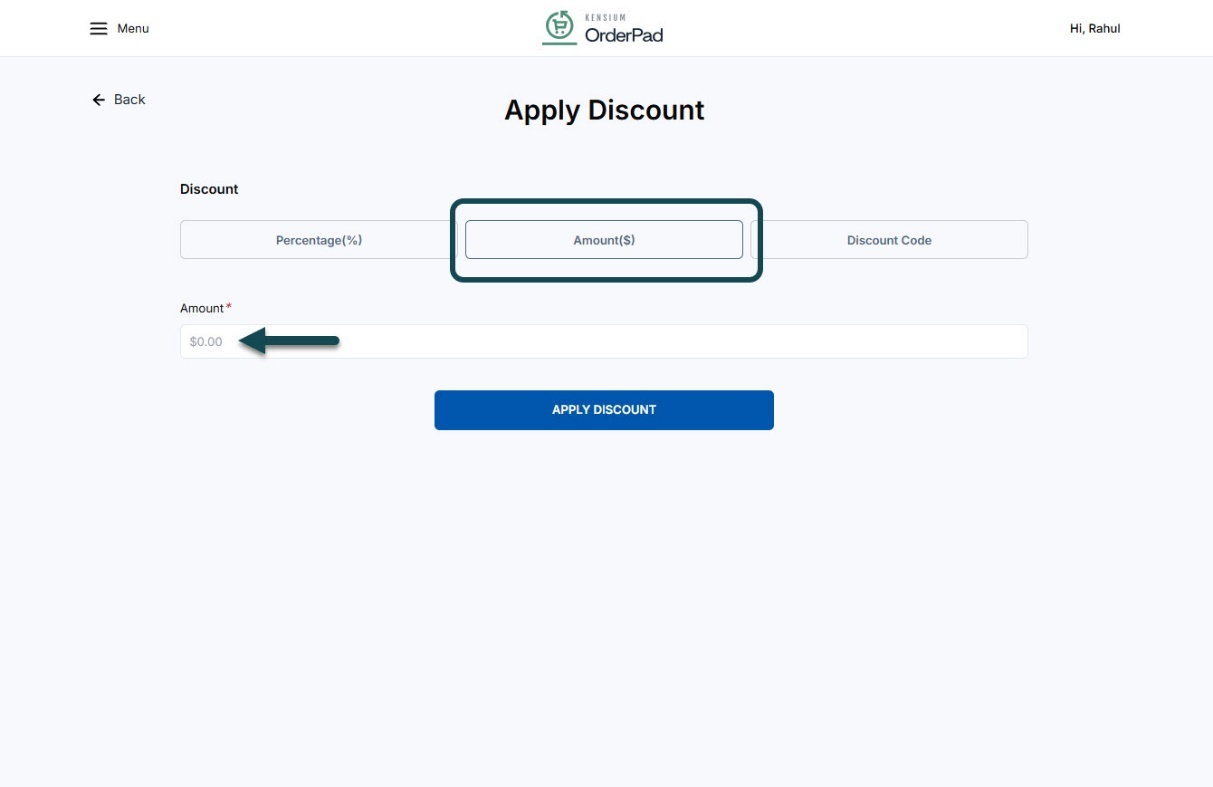
- Discount Code: Select the discount code button and a text field will be activated where you can enter a voucher or a promotional code that is associated with a discount.
Any type of discount applied will be displayed in the OrderPad cart as an amount. OrderPad will also generate a toast message confirming that the coupon has been applied successfully.
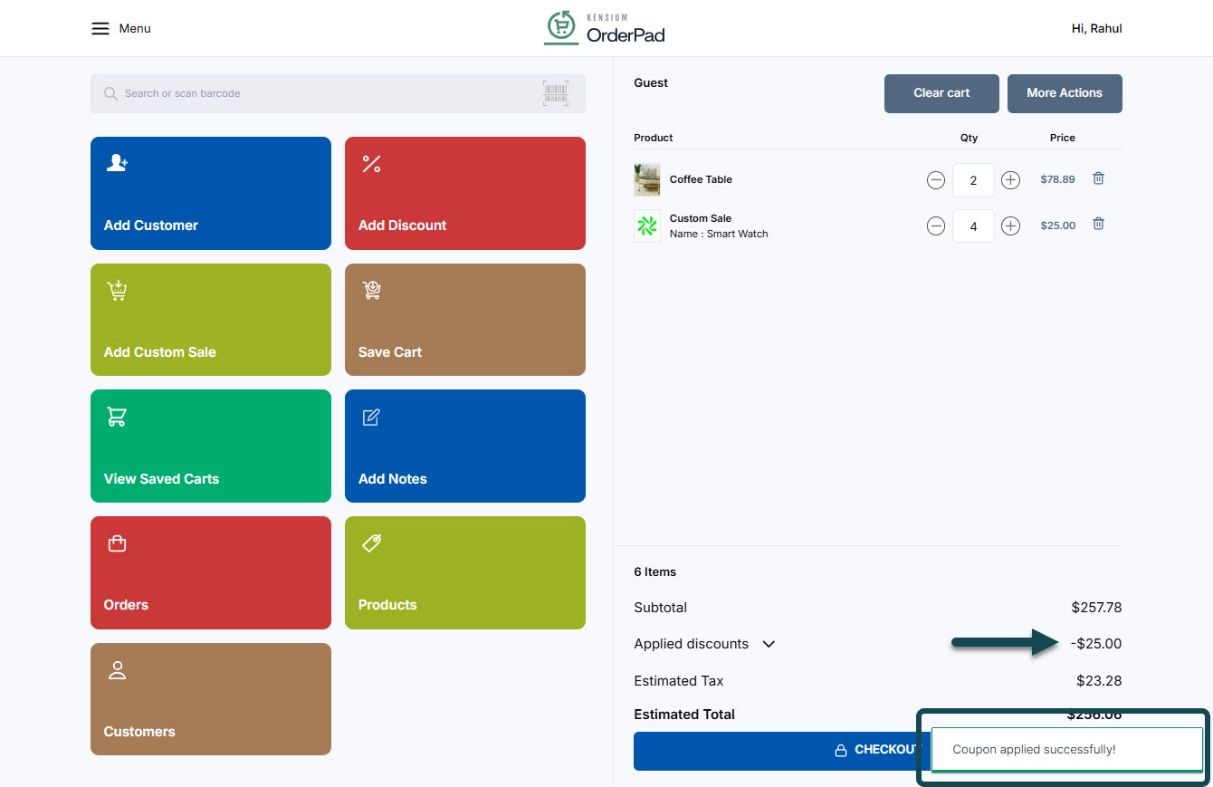
- To remove the applied discount before checkout, you can simply go to the Apply Discount page and click [Remove Discount].
Note: You are not required to enter any details to remove the discount applied.
Add Note
Within the Smart Grid and Cart Modifiers under the More Action Section, OrderPad provides the option to add notes.
- Click on Add Notes and you will be redirected to the following screen
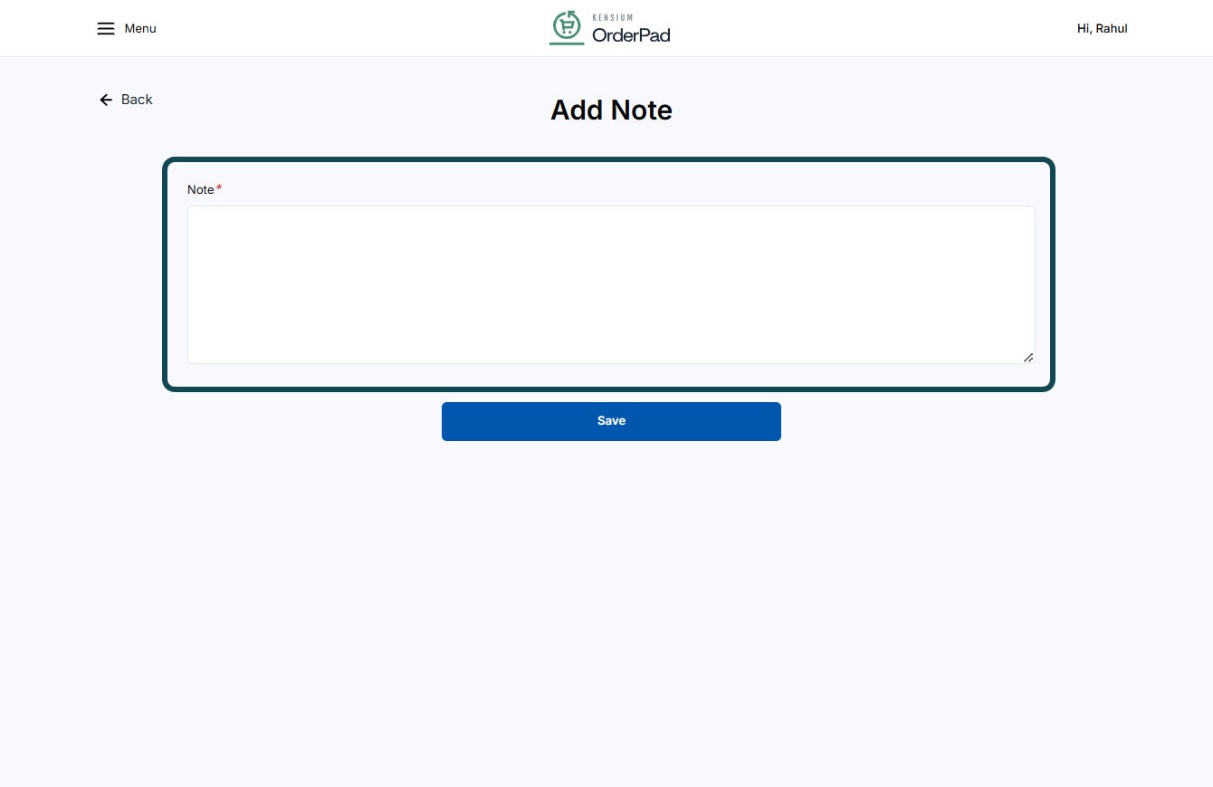
- After entering the notes, click on [Save].
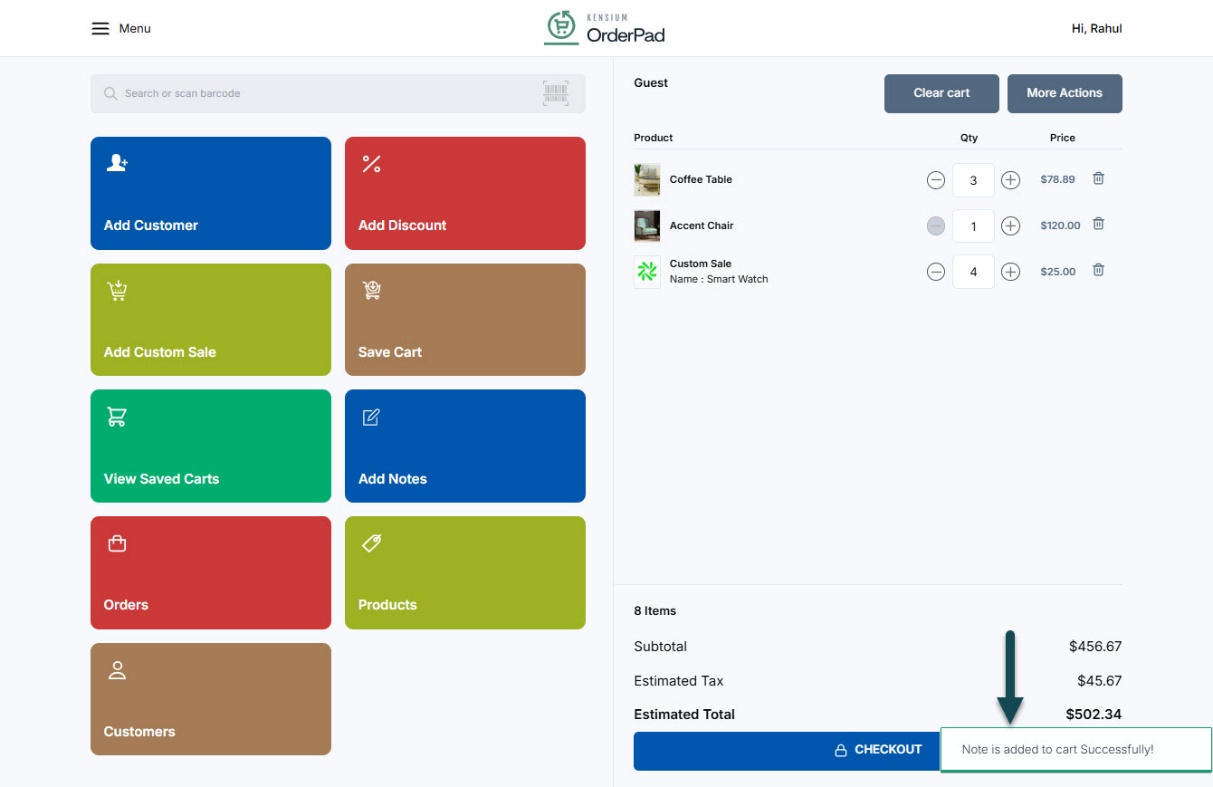
- OrderPad will present a toast message confirming that the notes have been successfully added. It will be displayed post-synchronization.
Note: The notes you enter will not be displayed on the cart.
Save Cart
You can use this section to save a customer’s cart with the products so that they can continue the purchase later without having to start from the beginning again.
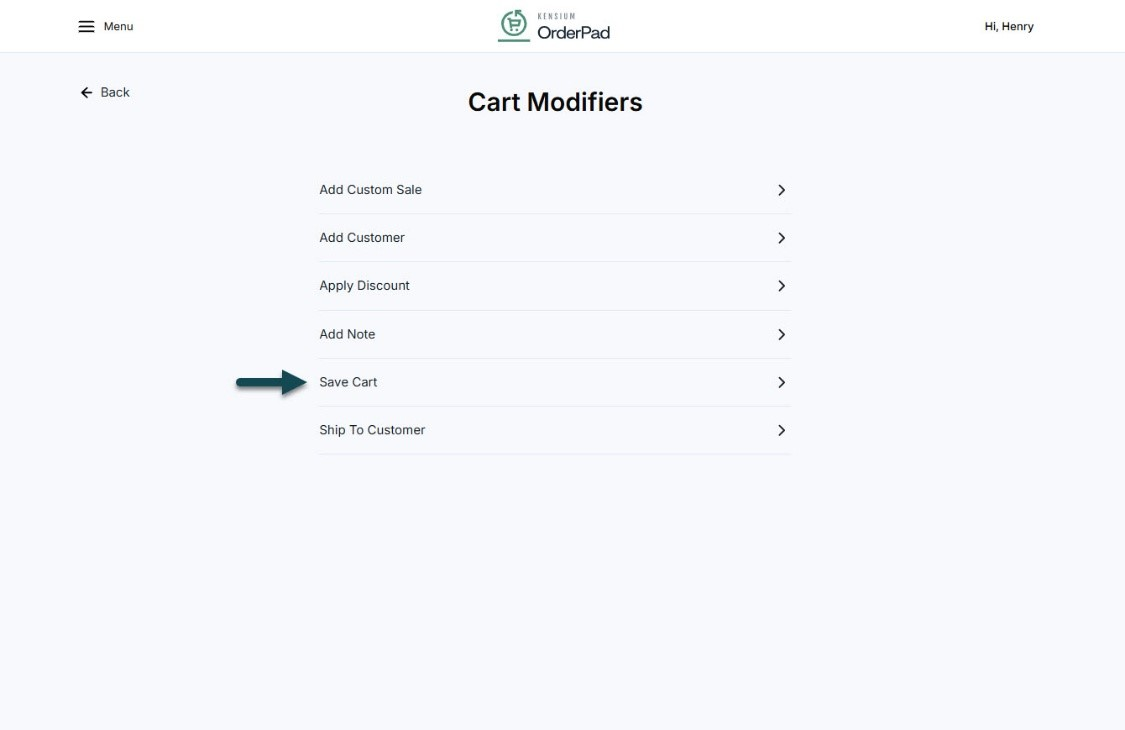
- Click on Save Cart from the Cart Modifiers page.
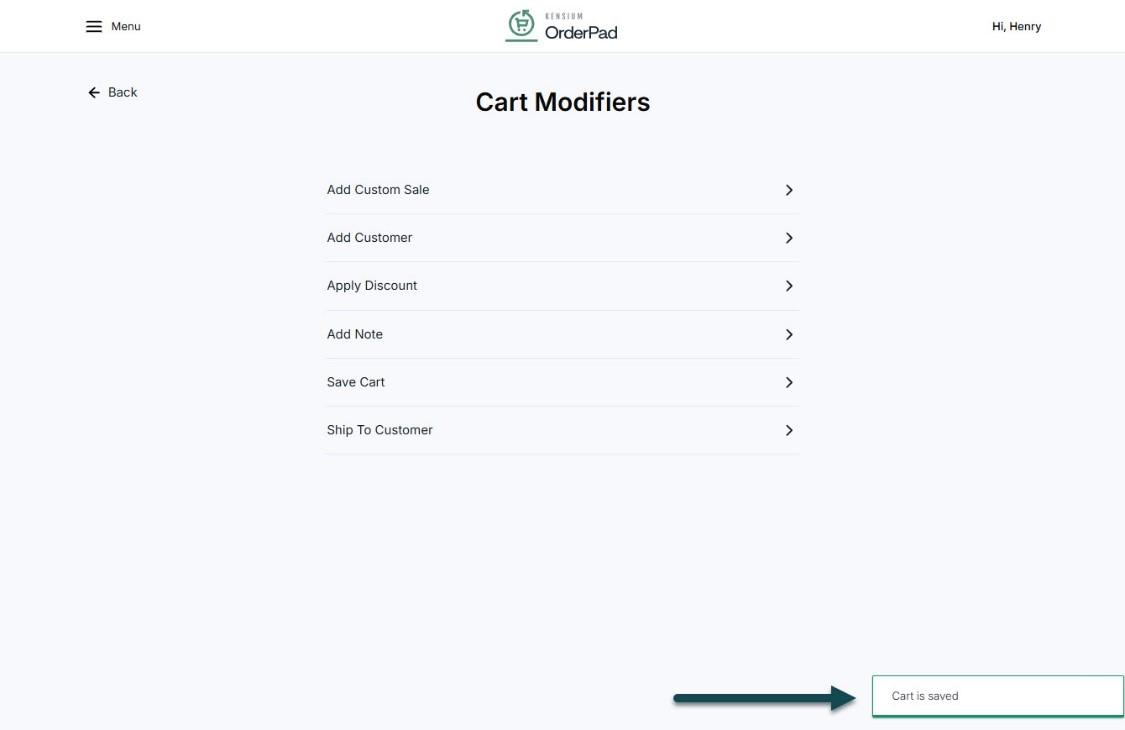
- A toast message will pop up on the screen confirming that the cart is saved.
Note: A cart can be saved only when a customer is linked to the cart.