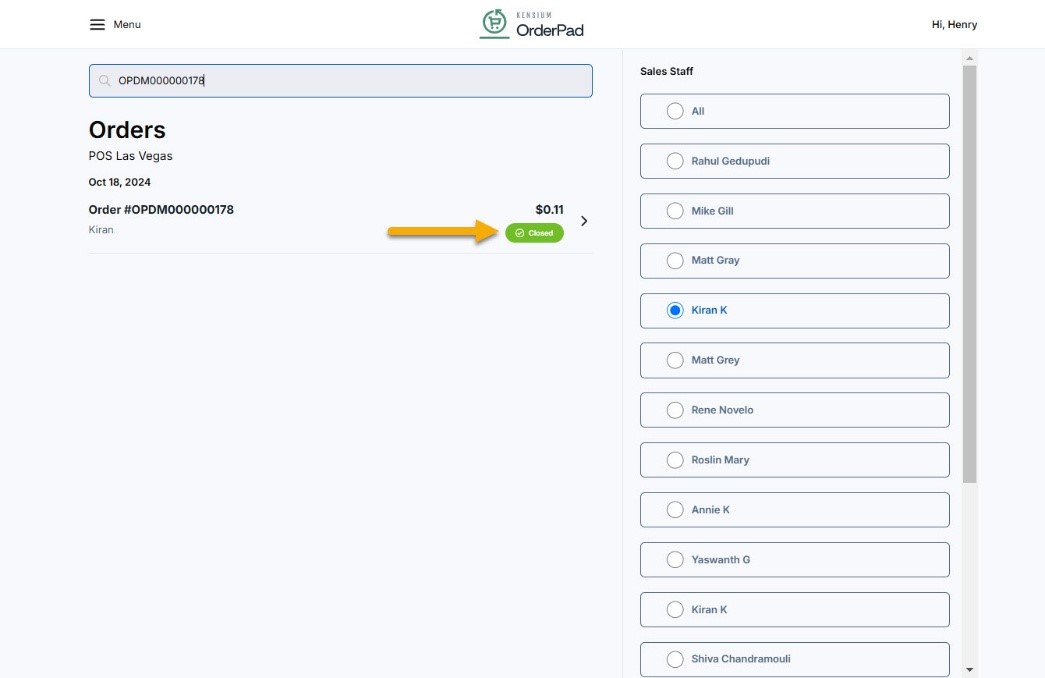
Admin section for the Fortis Payment
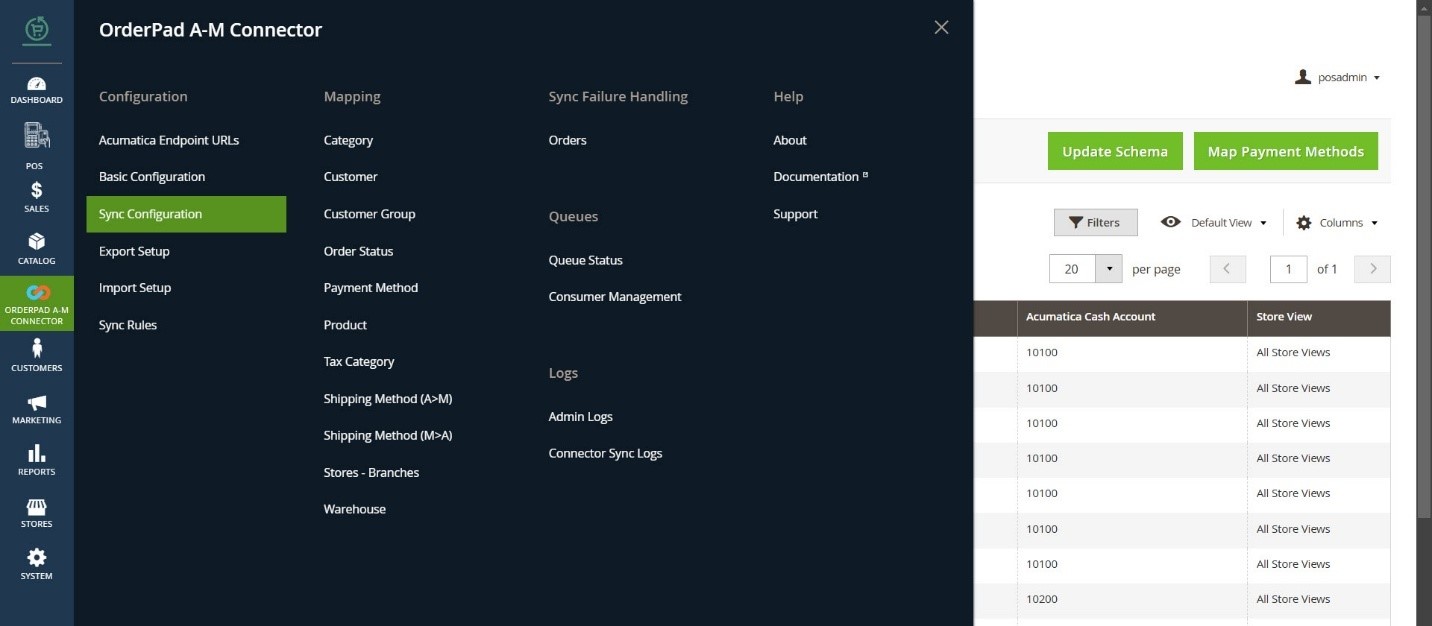
From the OrderPad A-M Connector navigate to Sync Configuration. Navigate to Sales -> Payment Methods -> RMS Pay and Enable the option from the dropdown menu.
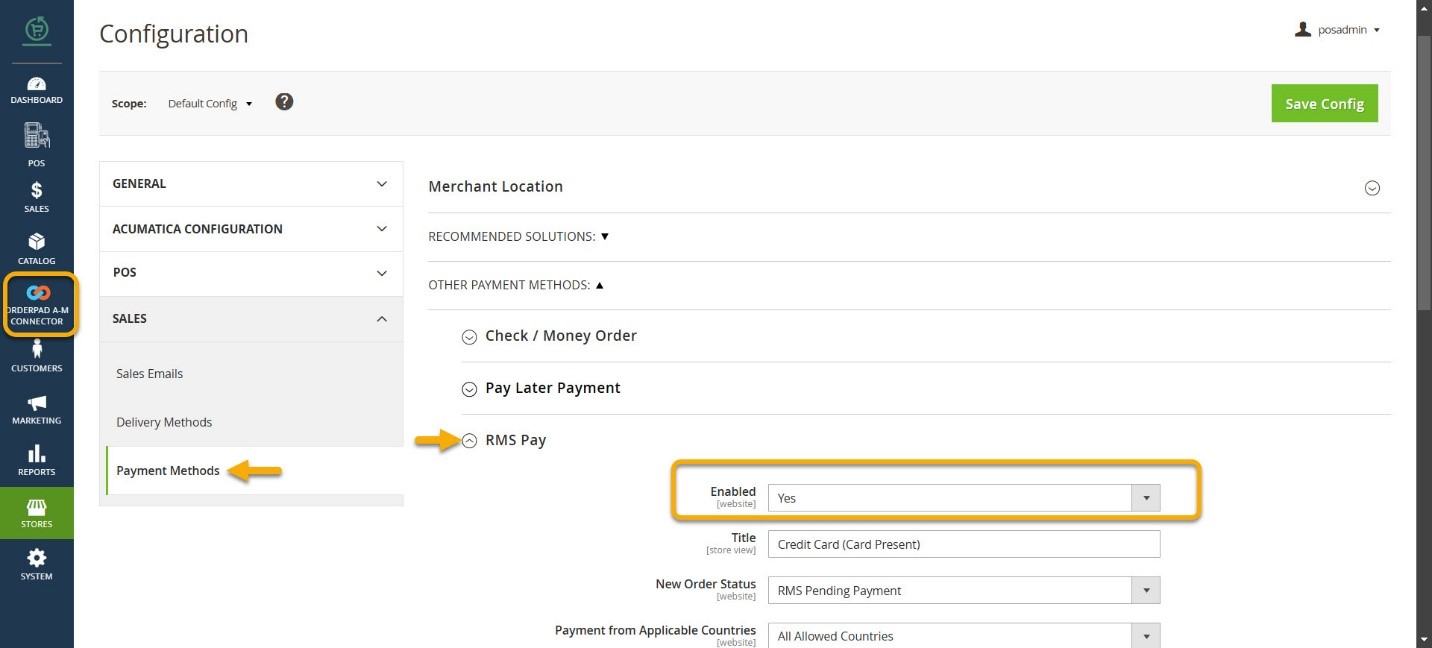
The following field details should be filled out.
|
Field |
Description |
|
Enabled |
Select ‘Yes’ from the dropdown menu. |
|
Title |
Credit Card (Card present) |
|
New Order Status |
Select RMS Pending Payment from the dropdown. The default connector of the Order Sync has a status of Processing /Pending and the application is syncing only those statuses to Acumatica. |
|
Payment from Applicable Countries |
Select All Allowed Countries from the dropdown. |
|
Payment Specific Countries |
All countries will be automatically selected and greyed out. |
|
Sort Order |
Leave this field blank. |
|
API URL |
Enter the Client API URL. |
|
Client ID |
Enter the client ID. |
|
Client Secret |
Enter the Client’s Secret. |
|
Validate Credential |
By using this button, you can validate the credential that you have entered. Upon successful validation a message will appear below the button Your credentials are valid]. |
|
Void Transactions |
Two options are available 1. Yes and 2. No from the dropdown. If you select ‘Yes’ then you can void the Fortis Payment Order and if you select ‘No’ you can’t void the transaction |
|
Debug |
Two options are available 1. Yes and 2. No from the dropdown. This is mainly for the backend or the development team. Select Yes from the dropdown. |
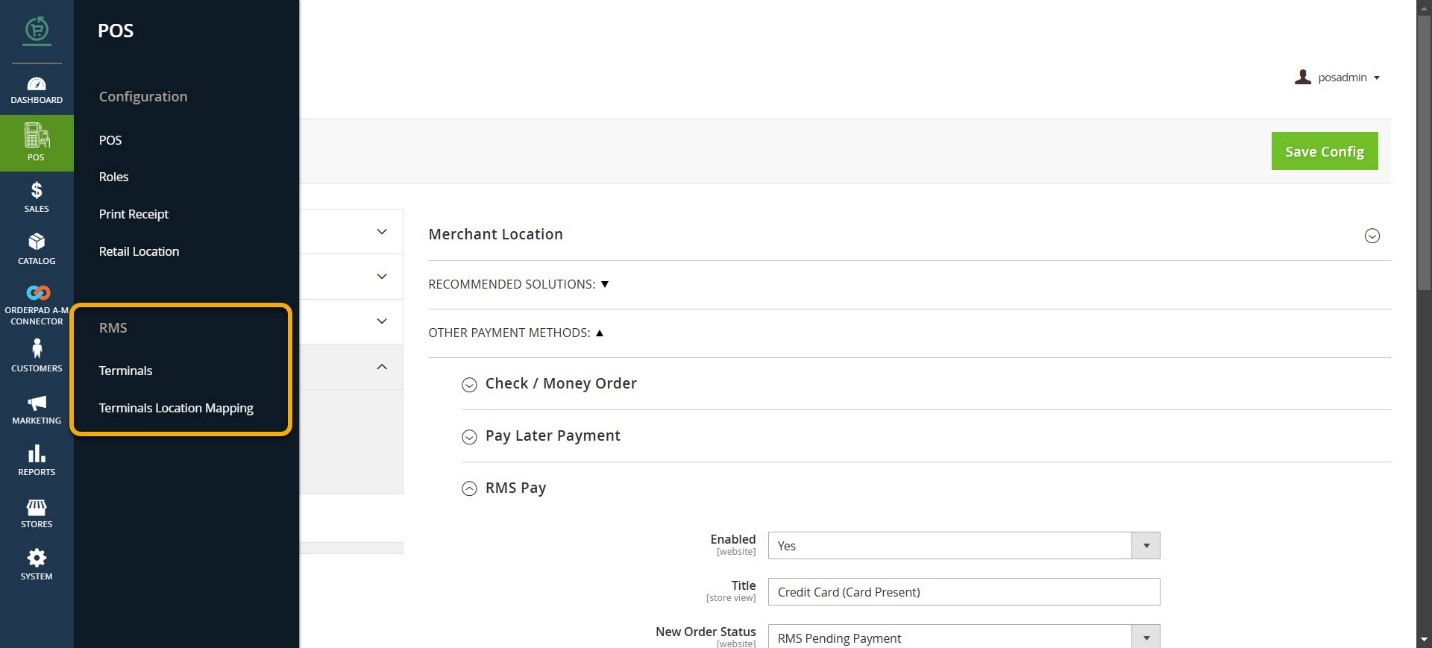
Upon successful validation of the credentials in [Kensium POS], a new option will be available as [RMS]. Under RMS there will be two new menus.
- Terminals
- Terminals Location Mapping
About Terminals:
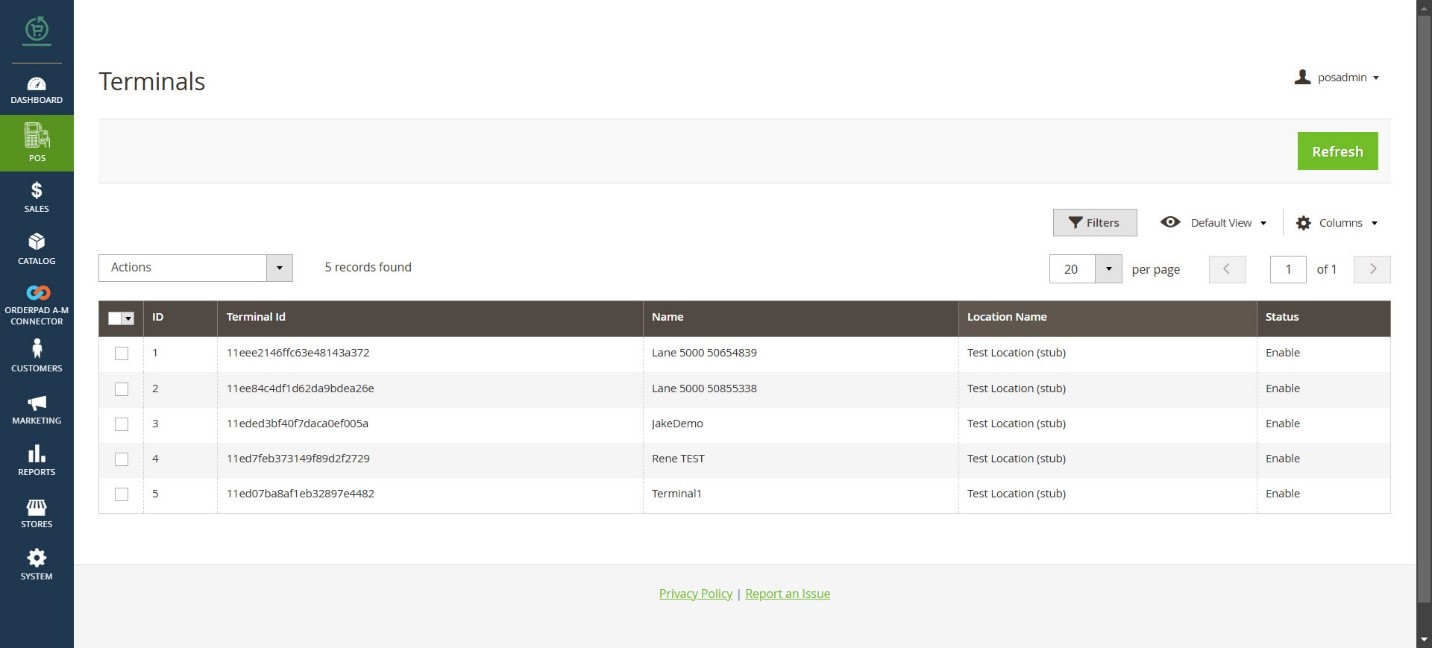
Once you click on the [Validate Credentials] all the data will be displayed within the Terminal menu. The application doesn’t allow you to enter any data within Terminal. It will directly fetch the data from Kensium RMS. If any changes happen within the Fortis Payment that will be reflected in the Terminal upon clicking on the Refresh button.
Enabling Terminal:
If you want to enable or disable the Terminal navigate to the Action grid, select Change Status from the dropdown and select Enable / Disable.
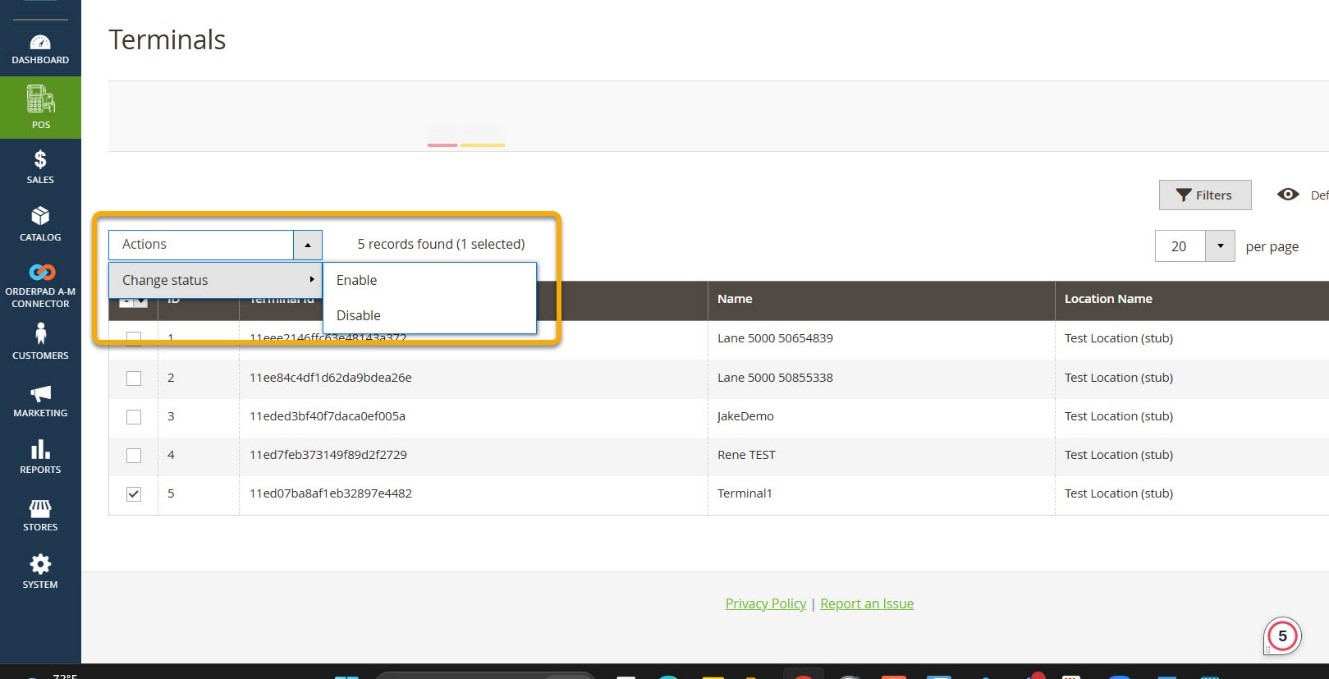
If you disable the Terminal this will not be displayed in the OrderPad front end.
Terminal Location Mapping:
In Terminal Location Mapping you can manage the Retail Location Mapping i.e. OrderPad Location Mapping.
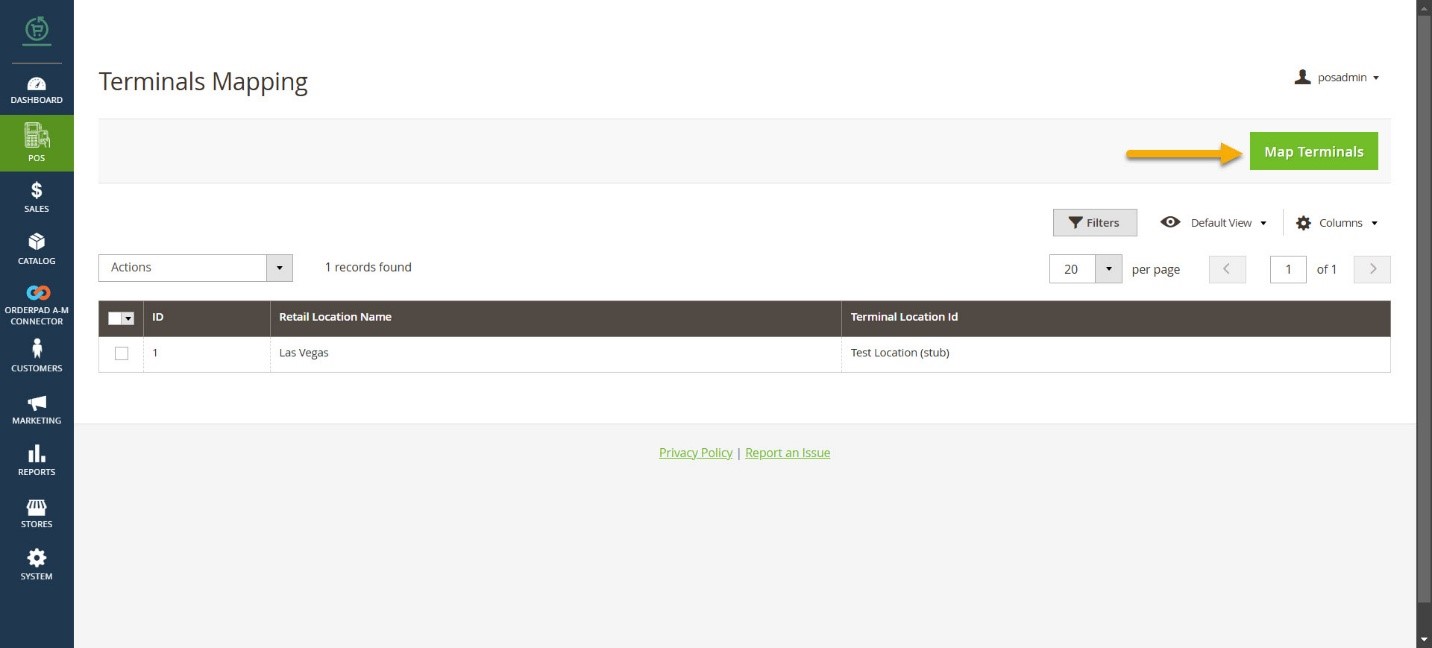
To Map the location, click on the Map Terminal button at the top right of the screen. A popup will appear on the screen.
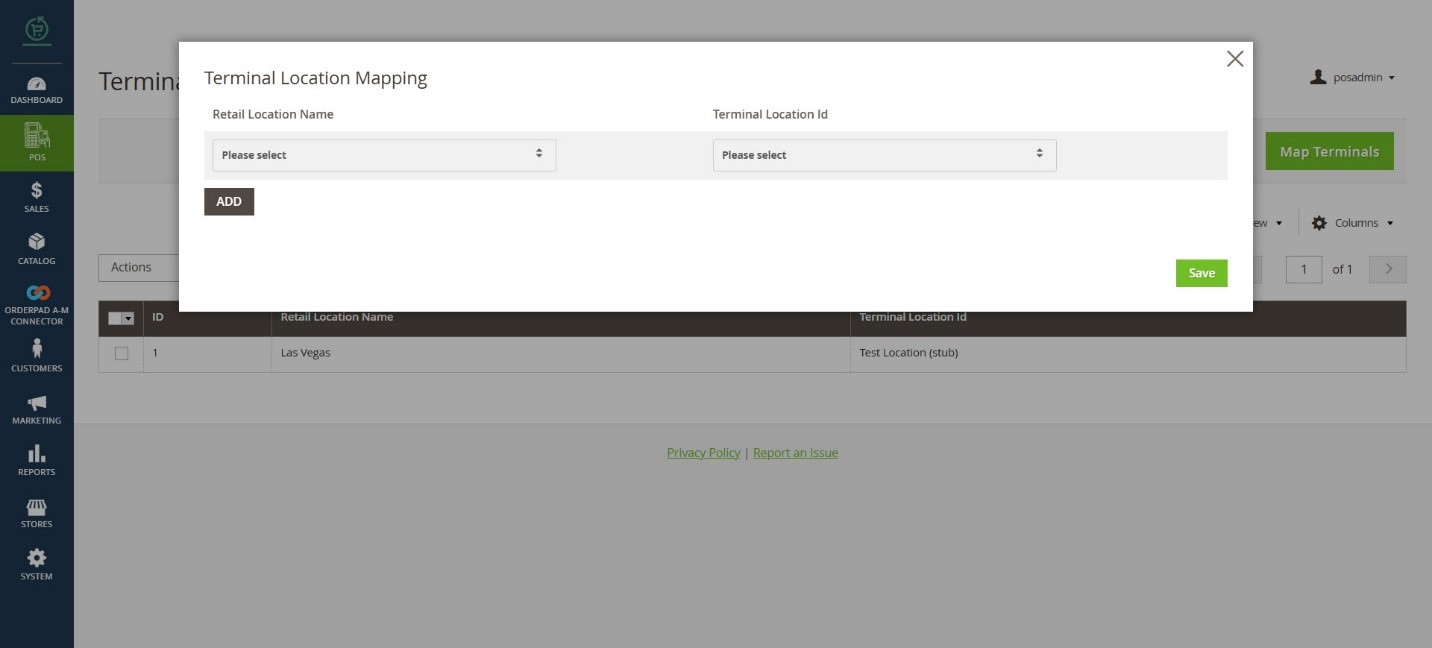
You must map the OrderPad Retail Location Name with the Terminal Location ID.
On the front end of the OrderPad navigate to Settings the Terminal will be shown here based on the location that you have selected.
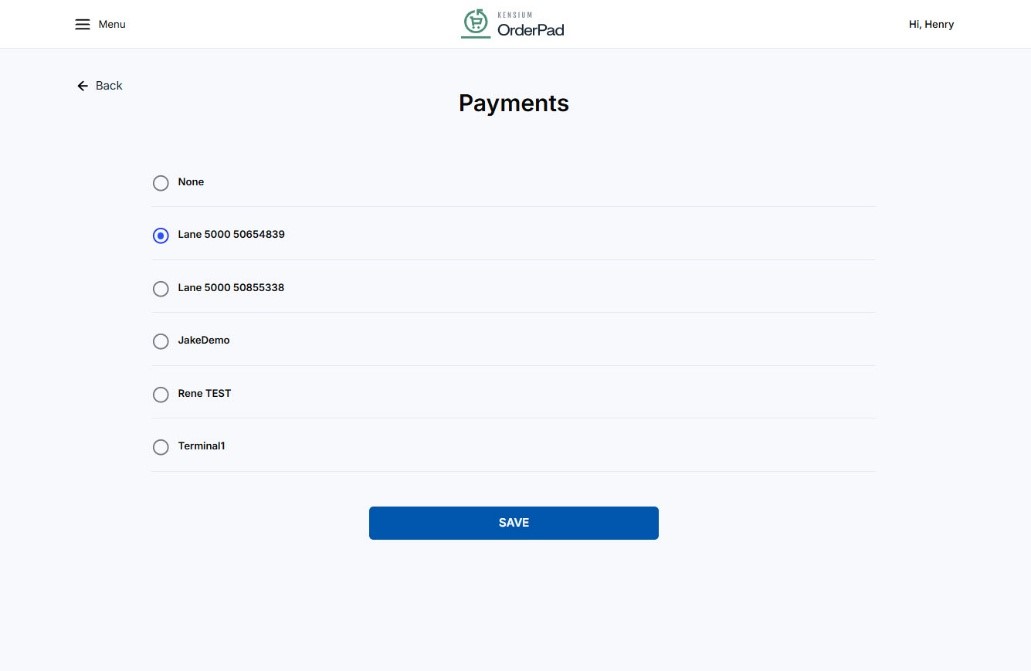
Under Payments, you can view all the devices and you need to select the default device.
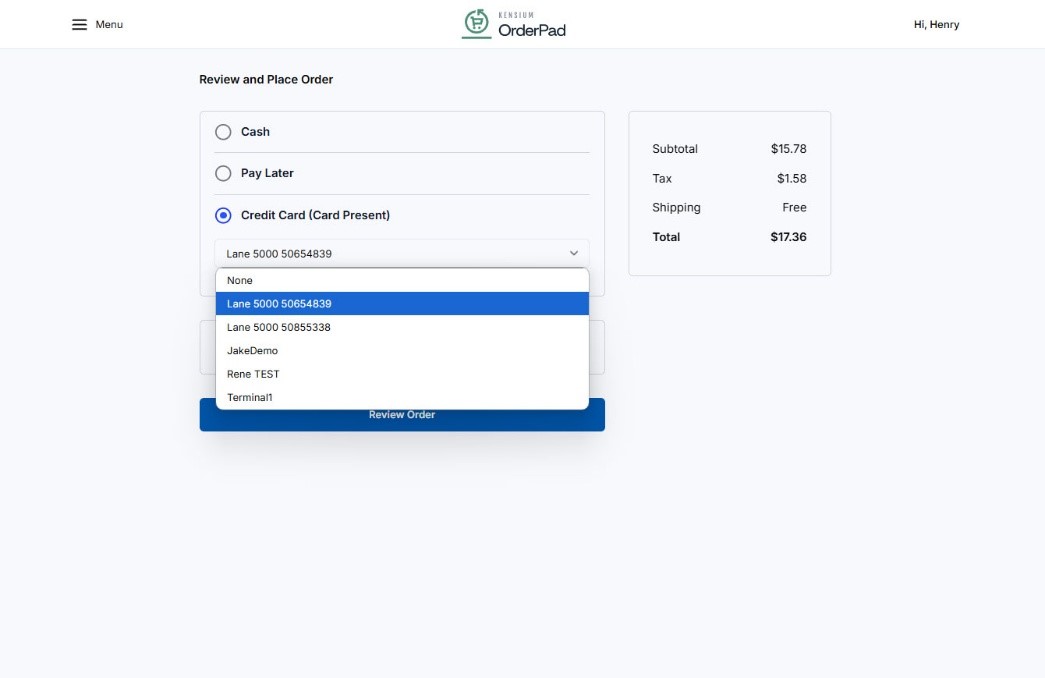
Now add a product to the cart and proceed to check out. By default, the default location will be selected. You can change the terminal from the dropdown if you wish to change the terminal.
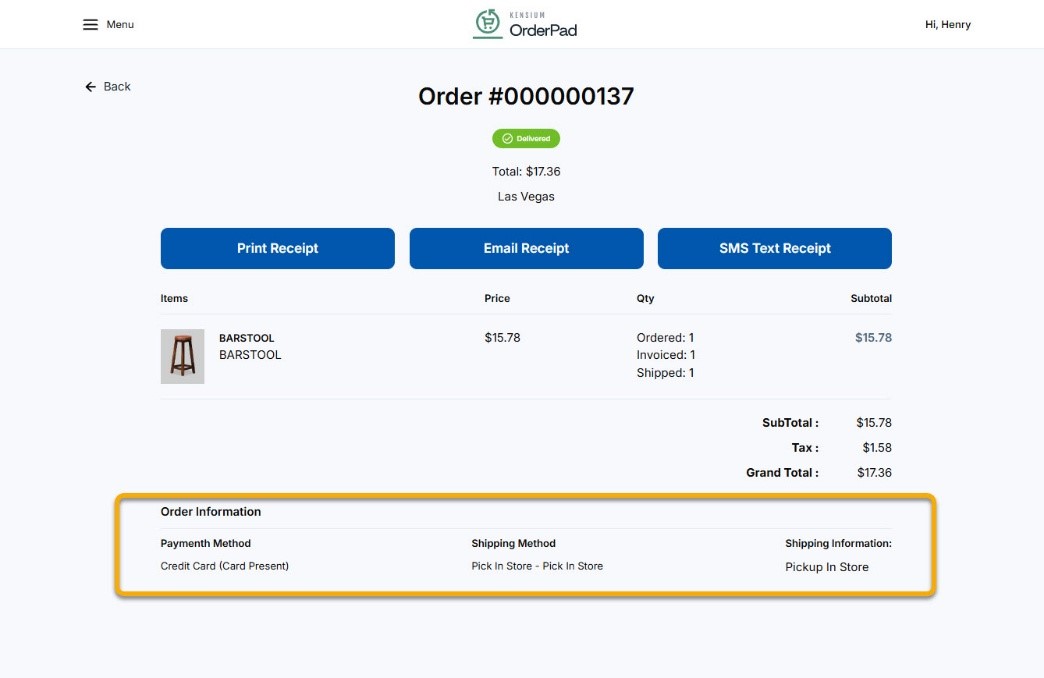
After reviewing the Order, place the order.
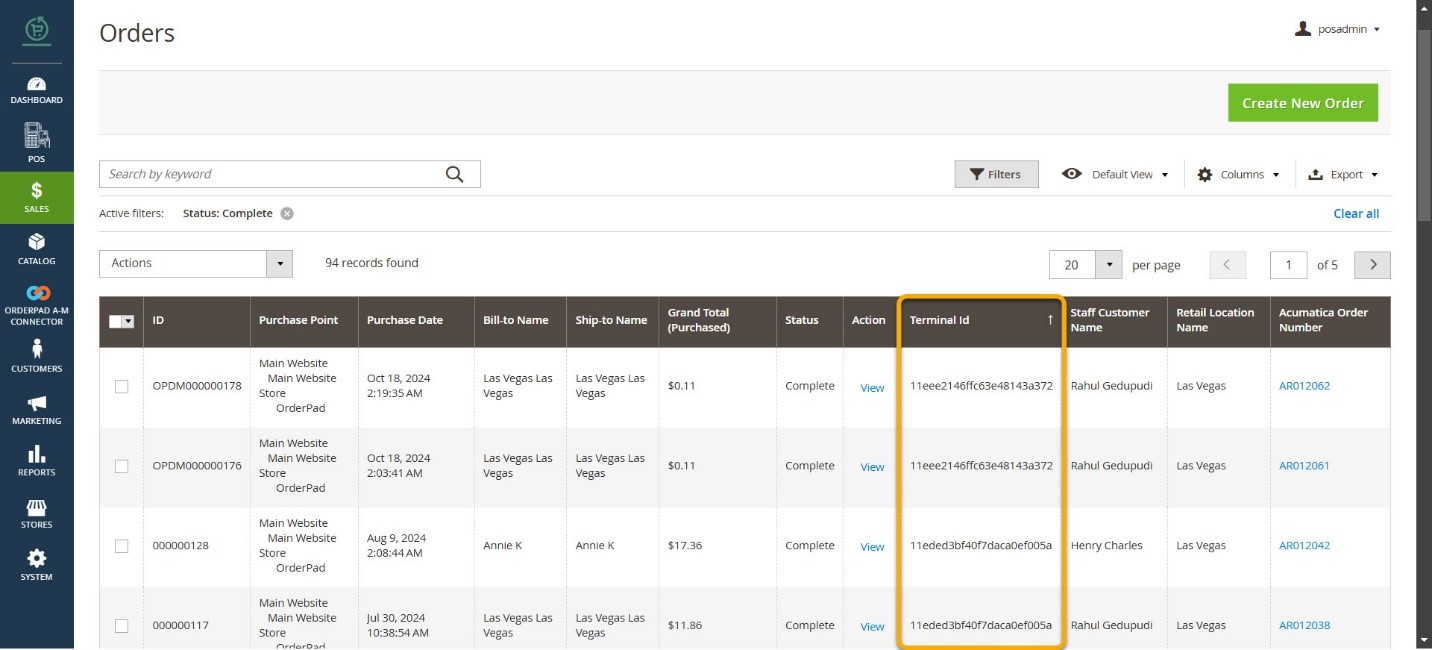
Terminal ID in Orders
From the Sales menu open the Order to view the Terminal ID, Staff Customer Name and Retail Location Name. These fields are introduced to view the details of the Order.
Payment Method Mapping
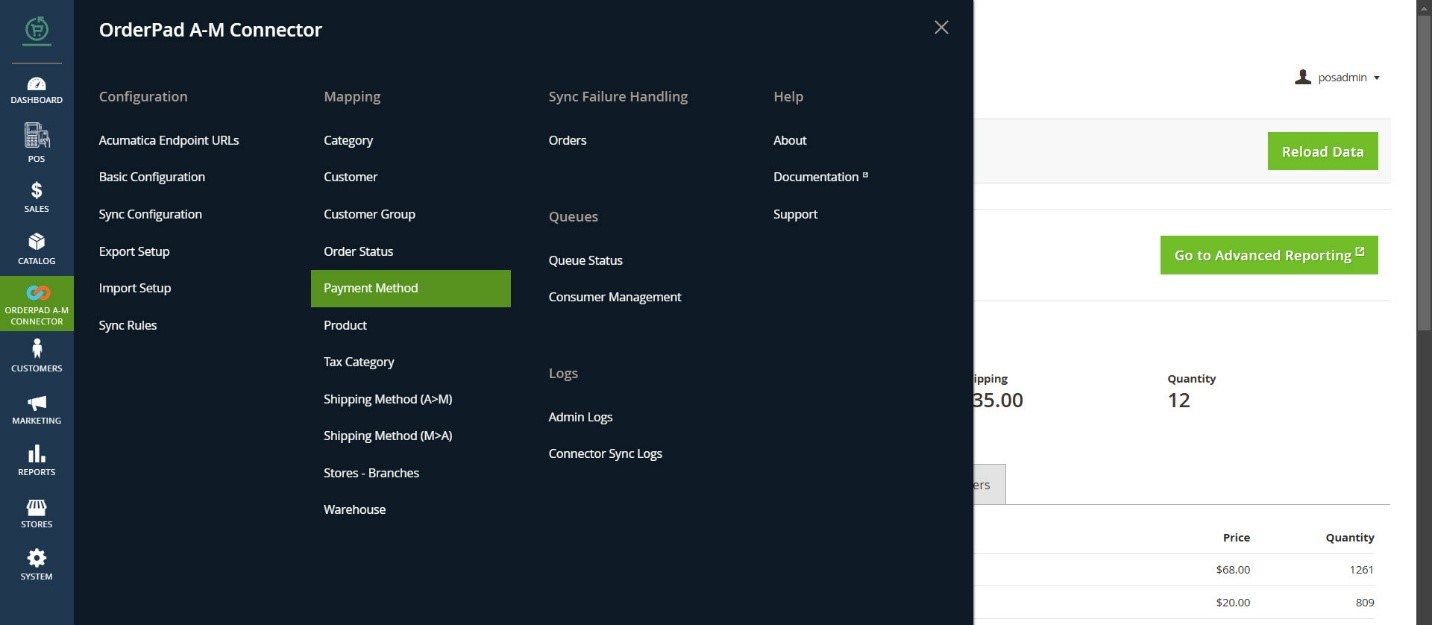
The Payment Method is mapped with Acumatica. Navigate to OrderPad A-M Connector and click on Payment Method under Mapping.
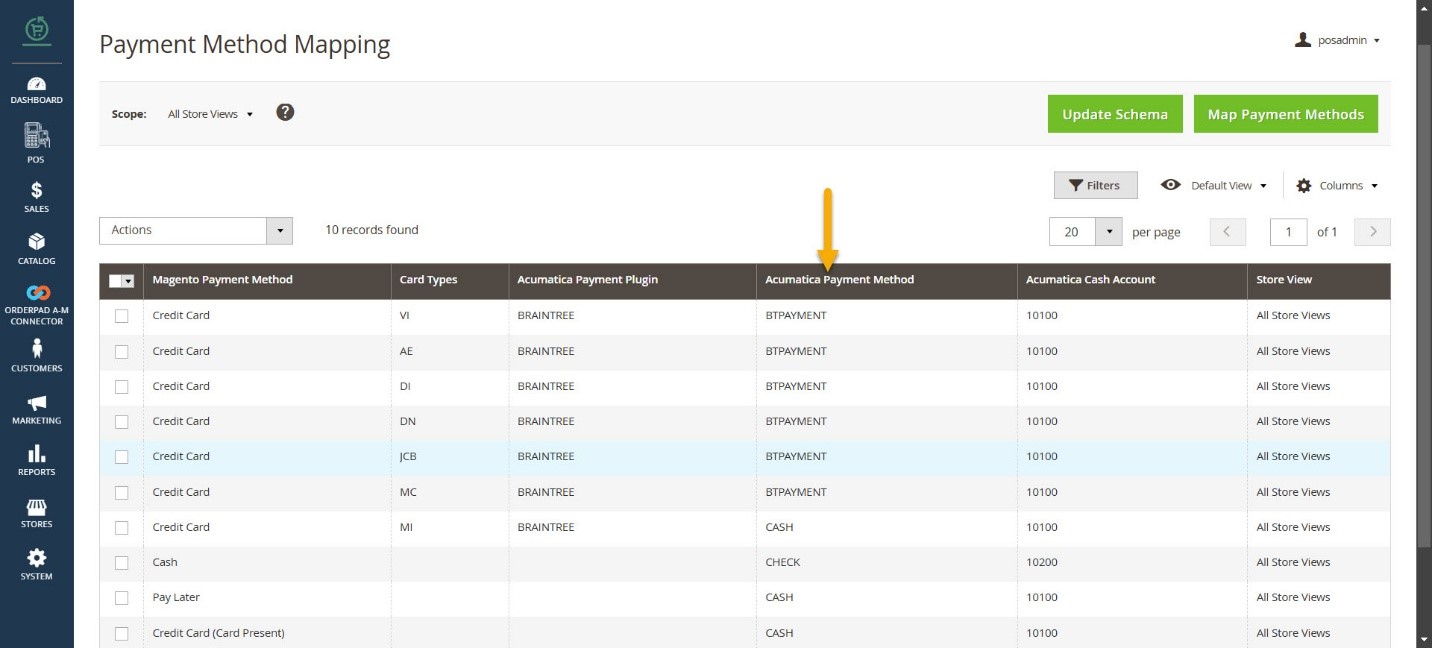
In the Payment Method Mapping screen you can view the Acumatica Payment Method mapped to Cash.
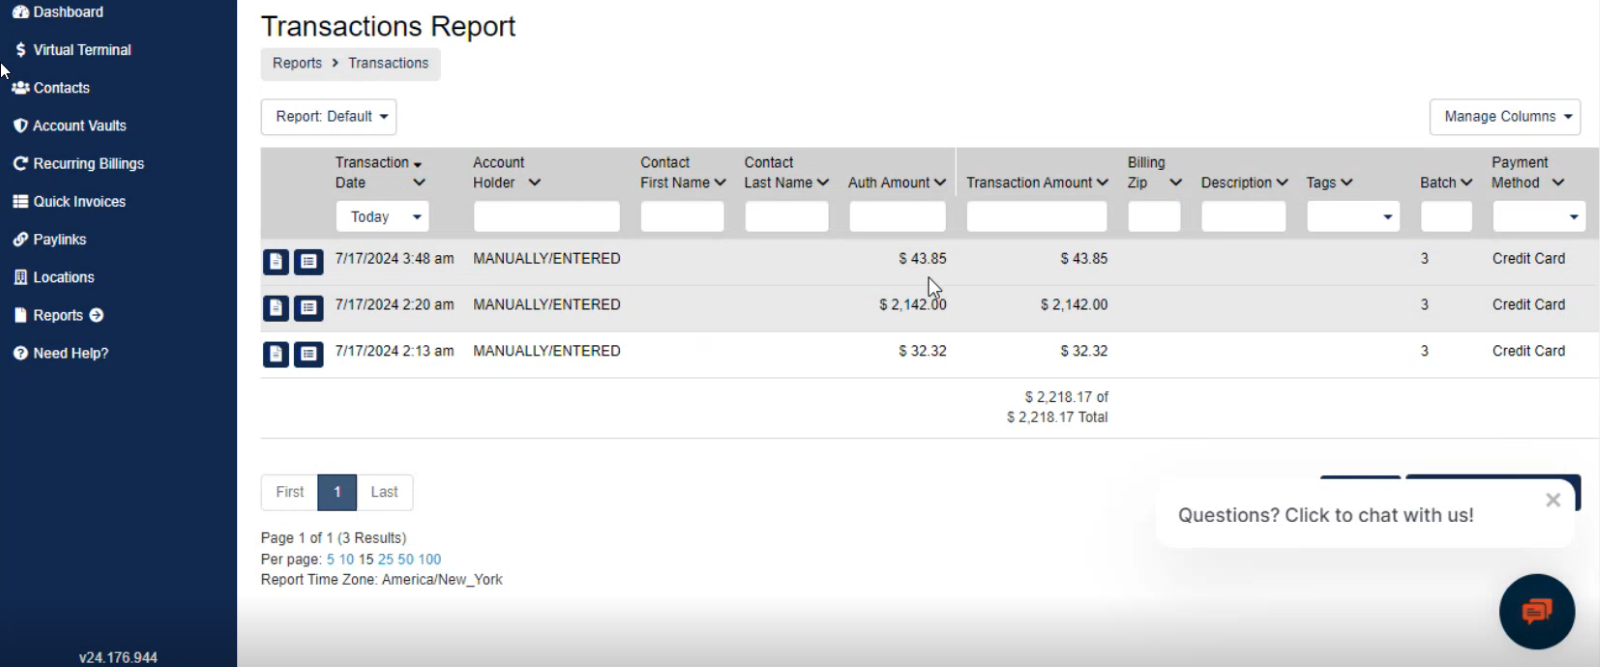
Transaction in the Fortis Portal
To view the Transaction in the Fortis Portal, navigate to Reports -> Transactions the following screen will appear.
Void Transaction
You can void the transaction from the Order. Navigate to the Order Information and an option will be available as RMS Void at the top right-hand corner.
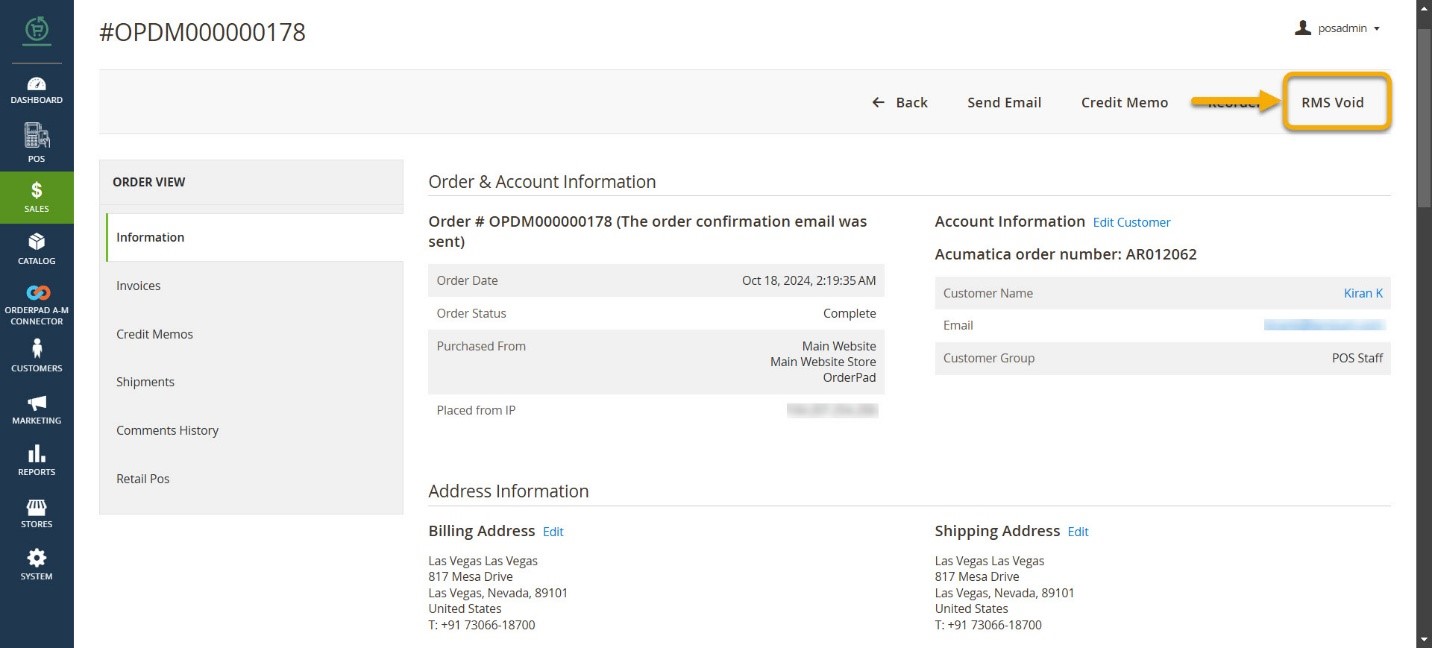
Upon clicking on the RMS Void menu, a pop-up will appear on the screen with [OK] and [Cancel] options.
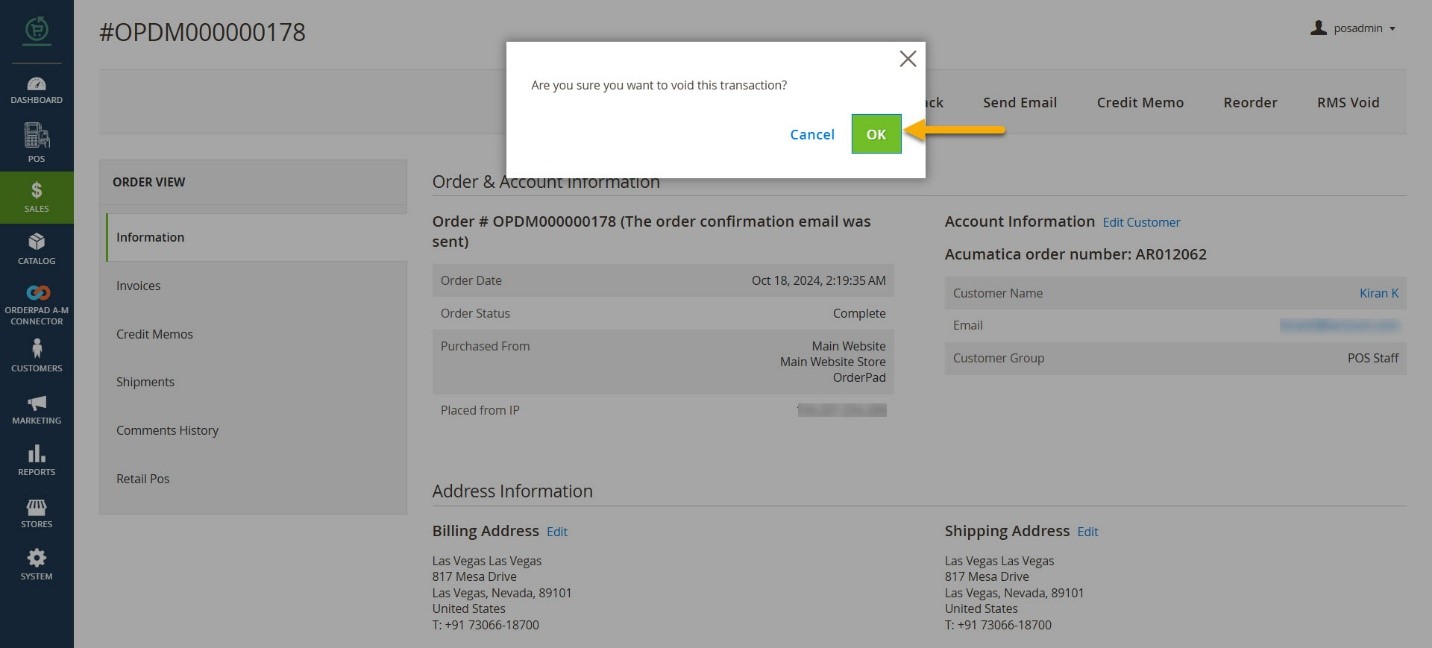
Selecting OK [Voiding Transaction] the order status will be closed.
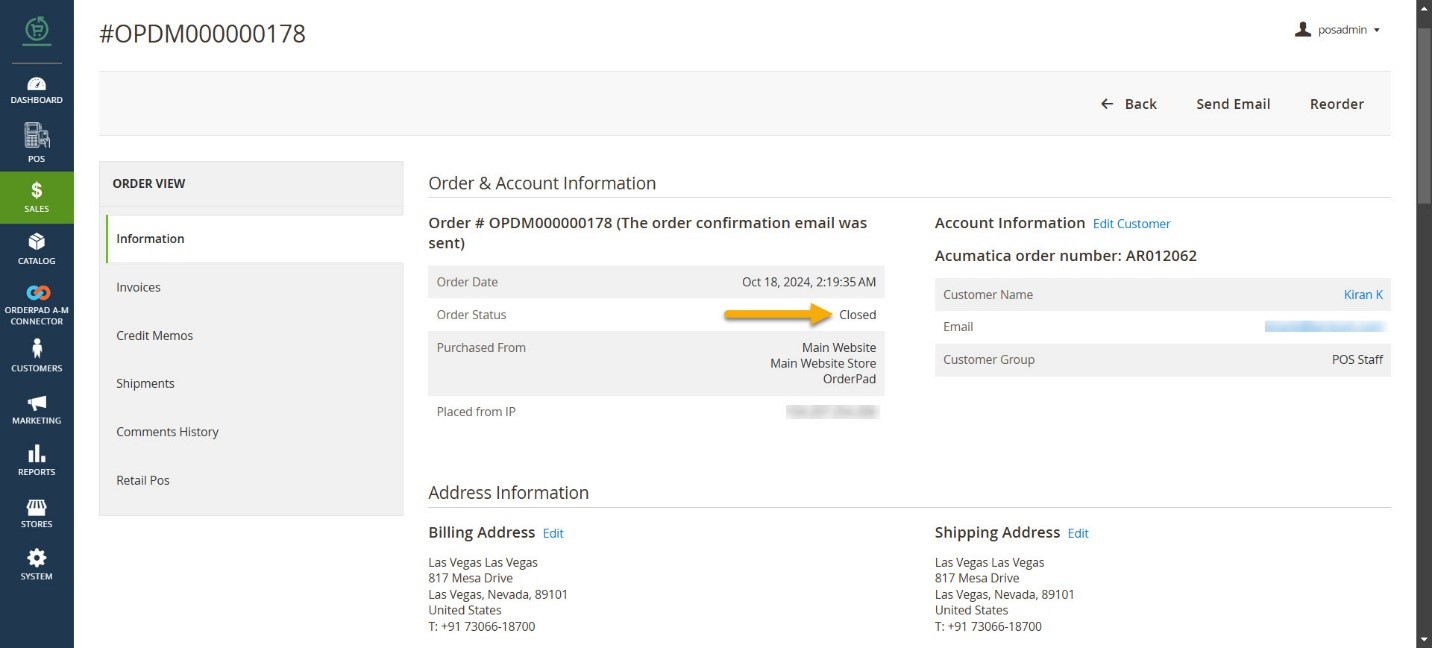
The same will be reflected on the OrderPad front end.
