Creating the Store
At the first stage only default store will be displayed which you can edit from the Manage Stock Screen.
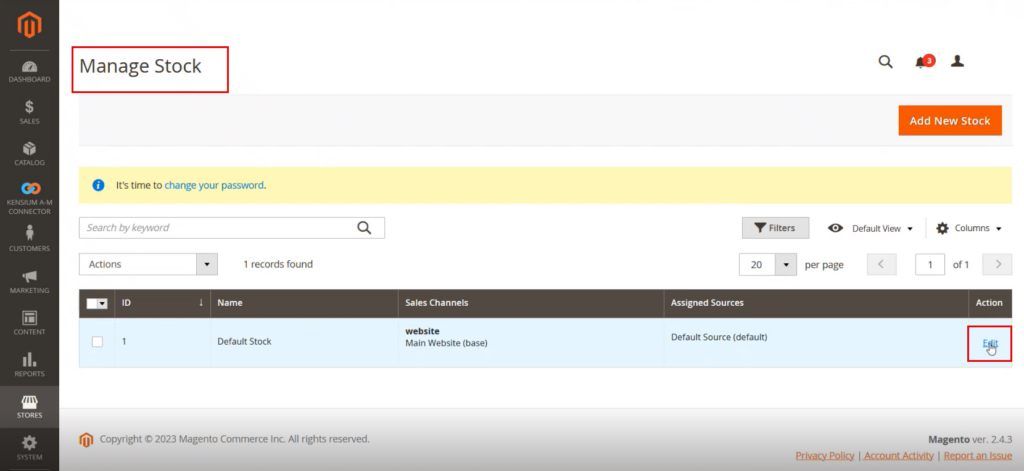
Upon clicking on the [Edit] button you will be redirected to the following screen.
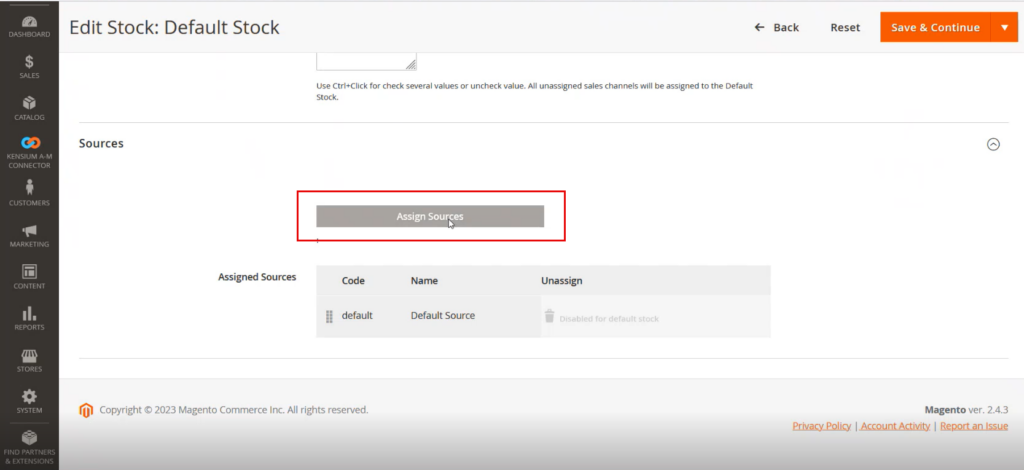
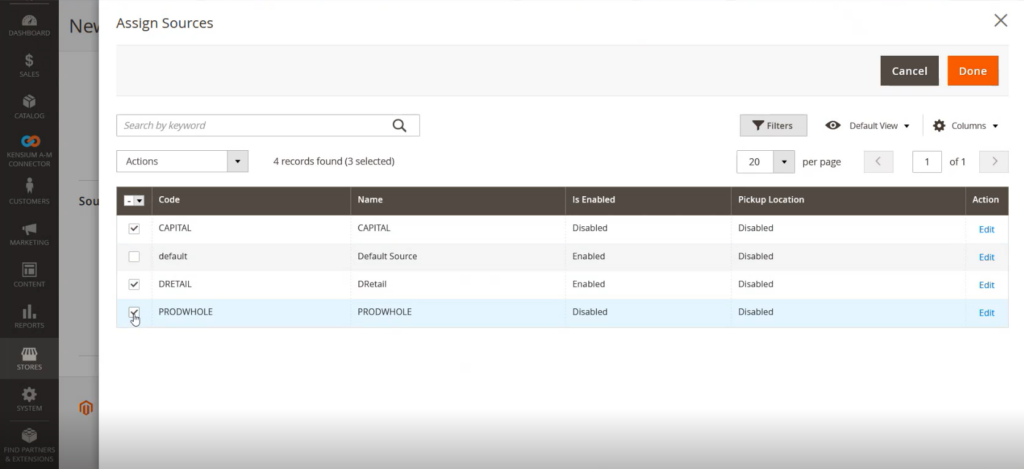
Upon clicking on the [Assign Sources] the following screen will appear. Here you are mapping the stock. Click the sources that you want to add. After selecting click on [Done].
The selected sources will be displayed under Assigned Sources and click on [Save & Close].
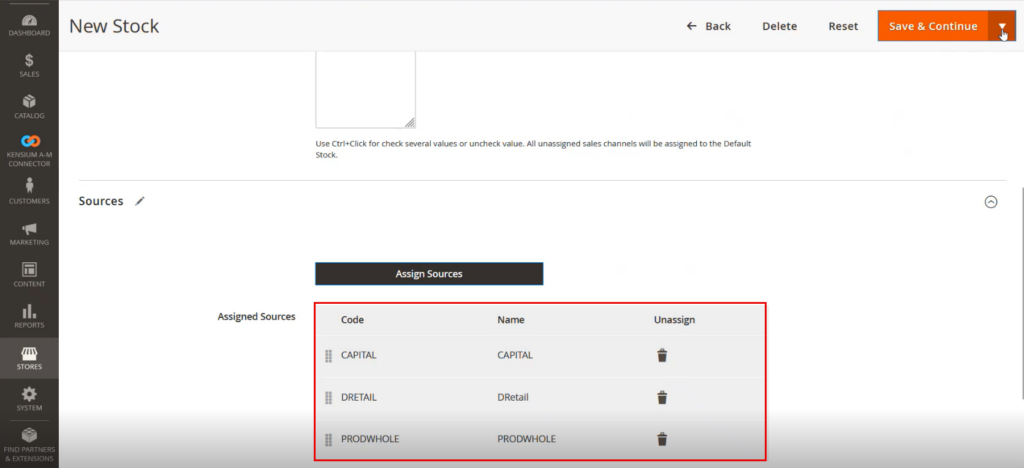
So, you can create a new stock by using the above methods. You have added a main website and different sources/ Stores.
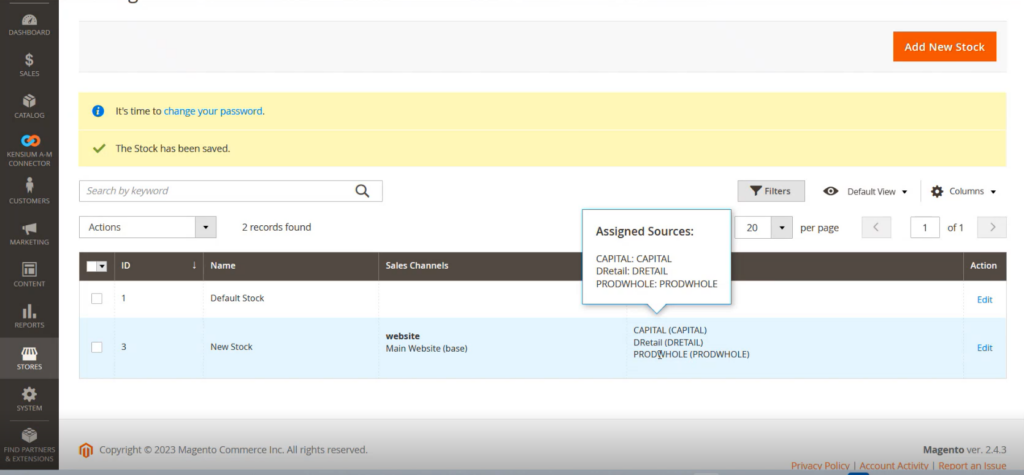
Now you have sources in Magento, and you have Branches in Acumatica.
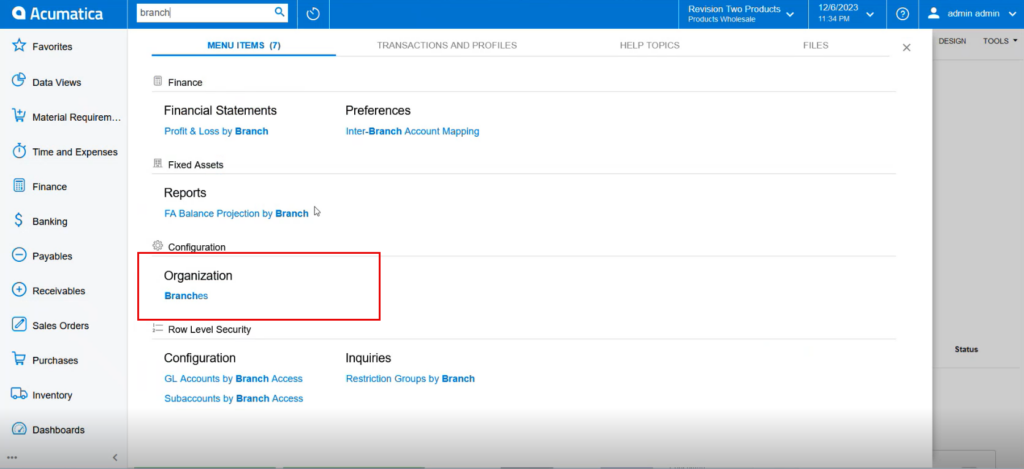
From the Configuration -> organization -> Branches you can see the details within Acumatica.
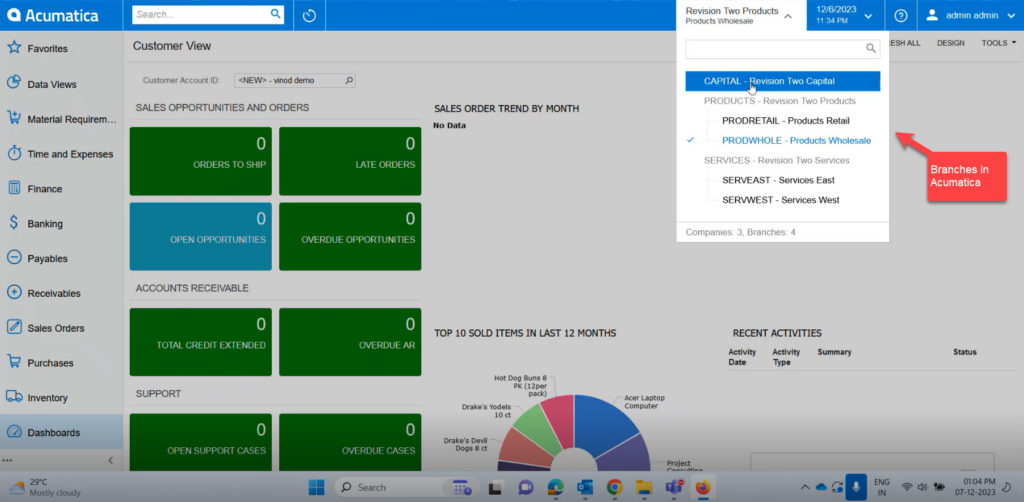
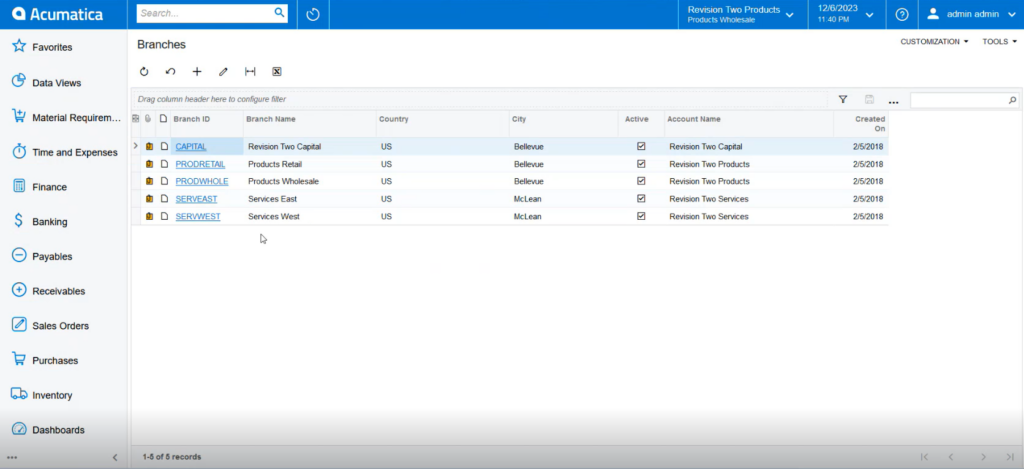
So, the data can be defined according to the Branches. When you are defining the branch-wise data and syncing it to Magento, you also need to keep the data similarly (Branch Wise).
Go to [Profiles] in Acumatica and click on Stock Item as shown below.
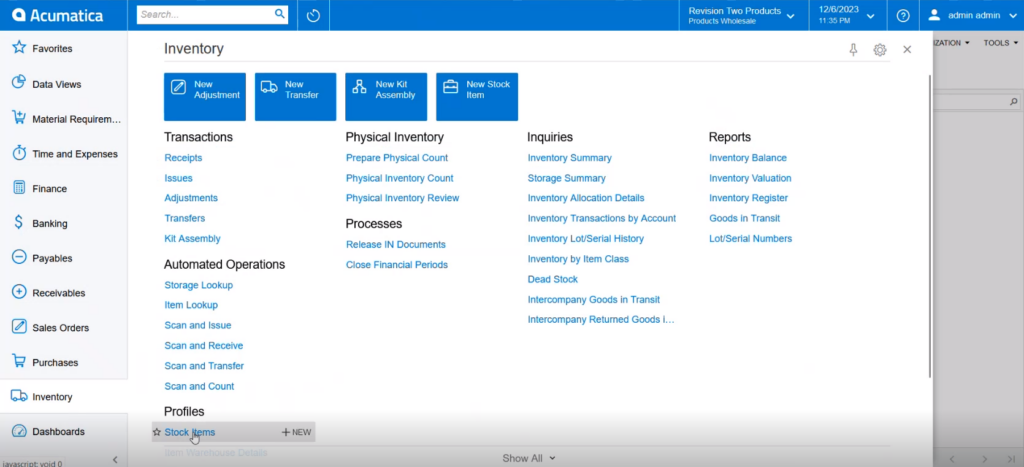
The following Product comes under the [Wholesale]. So, this product belongs to the respective branch. In other branches, the same product will not be available. Here we segregate the data where the product belongs.
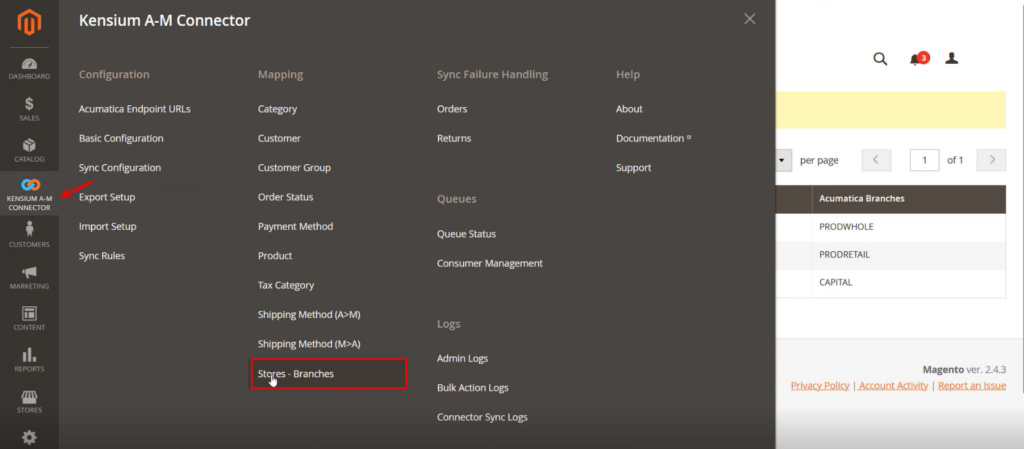
You need to map these two. To map you need to go to the mapping screen. To map go to Magento Kensium A-M Connector and under Mapping click on Store-Branches as shown below.
Upon clicking on the Stores- Branches you will be redirected to the mapping screen as shown below.
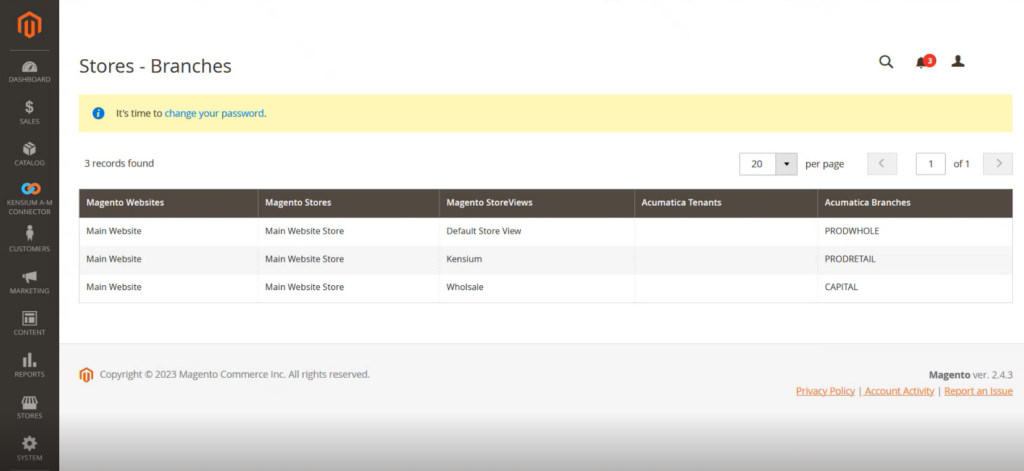
In the above screenshot you can view each store of Magento is mapped with each Acumatica Branches.
To see the use of the mapping click on the Catalogue in Magento and from there click on the Products.
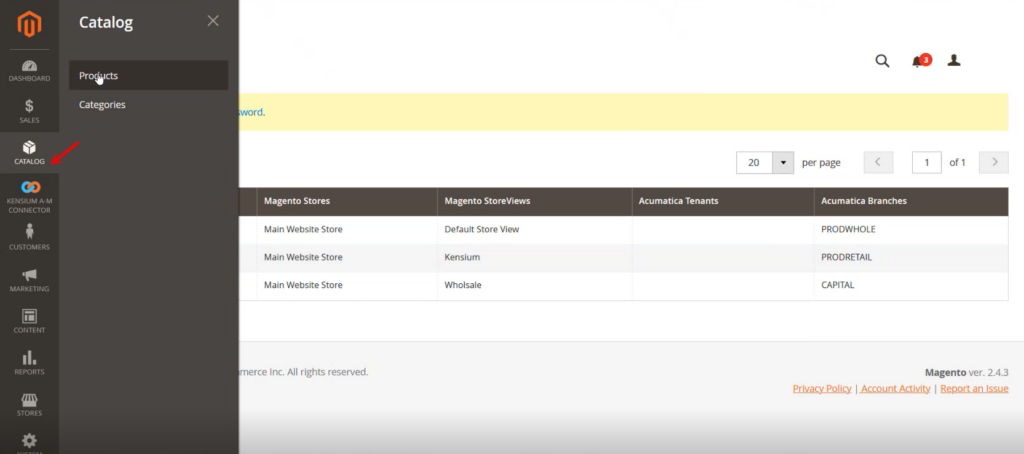
From the Product Screen go to Products in Website.
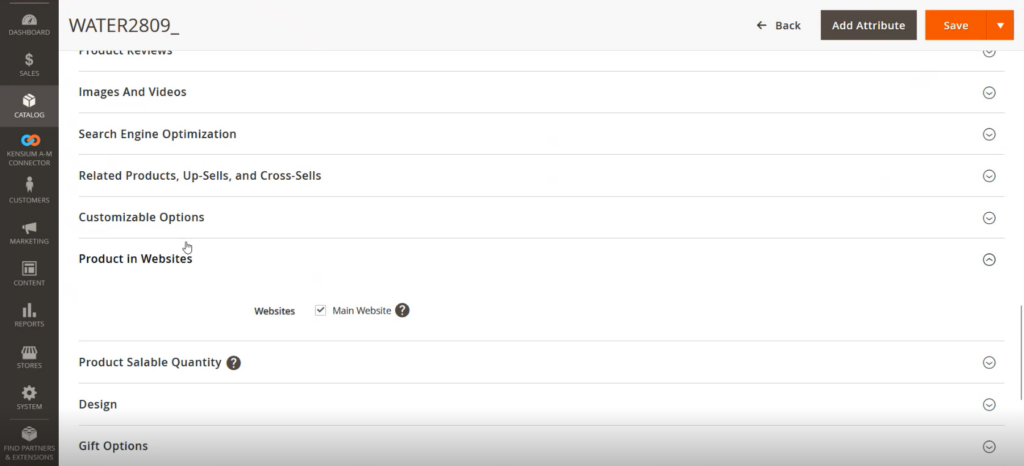
Since all the products are added to the main website, the [Checkbox] for main Website is checked.
If you have multiple websites and if a product belongs to that website, it should be checked. If a product is available in all the stores you can check all the websites.