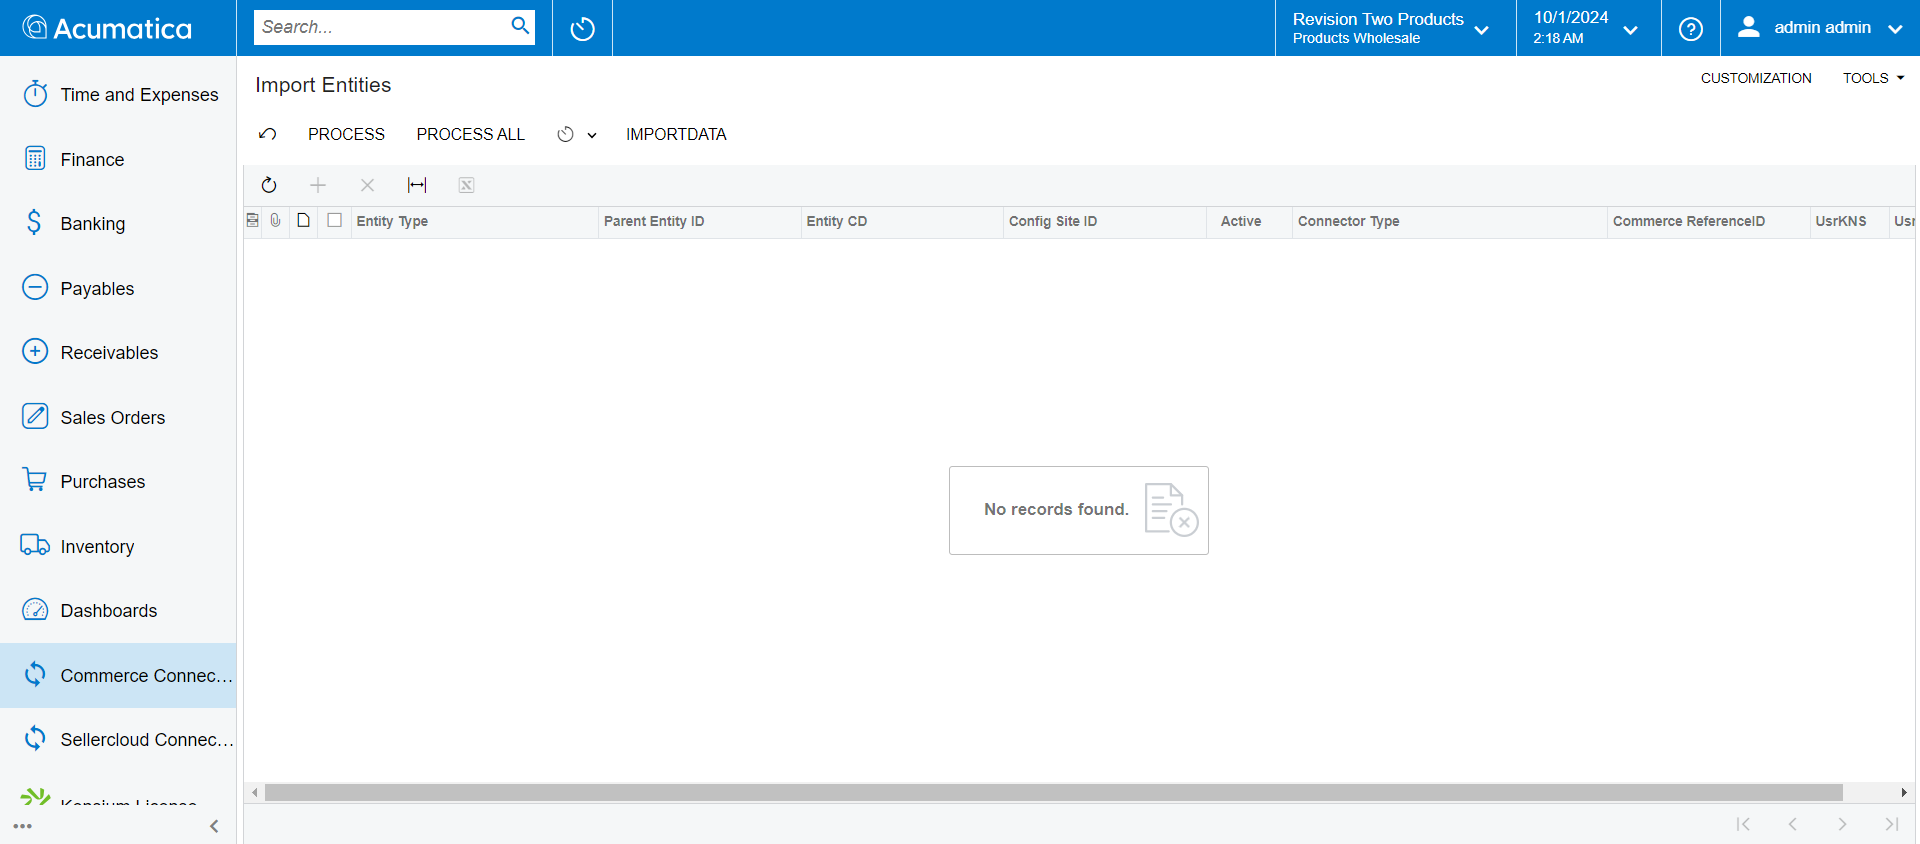
Import Entities
The Import Entities option enables you to update batch data to be processed in Acumatica.
- Navigate to the left side panel of Acumatica, click on [Commerce Connector], and select [Import Entities] under [Real Time-Processes].
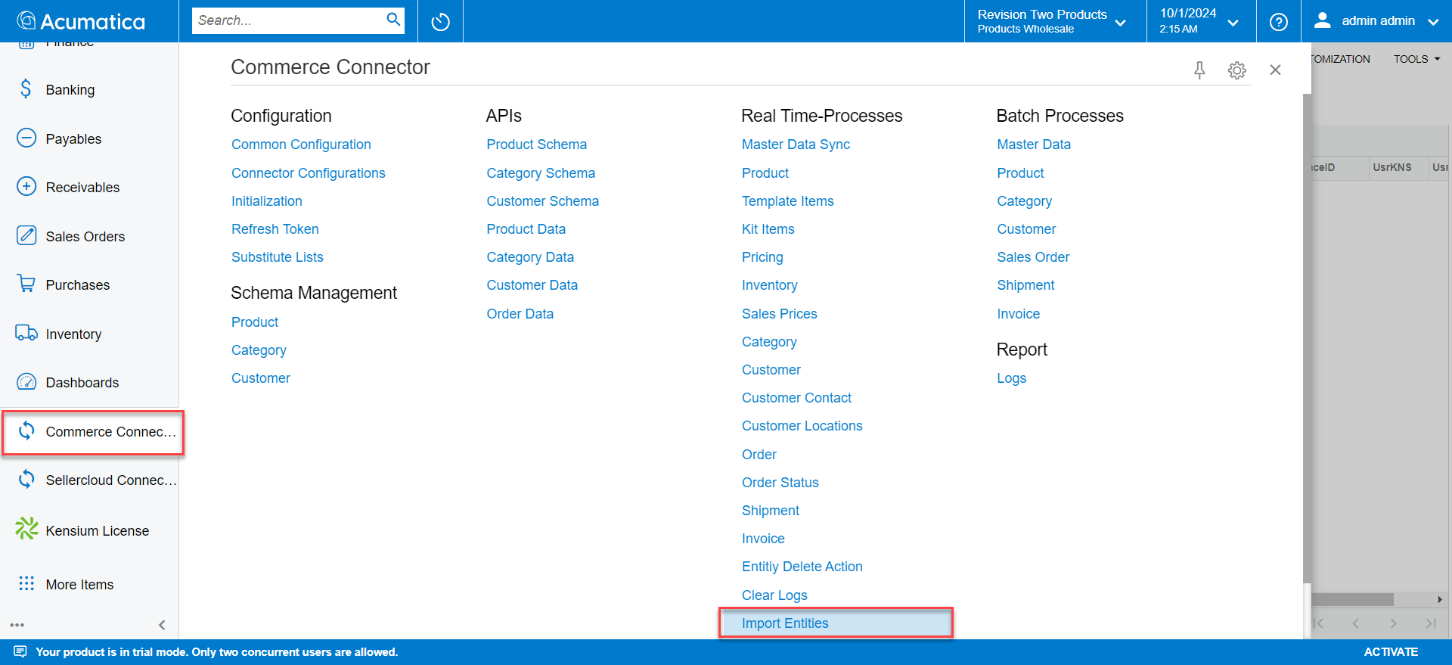
- You will be redirected to the following page:
- To create entities, the input data file should be in [.xlsx] format and template as shown below.

- The mandatory columns to be included in the input file are
- Select
- Entity Type
- Entity CD
- Config Site ID
- Active
- Connector Type
- Commerce ReferenceID
- Product Type
|
|
The input characteristics are case-sensitive, and column order needs to be exactly as per the template. |
- Once the data file is created in the specified template save the file in [.xlsx] format.
- Click on [IMPORTDATA] on the [Import Entities] page and a pop-up will appear to choose the file.
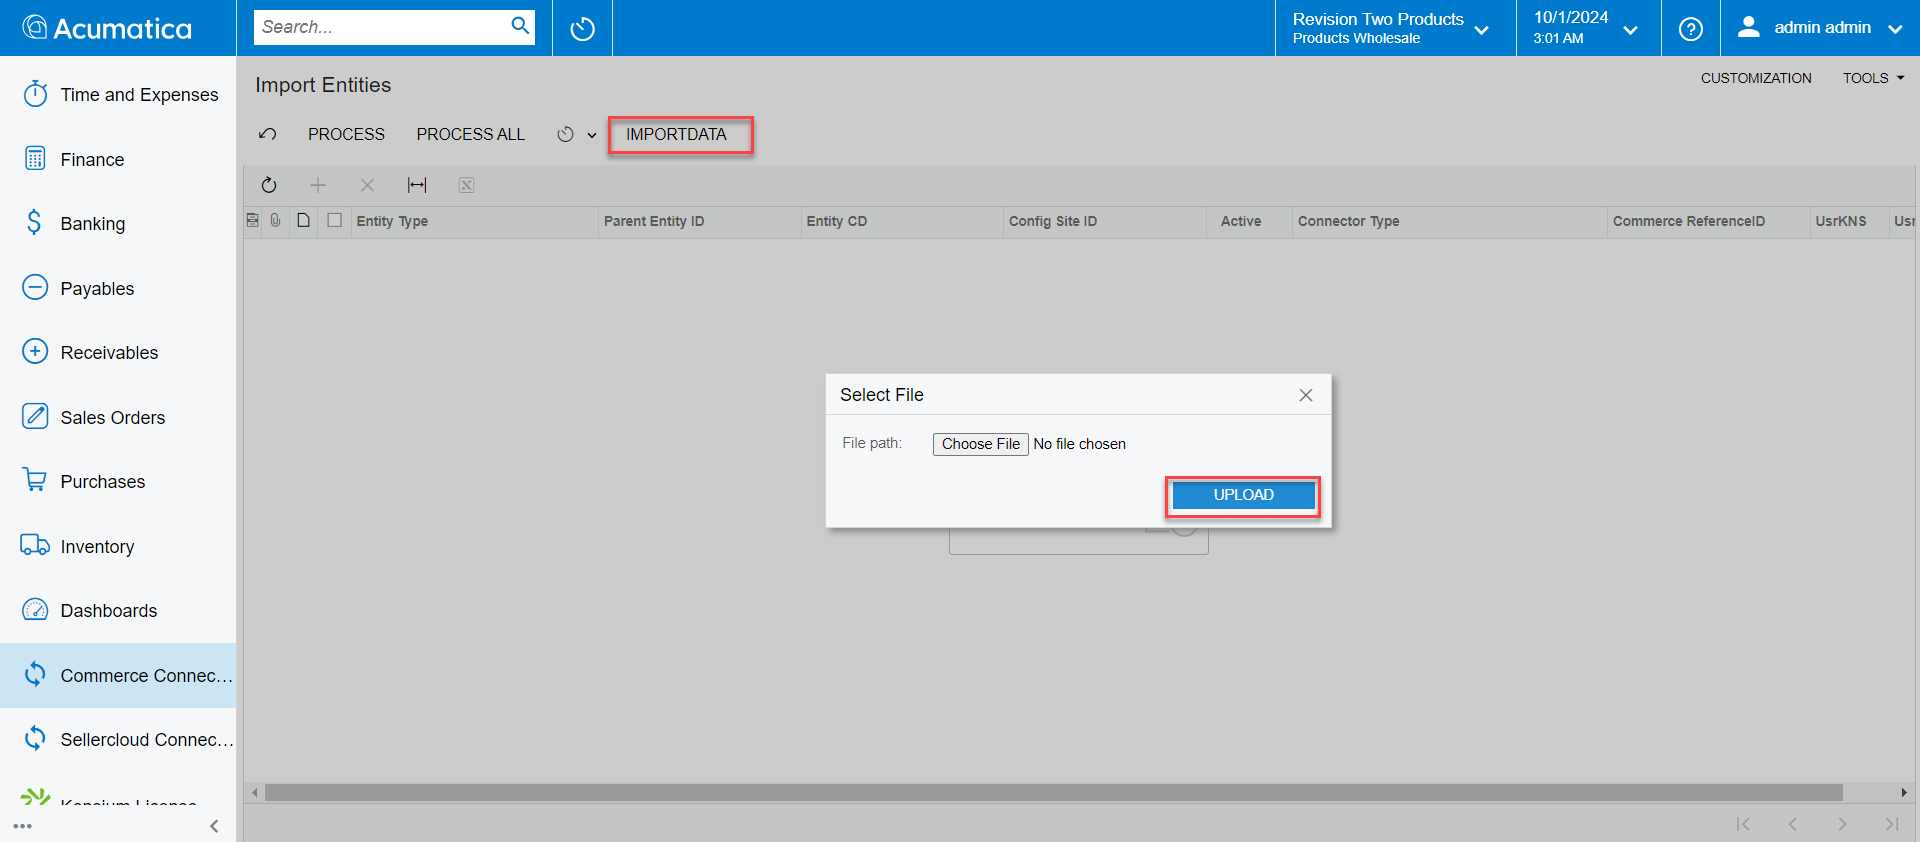
- Select the data file prepared and click [UPLOAD]. The entities will be reflected on [Import Entities] page
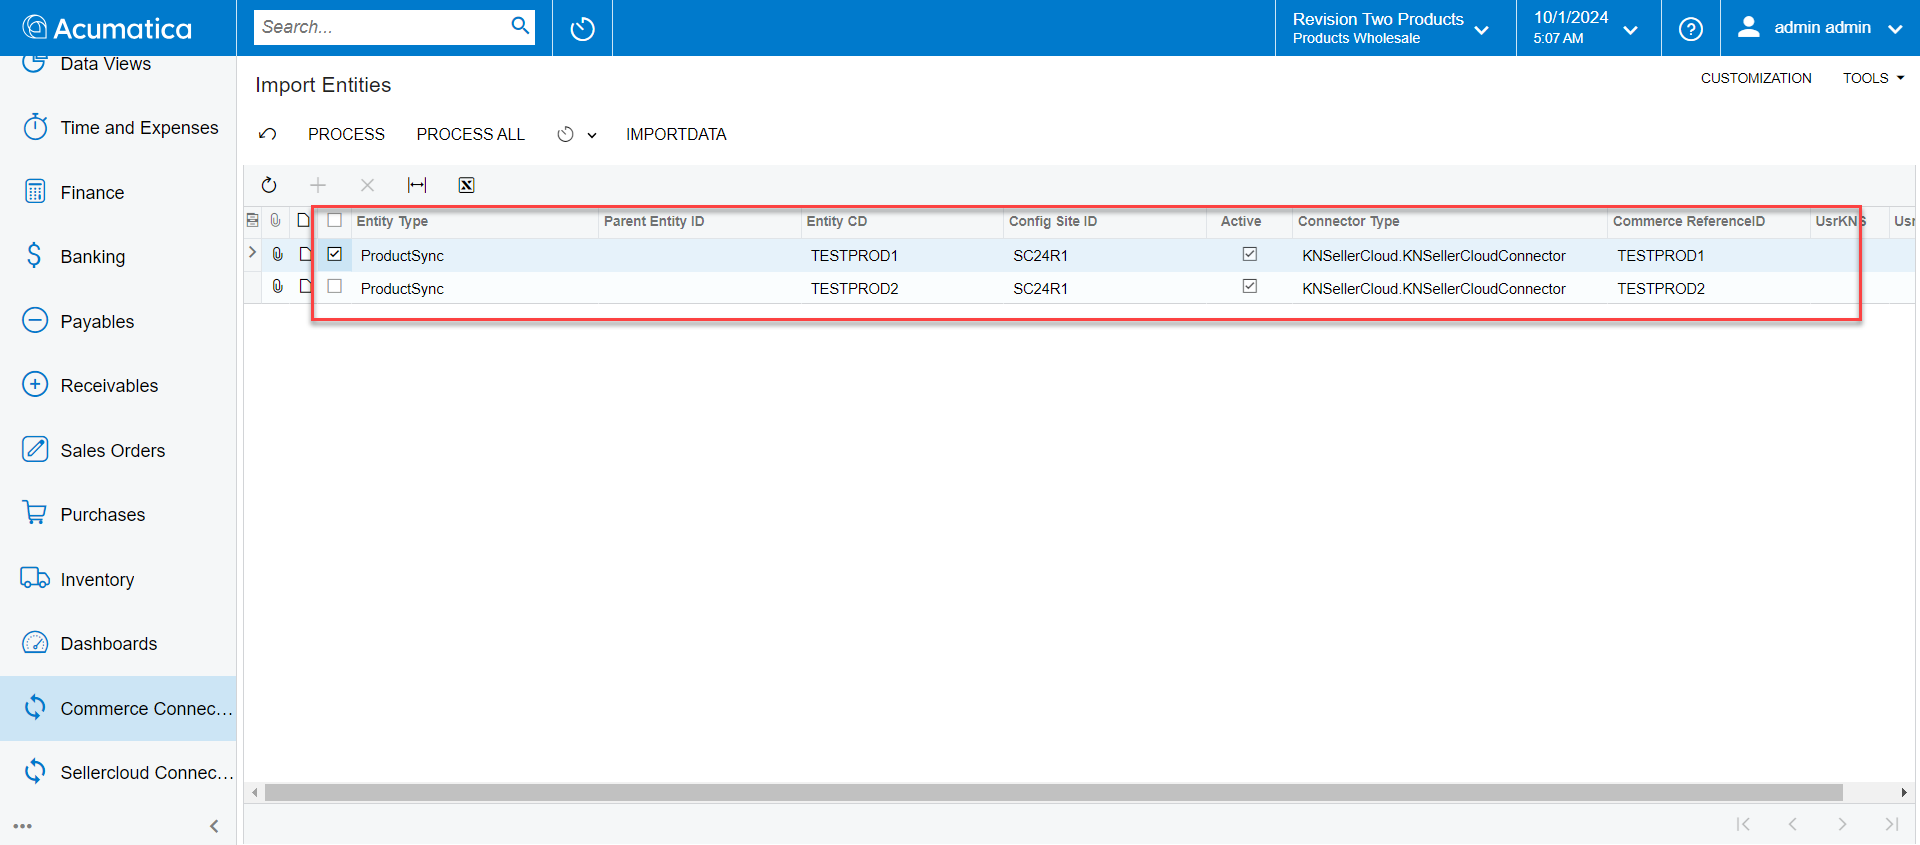
- To process a single item or multiple items, select the [Entity type] check box of the item to be processed and click [PROCESS].
- To process all items at once, click [PROCESS ALL].
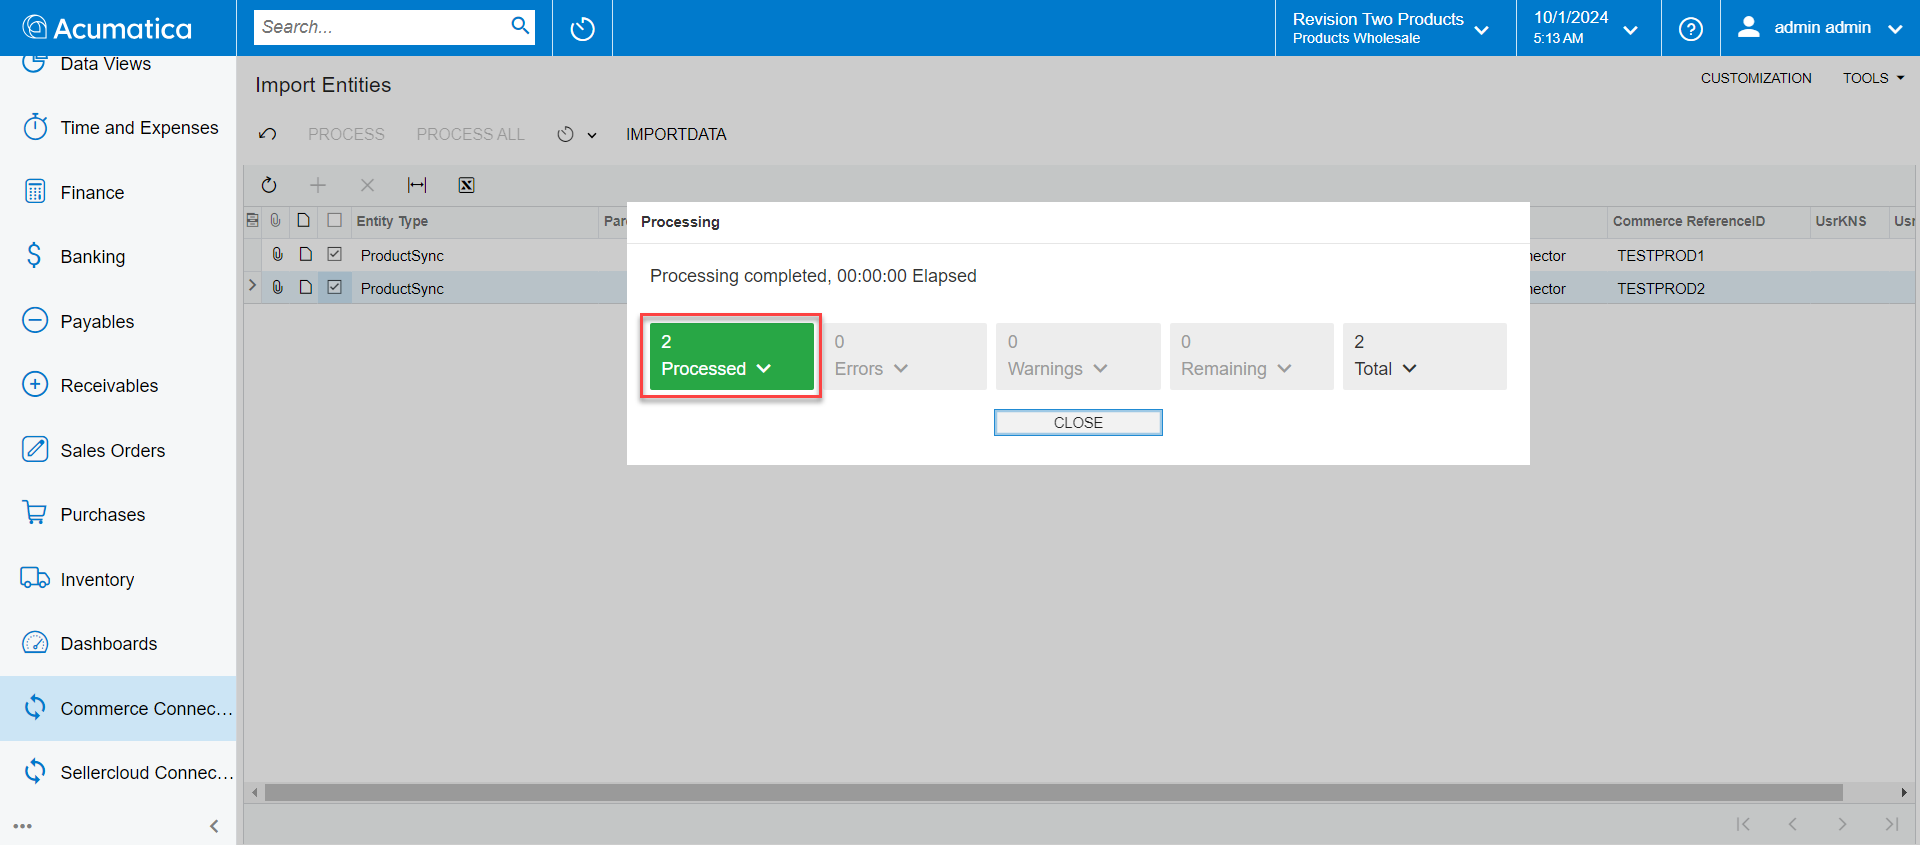
- A Processing confirmation pop-up will appear on the screen. Verify and close the pop-up to complete the action.
- The following are the details to be entered in the input file.
|
Input title |
Input data |
Corresponding action |
|
Select |
TRUE or FALSE |
Select or unselect the Entity Type checkbox, on the Import Entities page, once the file is uploaded. It is advised to be entered as TRUE. |
|
Entity Type |
ProductSync |
The entity type is to be entered as “ProductSync” in the input file. |
|
Entity CD |
Inventory ID |
Enter the inventory ID of the product as reflected in Acumatica. |
|
Config Site ID |
Connector ID |
In the input file, enter the ID of the installed KCF plugin. This allows you to update the related data. |
|
Active |
TRUE or FALSE |
This enables you to select or unselect the Entity Type checkbox on the Import Entities page and select or unselect the Act checkbox on the product page. |
|
Connector Type |
KNSellerCloud.KNSellerCloudConnector |
The connector type is to be entered as “KNSellerCloud.KNSellerCloudConnector” in the input file. |
|
Commerce ReferenceID |
SKU ID |
Enter the SKU ID of the product that needs to be reflected in SellerCloud. |
|
Product Type |
MAIN SKU or SHADOW SKU |
This updates the [Seller Product Type] in the product level page. |
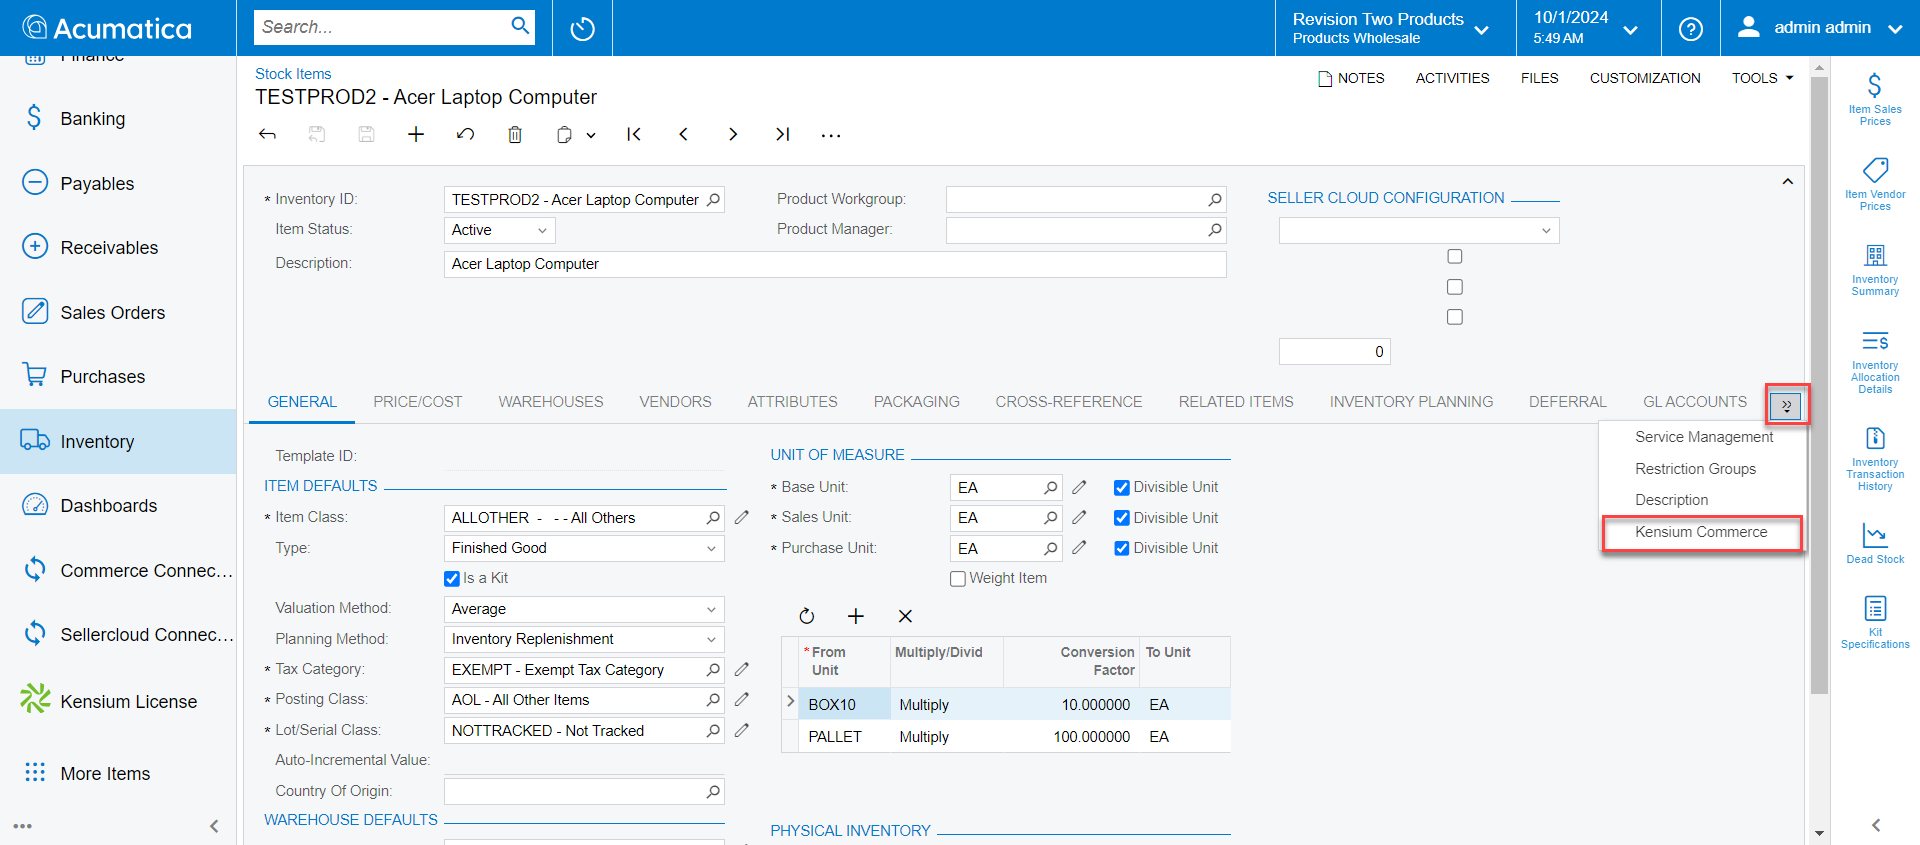
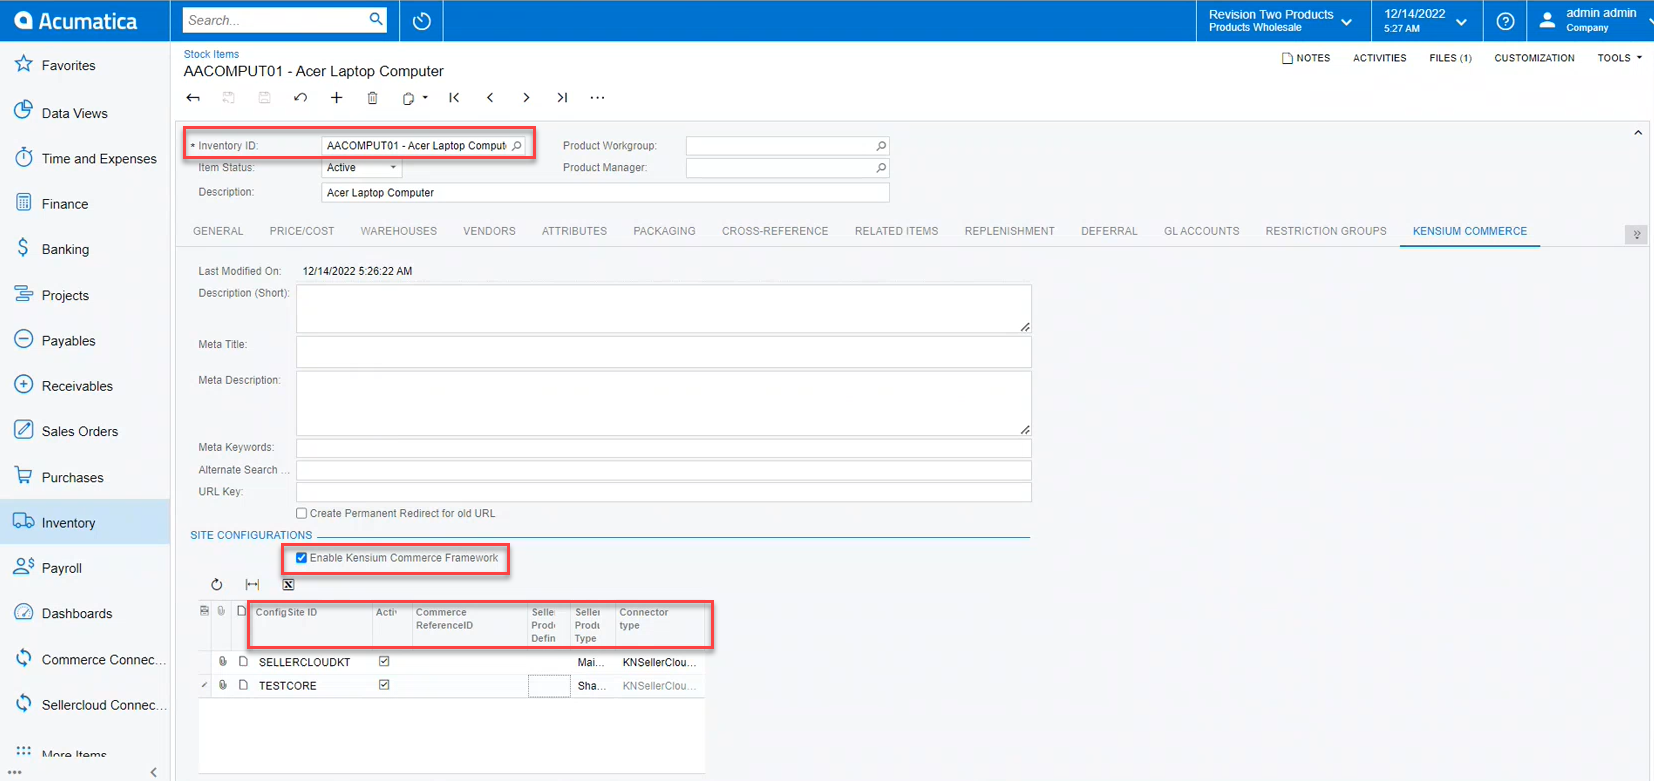
- To view applied changes, navigate to the left-side panel of Acumatica, click on [Inventory], and select [Stock Items] under [Profiles]. Click on Inventory ID to open the product-level page. Click on double-chevron >> and select Kensium Commerce.