Site Configurations
Through site configurations, Businesses can establish the behaviour and synchronization criteria for data communication, as well as how Acumatica should interact with Rithum Connector, through site configurations.
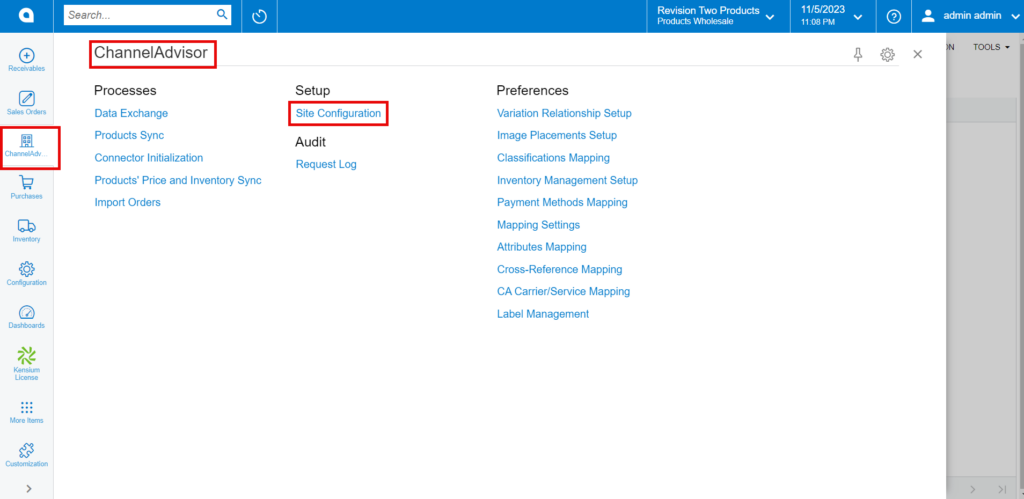
- You need to Navigate to the left side Panel in [Acumatica], click on [Rithum Connector] look for [setup] submenu and select [Site Configuration].
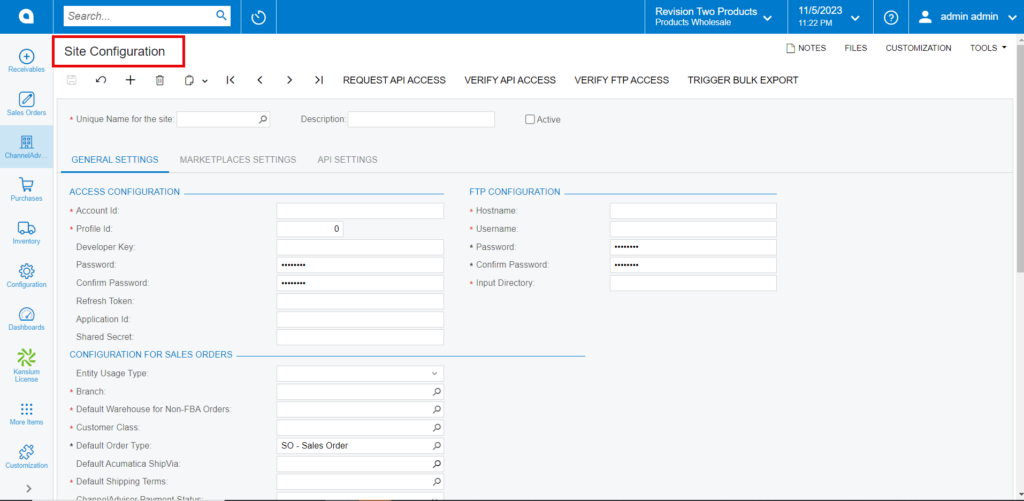
- You will be redirected to the following screen.
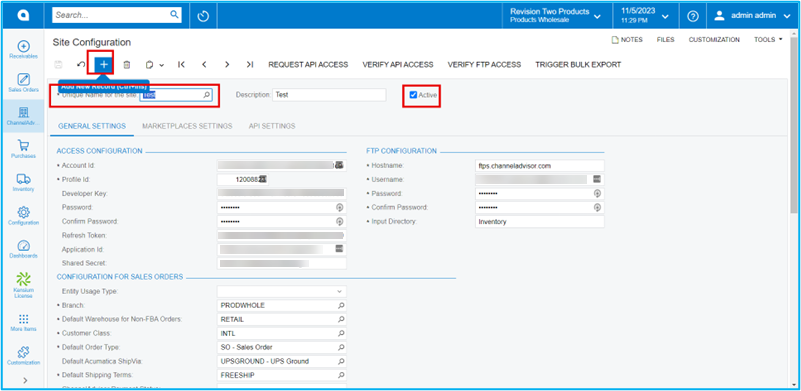
- Click on [+] icon.
- You need to search for the [unique Name for the site] to create your store.
- You need to provide the [Description].
- Locate the [Active] checkbox and click on it to enable the site and make it accessible for configuration.
- Click on the [General Settings] within the Site Configuration screen. This tab contains options to configure various aspects of the site there are:
- Access Configuration
- FTP Configuration
- Configuration For Sales Orders