
Inventory in Acumatica Through PO Receipts
To access the inventory through PO Receipt you need to go to Payables on the left panel and click on Purchase Orders under [Transaction].
![Purchase Orders under [Transaction]](/wp-content/uploads/2023/12/Purchase-Orders-under-Transaction-1024x468.png)
Click on the [New] or + sign to create the purchase order. The logic of warehouse i.e., Wholesale and Retails remains the same. In the Setup Parameter of Acumatica, these two warehouse types are defined.
To create the PO receipt, follow the steps.
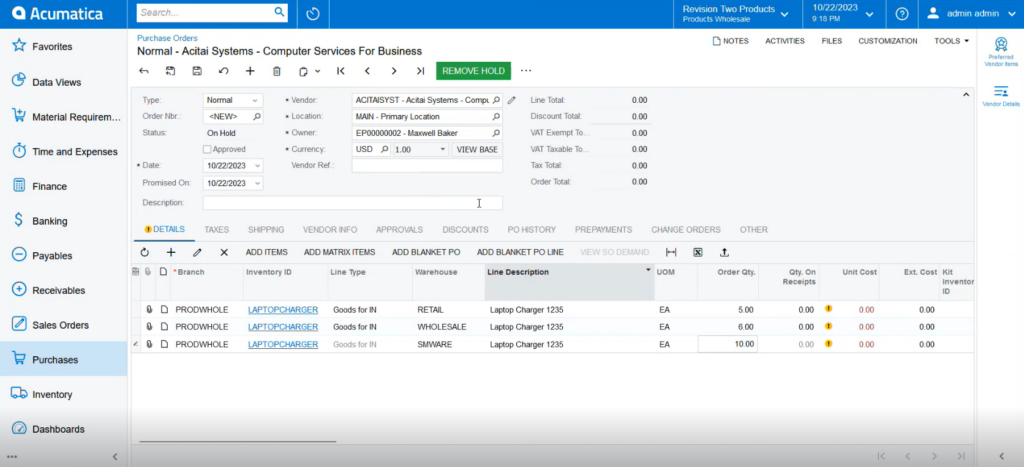
Step 1. Create the PO with all the details including the Warehouse details as shown below. In the following screenshot apart from Wholesale and Retail another warehouse has been selected.
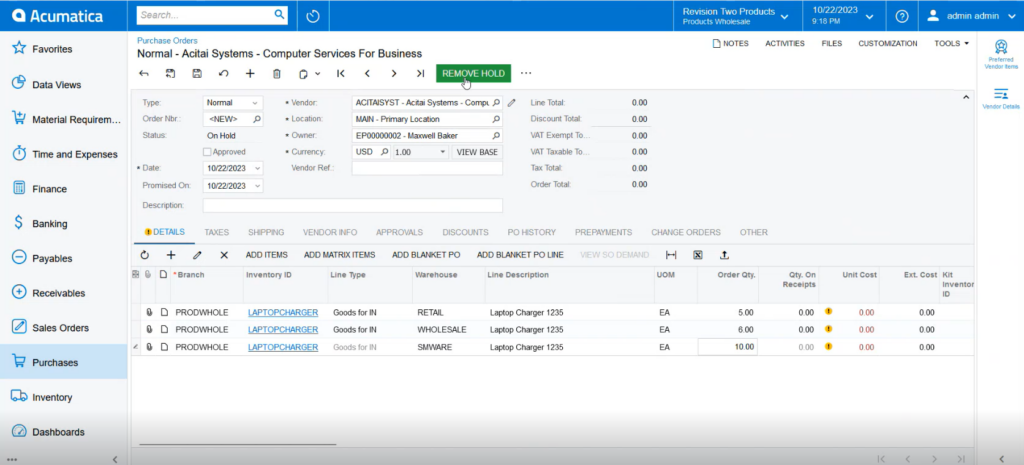
Step 2: Click on [Remove Hold] to remove the P.O.
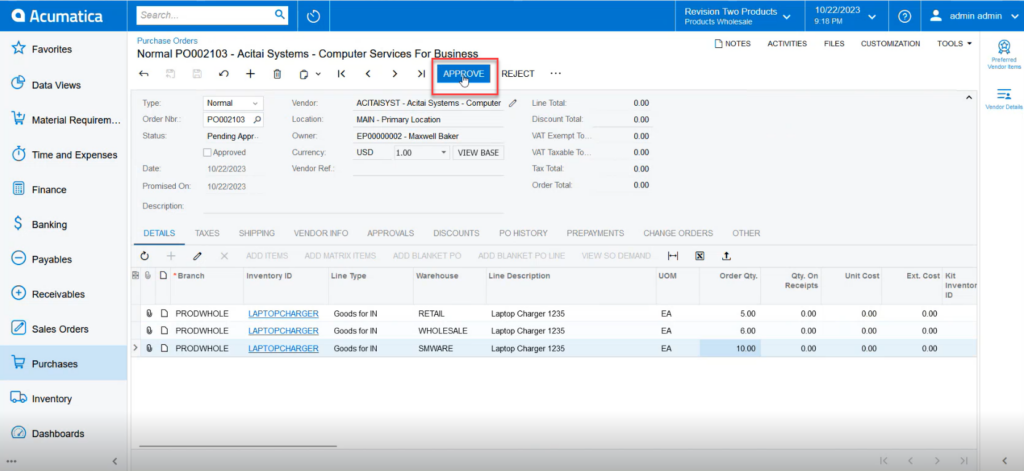
Step 3: Click on the [Approve] button to proceed.
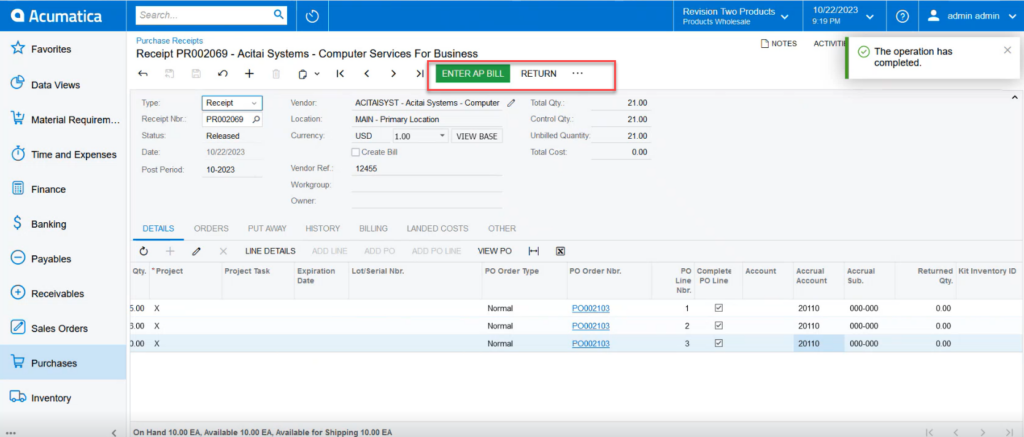
Step 4: Click on the [Enter PO Receipt].
![Click on [Enter PO Receipt]](/wp-content/uploads/2023/12/Click-on-Enter-PO-Receipt-1024x472.png)
Step 5: Enter the Reference Number and click on the [Release] button to proceed. The application will execute the release procedure.
![Click on the [Release] button to proceed](/wp-content/uploads/2023/12/Click-on-the-Release-button-to-proceed-1024x465.png)
Step 6: After successful [Release] you will be redirected to the following screen.
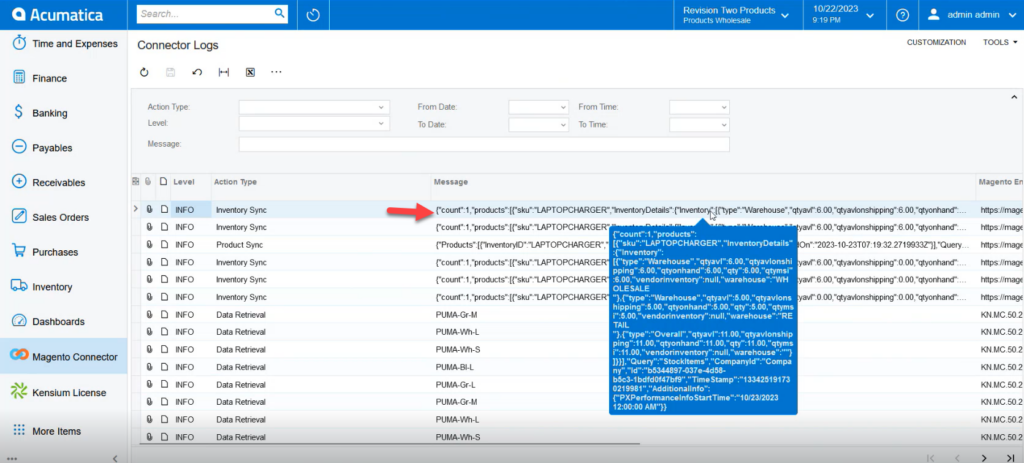
Step 7. Now go to the Acumatica Connector Log. The connector log will show the quantity of Warehouse Wholesale and Retail.
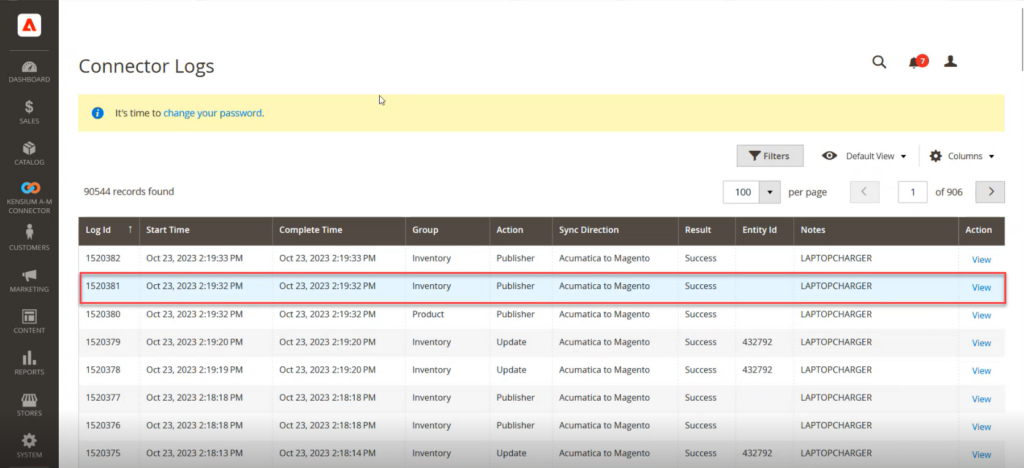
Step 8: Go to the Magento Connector Log. The connector log will show the Inventory is published.
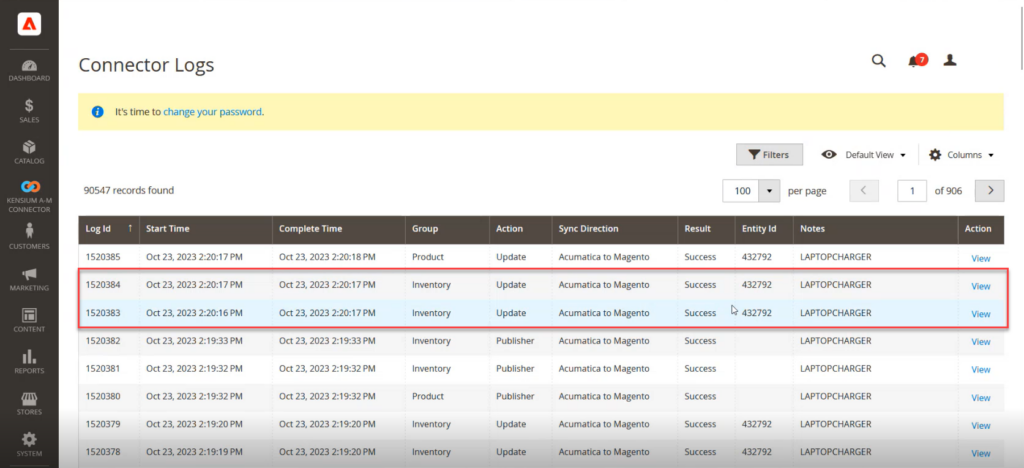
Step 9: Upon refreshing the screen, you will be able to view that the inventory is updated in Magento.
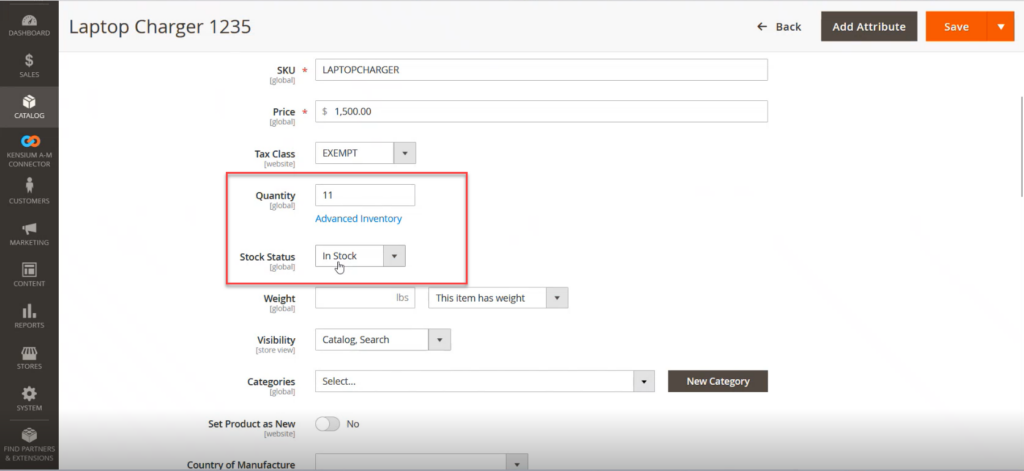
Step 10: Click on view and go to the Product Details. The page displays the Quantity and Stock Status (In-Stock). When the quantity becomes 0 the stock status will change to out of stock.
|
|
When the Child Items quantity becomes zero then the Parent Item automatically becomes zero in terms of quantity and the stock status will change to out of stock automatically. |