Managing the Sync Order with Tax
Magento allows you to sync the order along with the Tax. You need to follow the steps as described.
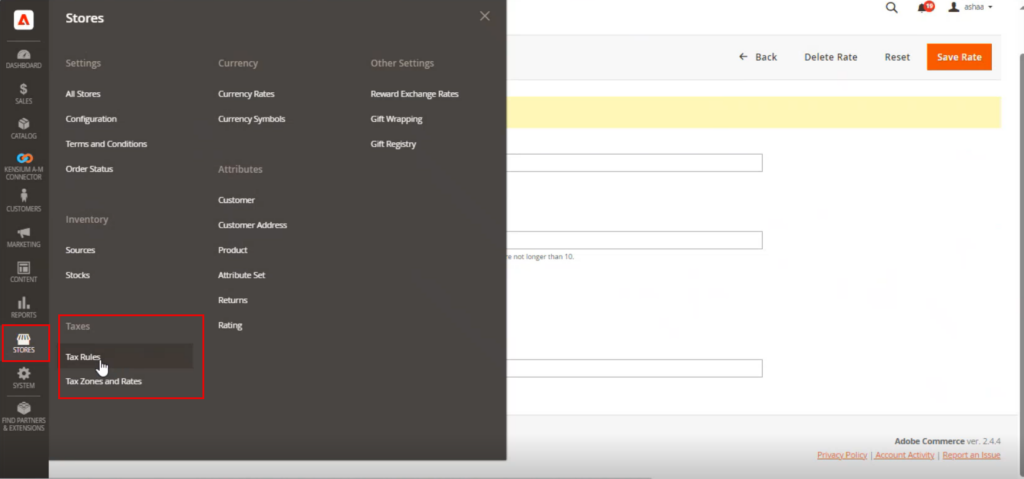
Step 1: Go to the [Stores] on the left panel, you will be able to view [Tax Rules] and [Tax Zones and Rates] under Tax.
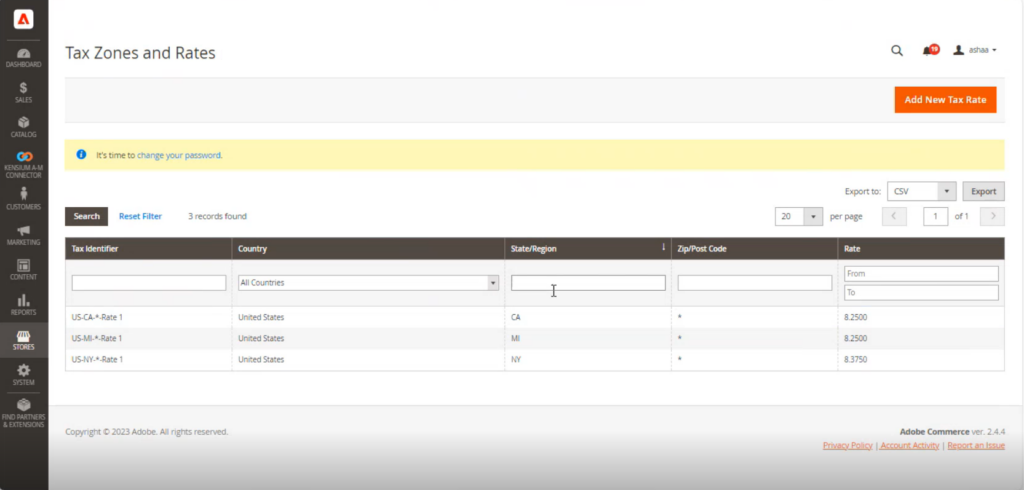
Step 2: Click on the Tax Zones and Rates. You will be redirected to the following screen.
Step 3: To create the New Tax Rate, you need to enter the following details.
- Tax Identifier (Mandatory): Enter the name of the Providence.
- Zip/Post is Range [Checkbox]
- Zip/ Postal Code: Enter the Zip or Postal Code
- State [Drop-down]
- Country [Drop-down]
- Rate Percent [Mandatory Text box]: Enter the applicable tax rate and save.
Step 4:
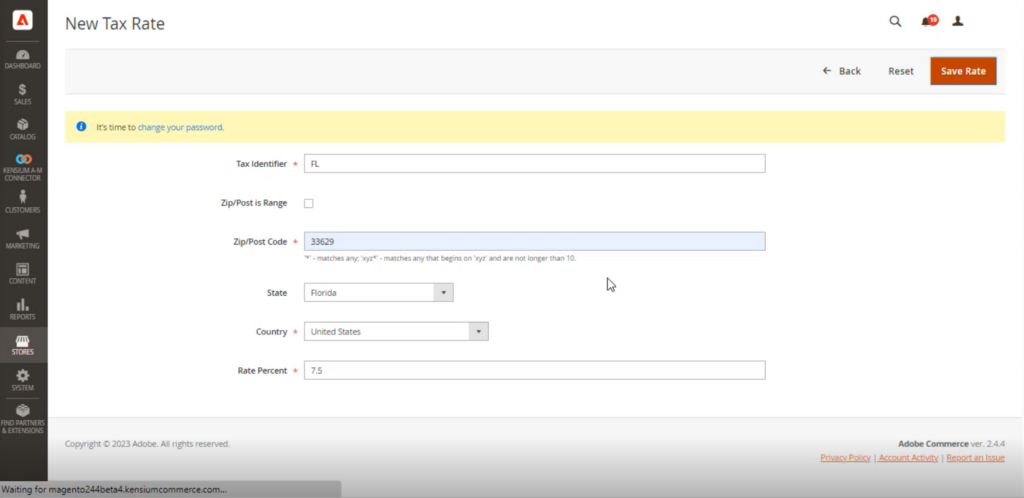
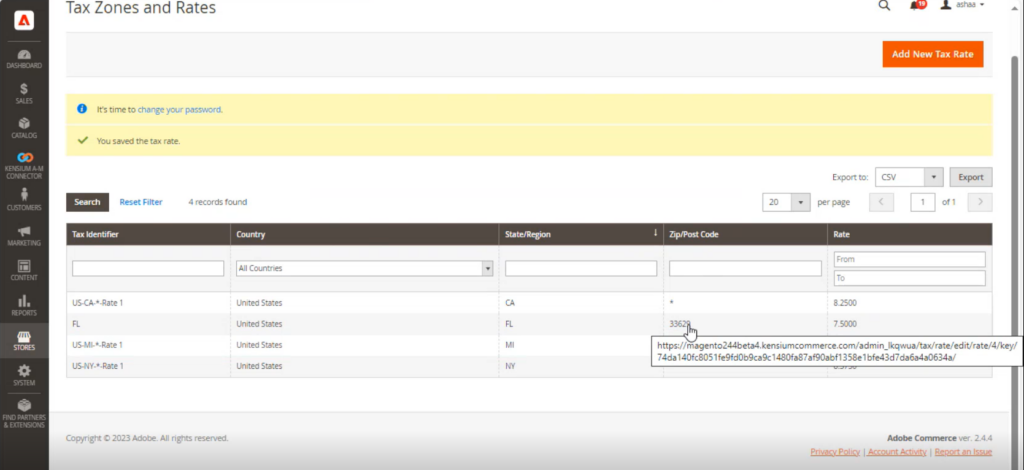
Note: If you give the Zip/Postal Code here only for that postal code Tax rate will be applied. If the Zip/Post code shows as* this tax rate will be applied.
Step 5. You need to create the Tax Rule. You need to fill up the following fields to complete the rule.
- Name (Mandatory Tax Field)- Rule Name
- Tax Rate [Mandatory Drop-Down]: The tax rate which you have created in the tax zones will be populated in the dropdown. You need to select the applicable one. On the fly, you can create the Tax Rate by using [Add New Tax Rate].
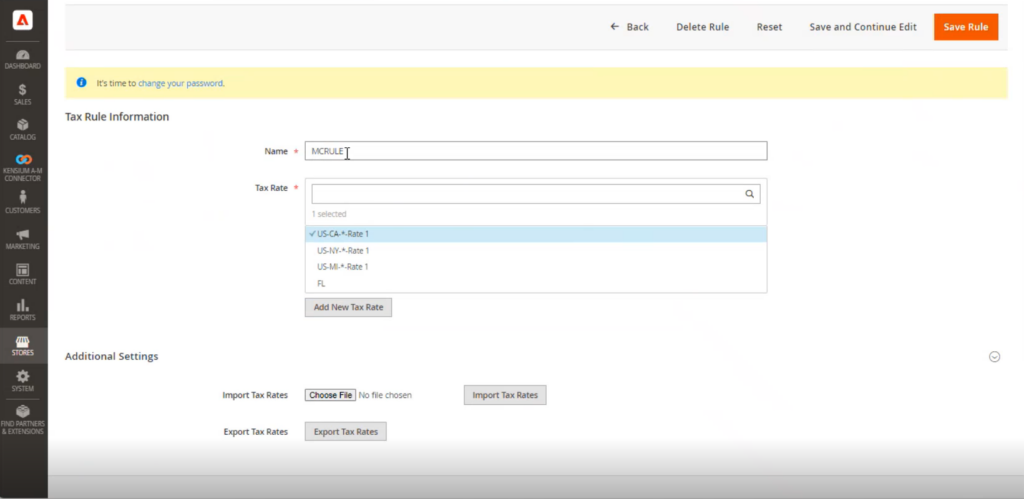
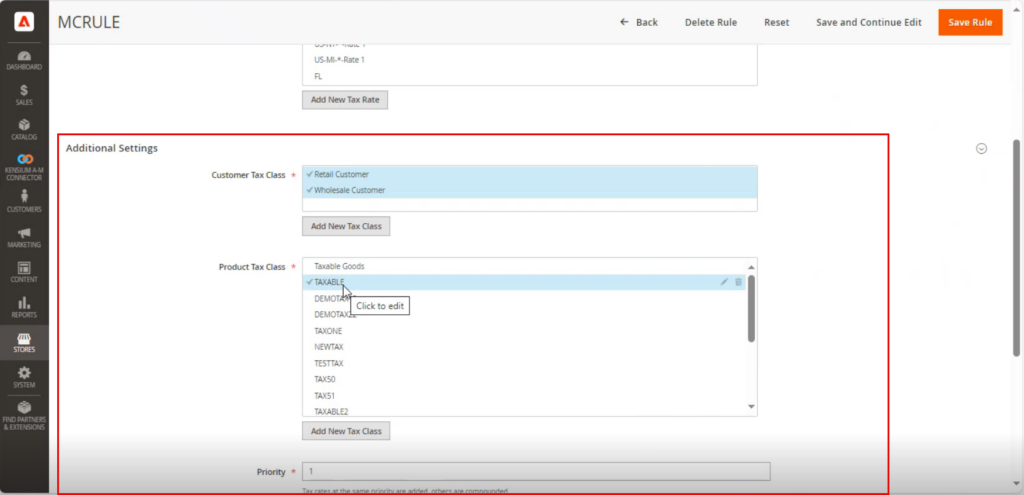
Additional Settings:
This section includes the following field which needs to be field.
- Customer Tax Class [Mandatory dropdown]: You need to select the Customer Tax Class. For example, Retail Customer or Wholesale customer. On the fly, you can add a new tax class from the [Add New Tax Class] option.
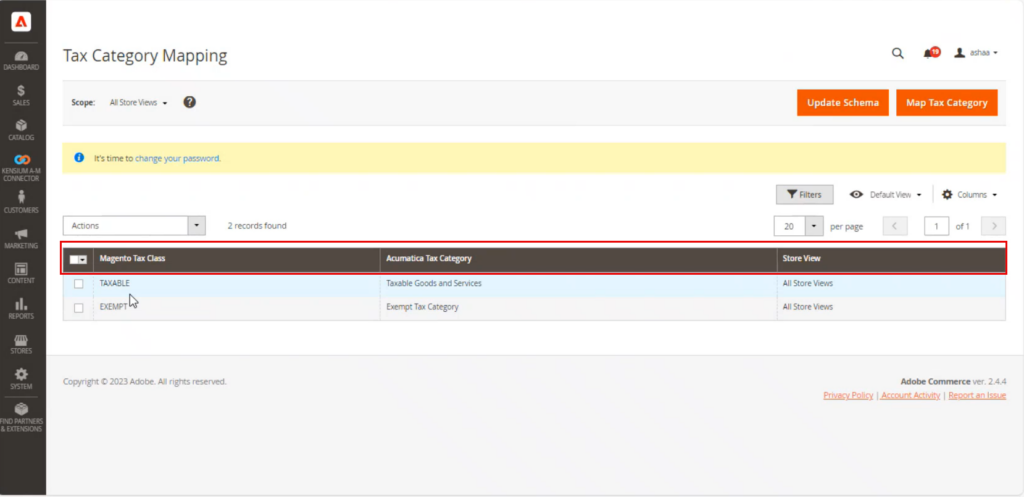
- Product Tax Class: If you click on the Kensium A-M connector you will have the option for Tax Category mapping. Here you need to select the Product Tax Classes which are mapped to the Acumatica Tax Category in the Tax Category Mapping Screen.
- Priority {Mandatory Tax Field]: You need to enter the priority and the sort order and save the rule.
